Perfectly Sweet & Easy: Your Guide to Classic Jam Thumbprint Cookies for the Holidays
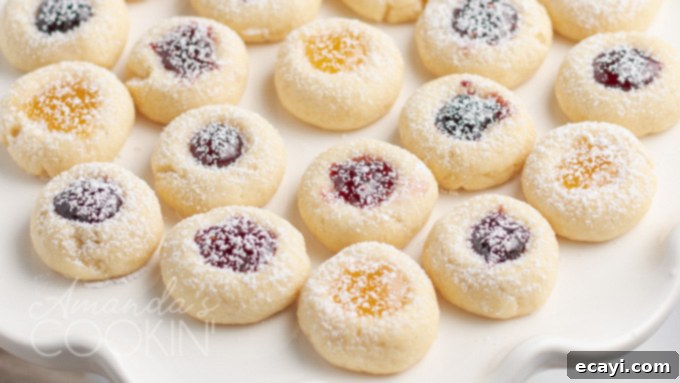
Thumbprint cookies are a quintessential delight, especially when holiday baking is in full swing. These charming little cookie bites are crafted from a simple, tender spritz-style dough, rolled into perfect spheres, partially baked, then lovingly filled with vibrant jam, and finished off in the oven. Their sweet, fruity centers nestled within a soft, buttery cookie make them an irresistible treat and a beautiful addition to any holiday cookie plate. I often find myself filling festive trays with these delightful thumbprint cookies alongside my equally popular Italian Anisette Cookies, creating a diverse and delicious spread that everyone adores.
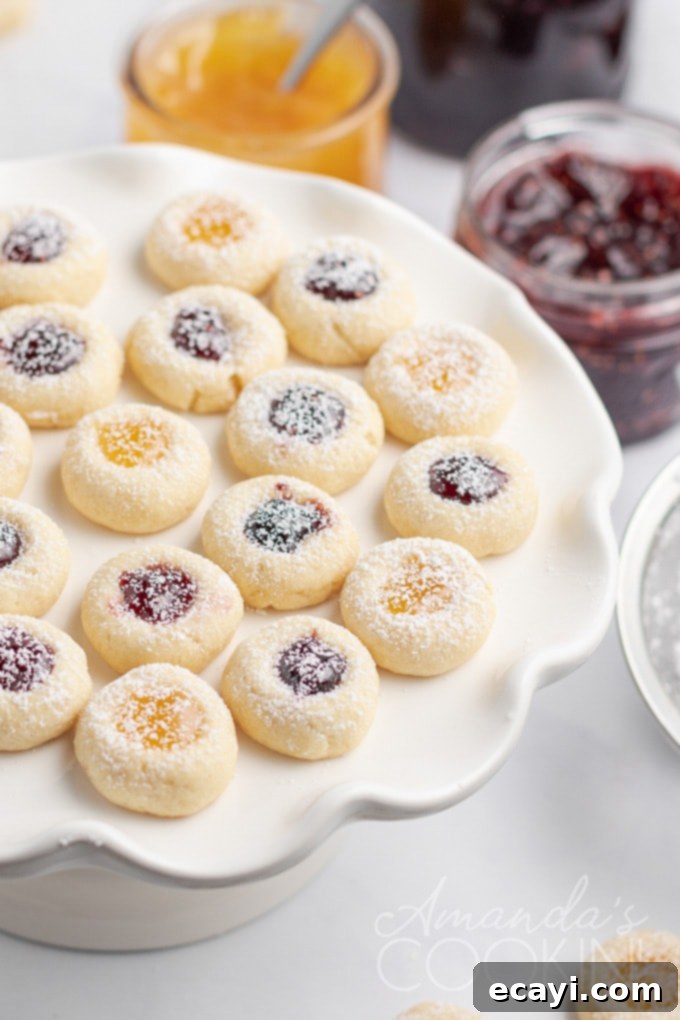
Timeless Elegance: The Beloved Thumbprint Cookie Recipe
This particular thumbprint cookie recipe holds a special place in my heart and kitchen. It’s undeniably one of the easiest cookie recipes I’ve ever encountered, and its simplicity doesn’t compromise on flavor or charm. For over 25 years, I’ve returned to this exact recipe every Christmas season, without a single change to the base dough – only the fillings vary, keeping things exciting and fresh year after year. The consistent success and pure joy these cookies bring make them a cherished family tradition.

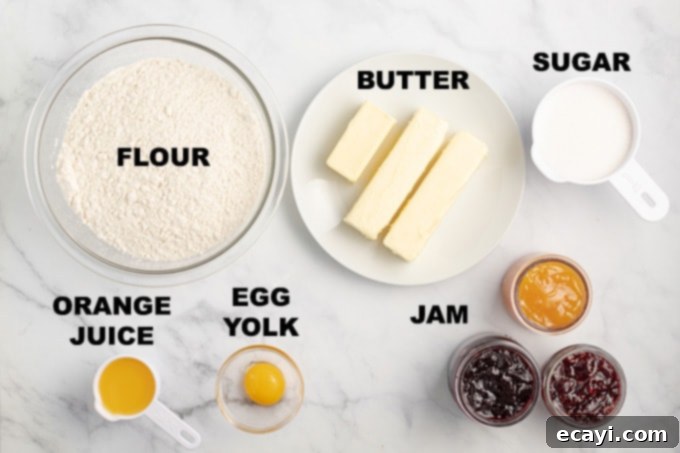
Essential Ingredients for Your Perfect Thumbprint Cookies:
Crafting these classic jam thumbprint cookies requires a handful of common pantry staples. The magic truly lies in the quality of these simple components and how they come together to form a tender, flavorful dough that perfectly complements any sweet filling.
- Dry Ingredients:
- All-purpose flour: This forms the structural backbone of our cookies, giving them their tender yet firm texture. Ensure it’s measured accurately to prevent a tough dough.
- Wet Ingredients:
- Unsalted butter: Softened, not melted. Butter is crucial for flavor and tenderness. Using unsalted butter allows you to control the overall salt content of your cookies.
- Granulated sugar: Provides sweetness and helps achieve that delightful golden-brown edge during baking. It also contributes to the cookie’s tender crumb.
- Egg yolk: Adds richness, helps bind the ingredients, and contributes to the cookie’s golden hue and smooth texture.
- Orange juice: A subtle but important addition that brightens the flavor profile of the cookie, adding a hint of citrus that pairs wonderfully with sweet jams.
- Filling:
- Jams, curds, and/or preserves: This is where you can truly customize your thumbprint cookies! From classic raspberry and apricot jams to zesty lemon curd or rich cherry preserves, the possibilities are endless. Choose your favorites to create a colorful and flavorful assortment.
Helpful Baking Tools for Thumbprint Cookies:
Having the right tools can make the baking process even smoother and more enjoyable, especially when aiming for consistent results with your thumbprint cookies.
- Stand mixer: A stand mixer is an invaluable asset for creaming butter and sugar efficiently, ensuring a light and airy base for your cookie dough without tiring your arms.
- Measuring cups and spoons: Essential for precise ingredient measurements, which is key to achieving the perfect texture and flavor in your cookies.
- Cookie scoop: A cookie scoop helps create uniformly sized dough balls, ensuring even baking and a professional look for all your thumbprint cookies.
- Insulated baking sheets: These sheets help prevent the bottom of your cookies from browning too quickly, promoting even baking and a soft texture throughout.
- Silicone baking mat: A reusable, non-stick surface that prevents cookies from sticking and promotes even heat distribution, making cleanup a breeze. Parchment paper is a great alternative.
- Wire cooling racks: Crucial for allowing air to circulate around your freshly baked cookies, preventing them from becoming soggy and ensuring a crisp exterior as they cool.
12 DAYS OF CHRISTMAS COOKIES
12 Christmas cookies you will love, PLUS bonus baking tips and TWO extra recipes you will not find on this blog! See ALL my cookbooks here!
Get the Christmas cookies cookbook! ONLY $9.97!!
Expert Baking Tips for Flawless Thumbprint Cookies:
Even though this recipe is incredibly forgiving, a few expert tips can elevate your thumbprint cookies from simply delicious to absolutely perfect.
- Butter vs. Margarine: I’ve successfully made these cookies with both margarine and butter, and they turn out wonderfully either way. However, for the richest flavor and best texture, unsalted butter is always my preference. It provides a depth of taste that margarine simply can’t match, and using unsalted butter gives you precise control over the salt level in your baking.
- Creating Perfect Indentations: While your thumb works just fine for making the characteristic “thumbprint” indent, a small, round-ended mixing spoon or even the back of a measuring spoon can create a more uniform and neat indentation. When pressing, be gentle but firm. Sometimes, pressing on one side can cause the cookie ball to lean. A simple trick to counteract this is to gently turn the cookie sheet around and repress each indent from the opposite side. This helps the cookies stand upright and ensures a beautiful, symmetrical well for your jam.
- Calorie Count Note: Please remember that the provided calorie count for this recipe does not include the jam or preserve filling. The nutritional information is for the cookie base only, so factor in your chosen filling if you’re tracking specific dietary goals.
- Jam Flavor Variety: Don’t be shy about experimenting with different flavors! I love to use an assortment of jams, jellies, and preserves to create a visually appealing and taste-bud-tickling tray. While all options are fantastic, my personal favorites are filled with bright and tangy lemon curd. Seedless blackberry preserves come in a very close second, offering a rich, dark fruit flavor that contrasts beautifully with the buttery cookie. Other excellent choices include apricot, raspberry, cherry, or even a spiced apple butter for a fall twist.
- Don’t Overmix the Dough: Once you add the flour, mix until just combined. Overmixing can develop the gluten in the flour, leading to tough cookies instead of the desired tender crumb.
- Chill Your Dough: Refrigerating the dough for at least an hour is a crucial step. This allows the butter to firm up, preventing the cookies from spreading too much during baking and helping them maintain their shape. It also gives the flavors a chance to meld together.
- Keep an Eye on the Oven: These cookies bake relatively quickly. The goal is a light golden edge, not deep brown. Overbaking will result in a dry, crumbly cookie.

Step-by-Step: How to Make Irresistible Thumbprint Cookies
Making thumbprint cookies is a straightforward and rewarding process. While we won’t preheat the oven immediately, as the dough benefits from a good chill, you can certainly get a head start on preparing your baking sheets. Line two baking sheets with silicone baking mats or parchment paper; this will ensure easy release and prevent sticking.
These cookies are designed to be petite, perfect for popping into your mouth. Using a teaspoon to scoop the dough will yield approximately 145 small, delightful cookies. If you prefer a slightly larger cookie, opt for a tablespoon or a regular-sized cookie scoop, which will give you about 45 cookies.
- Cream Butter and Sugar: In the bowl of your stand mixer (or using a hand mixer), cream together the softened unsalted butter and granulated sugar until the mixture is light, fluffy, and pale in color. This step incorporates air, which contributes to the cookies’ tender texture.
- Add Wet Ingredients: Beat in the egg yolk until fully incorporated. Then, slowly add the orange juice, mixing until it’s just combined with the butter mixture. Avoid overmixing at this stage.
- Incorporate Flour: Gradually add the all-purpose flour to the wet ingredients, mixing on low speed until the flour is just incorporated and a soft, cohesive dough forms. Stop mixing as soon as no dry streaks of flour remain to prevent the cookies from becoming tough.
- Chill the Dough: Wrap the cookie dough tightly in plastic wrap and refrigerate for at least one hour. This chilling time is crucial as it allows the butter to firm up, preventing the cookies from spreading excessively during baking. It also makes the dough easier to handle and shape.

- Preheat Oven & Prepare Sheets: Once the dough has chilled, preheat your oven to 375 degrees F (190 degrees C). Make sure your prepared baking sheets are ready.
- Shape the Cookies: Use a level teaspoon (or tablespoon for larger cookies) to scoop out portions of dough. Roll each portion between your palms to form smooth, uniform balls. Place these dough balls about 1 inch apart on your prepared cookie sheets. Uniform sizing is key for even baking.
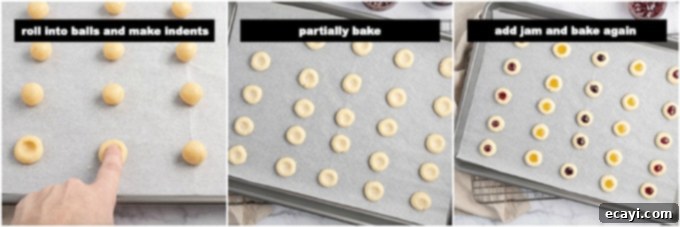
- Create Indents & First Bake: Use your thumb or the back of a small, round spoon to gently press into the center of each cookie dough ball, forming a small indentation. Be careful not to press all the way through. Bake the cookies in the preheated oven for 10 minutes. At this stage, they will be lightly set but not fully baked.
- Fill & Final Bake: Remove the partially baked cookies from the oven. Carefully fill each indent with your chosen preserves, lemon or lime curd, marmalade, or even apple butter. Return the cookies to the oven and bake for an additional 5-6 minutes, or until the edges are lightly golden and the cookies are set. Be vigilant not to let them brown too much, as this can dry them out.
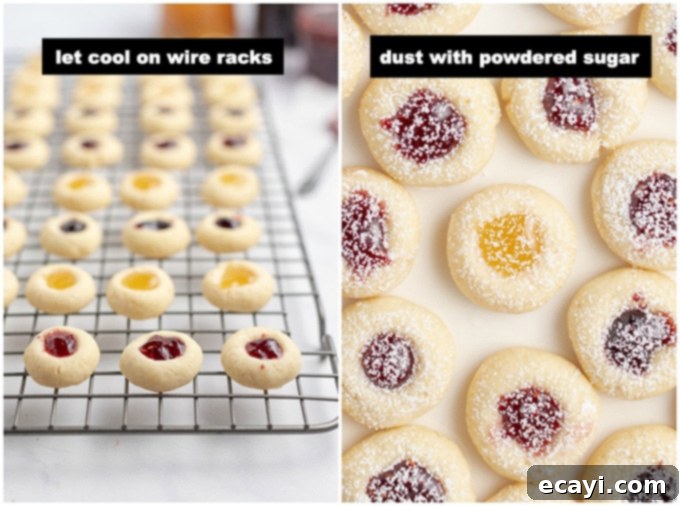
- Cool & Finish: Carefully transfer the baked cookies to wire cooling racks to cool completely. Once cooled, if desired, lightly sprinkle them with powdered sugar for a beautiful, festive finish.
Why This Simple Recipe Stands the Test of Time
You might think after all these years, I would have tried to innovate with this recipe – perhaps adding vanilla or almond extract, experimenting with spice additions, or even incorporating nuts or almond flour for a different texture. But honestly, why tamper with perfection? These classic jam thumbprint cookies are absolutely wonderful exactly as they are. The simplicity of the ingredients allows the pure, buttery flavor of the cookie to shine through, perfectly complementing the sweet, fruity burst of the jam. They achieve that ideal balance of firm yet soft, making every bite a truly delicious experience that doesn’t need any complex modifications to impress. It’s a testament to the fact that sometimes, the best recipes are the ones that remain true to their simple, humble origins.
Storage and Make-Ahead Tips:
- Storing Baked Cookies: Store cooled thumbprint cookies in an airtight container at room temperature for up to 5-7 days. To prevent the cookies from sticking together or the jam from transferring, you can place a sheet of parchment paper between layers.
- Freezing Dough: You can prepare the dough in advance and freeze it. Wrap the unbaked dough ball tightly in plastic wrap, then place it in a freezer-safe bag. It can be frozen for up to 3 months. Thaw in the refrigerator overnight before rolling and baking as usual.
- Freezing Baked Cookies: Fully baked and cooled thumbprint cookies can also be frozen. Arrange them in a single layer on a baking sheet and flash freeze until firm (about 1-2 hours). Then, transfer them to an airtight, freezer-safe container, separating layers with parchment paper. They can be frozen for up to 2-3 months. Thaw at room temperature before serving.
Delicious Variations to Explore:
While classic jam is always a winner, these thumbprint cookies are incredibly versatile. Here are a few ideas to spark your culinary creativity:
- Chocolate Delights: Fill the indents with melted chocolate (milk, dark, or white) after the first bake. You can even drizzle more chocolate on top after they cool.
- Caramel Kiss: Use a soft caramel candy, or a dollop of homemade caramel sauce for a gooey, rich center.
- Nutella Swirl: A spoonful of Nutella offers a hazelnut-chocolate twist that’s always a crowd-pleaser.
- Cream Cheese Filling: A sweetened cream cheese mixture can provide a tangy contrast to the buttery cookie.
- Nutty Crunch: Before or after filling, sprinkle chopped nuts (like pecans or walnuts) around the edges or directly into the jam for added texture.
More Delectable Cookie Recipes to Try:
If you’ve enjoyed making these classic thumbprint cookies, you’ll love exploring other cookie creations from my kitchen. These recipes are perfect for expanding your baking repertoire or simply finding new favorites for your next gathering or quiet moment with a cup of tea.
- Butter Cookies
- Cranberry Orange Spiral Cookies
- Orange Crinkle Cookies
- Chocolate Thumbprint Cookies
- Cornflake Christmas Wreaths
- Neapolitan Cookies
- Cherry Pie Cookies
- Cherry Wink Cookies
- Oatmeal Raisin Cookies

Thumbprint Cookies
IMPORTANT – There are often Frequently Asked Questions within the blog post that you may find helpful. Simply scroll back up to read them!
Print It
Rate It
Save ItSaved!
Ingredients
- 3 ¾ cups all purpose flour
- 1 ⅓ cups unsalted butter softened (not melted)
- ¾ cup granulated sugar
- ¼ cup orange juice
- 1 large egg yolk
- Preserves flavors of your choice
Things You’ll Need
-
Stand mixer
-
Measuring cups and spoons
-
Cookie scoop
-
Insulated baking sheets
-
Silicone baking mat
-
Wire cooling racks
Before You Begin
- These cookies are SMALL – hence using a TEASPOON to make the dough ball. You can make them bigger by using a tablespoon or regular sized cookie scoop and you will get about 45 cookies.
- Use your thumb or pointing finger to gently press the center of the cookie, forming an indent. Pressing the cookie will cause it to lean to one side. After creating all the indents, I turn the cookie sheet around and repress each indent from the other side. This makes then stand back upright.
- I like to use several different flavors of jam or preserves. My favorites are filled with lemon curd, but seedless blackberry preserves runs a very close second.
Instructions
-
Cream the butter and sugar, add the egg yolk, then slowly add the orange juice.
-
Slowly add in the flour until combined.
-
Wrap in plastic wrap and refrigerate for at least one hour.
-
Preheat the oven to 375 degrees F.
-
Measure out dough in level teaspoons to ensure uniform sizing. Roll balls in your hands to smooth, place on cookie sheet.
-
Use your thumb or pointing finger to gently press the center of the cookie, forming an indent. Bake for 10 minutes.
-
Remove from oven, fill indents with preserves, lemon or lime curd, marmalade, or even apple butter. Return to oven and bake 5-6 minutes more, do not let them get brown.
-
Cool on wire racks. Sprinkle with powdered sugar if desired.
Expert Tips & FAQs
- I’ve made these thumbprint cookies with margarine and with butter and they come out great either way. Unsalted butter is my preference.
- If you have a mixing spoon with a round flat end that will work great for making the indentations.
- Calorie count does not include jam filling.
Nutrition
The recipes on this blog are tested with a conventional gas oven and gas stovetop. It’s important to note that some ovens, especially as they age, can cook and bake inconsistently. Using an inexpensive oven thermometer can assure you that your oven is truly heating to the proper temperature. If you use a toaster oven or countertop oven, please keep in mind that they may not distribute heat the same as a conventional full sized oven and you may need to adjust your cooking/baking times. In the case of recipes made with a pressure cooker, air fryer, slow cooker, or other appliance, a link to the appliances we use is listed within each respective recipe. For baking recipes where measurements are given by weight, please note that results may not be the same if cups are used instead, and we can’t guarantee success with that method.
This post originally appeared here on Dec 7, 2010.
