Easy Homemade Valentine Cake Pops: The Ultimate Sweet Treat for Valentine’s Day
Celebrate love and sweetness this Valentine’s Day with these absolutely adorable Valentine Cake Pops! Crafted with a delightful blend of cake mix, rich frosting, and vibrant candy melts, these treats are more than just dessert—they’re a heartfelt expression. Whether you’re planning a romantic evening, a festive classroom party, or simply want to spread some joy, these cake pops are guaranteed to make hearts flutter. They’re surprisingly simple to make, even for novice bakers, transforming a few humble ingredients into stunning, bite-sized delights. Get ready to create edible works of art that are almost too cute to eat!

Why This Valentine Cake Pop Recipe Works
These Valentine cake pops aren’t just pretty faces; they’re incredibly easy to whip up and bring so much joy! What makes this recipe truly stand out is its reliance on readily available ingredients like a simple box of cake mix, a tub of creamy frosting, and colorful candy wafers. This shortcut approach eliminates much of the complexity typically associated with baking from scratch, making homemade treats accessible to everyone. The result? Perfectly moist cake balls coated in festive red, white, and pink candy, all presented on a convenient stick.
They are a fantastic choice for any Valentine’s Day celebration. Imagine presenting these darling confections at a classroom party, a family gathering, or as a thoughtful gift wrapped in cellophane bags and tied with a beautiful bow. Their individual serving size makes them hygienic and easy to enjoy, while their vibrant colors instantly brighten any setting. Plus, their versatility allows them to be enjoyed as traditional cake pops or as delightful cake balls without the stick, offering options for every preference. This recipe consistently delivers charming, delicious, and stress-free treats that are sure to be a hit!
Key Ingredients You Will Need for Valentine Cake Pops
Gathering your ingredients is the first exciting step towards creating these irresistible Valentine cake pops. We’ll be using a combination of pantry staples and special decorative items to ensure your cake pops are both delicious and visually stunning. For a complete list of all measurements, quantities, and detailed instructions, please refer to the printable recipe card conveniently located at the very end of this comprehensive post.
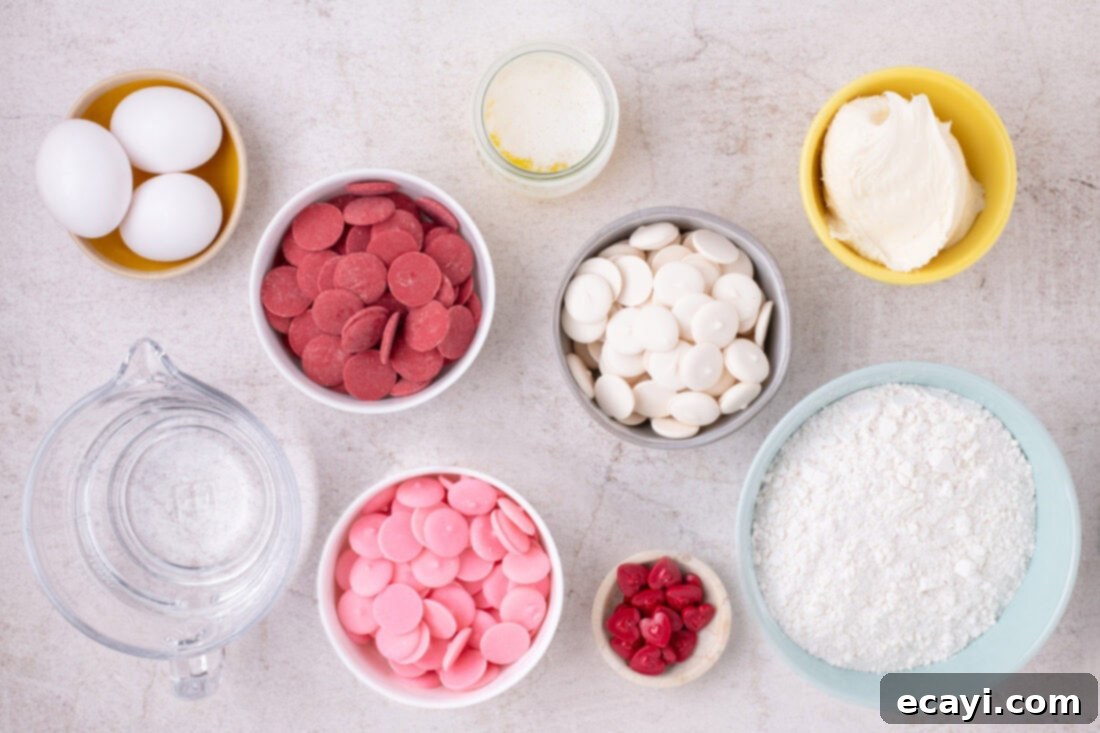
Ingredient Information and Smart Substitution Suggestions
Understanding the role of each ingredient can make a significant difference in the final outcome of your cake pops. Here’s a breakdown of the key components and how you can adapt them to your taste and pantry.
CAKE – While the back of most boxed cake mixes calls for oil, we strongly recommend replacing it with melted butter when preparing the cake for these pops. This crucial substitution is key to achieving a more dense and stable cake crumb. Butter creates a sturdier texture that holds its shape better, significantly reducing the chance of your precious cake pop crumbling or falling off its stick during the dipping process. Follow our specific directions and ingredient list below to ensure your cake base is perfectly prepared for success.
FROSTING – For ultimate convenience, grab a premade tub of vanilla frosting when you’re stocking up on your cake mix. This frosting plays a vital role in binding the cake crumbs together and adding essential moisture, creating that signature rich and chewy cake pop texture. It’s important not to use the entire tub; only use the precise amount specified in the recipe card to achieve the ideal consistency. Don’t feel limited to vanilla – you can easily personalize your cake pops by using your favorite frosting flavor! Homemade cream cheese frosting, rich chocolate fudge, or a classic buttercream are all fantastic choices that will beautifully complement your chosen cake flavor.
CHOCOLATE COATING – For coating perfection, we highly recommend using candy melts. These specialized confectionery wafers are designed to melt smoothly and set quickly, providing a beautiful, uniform, and vibrant finish without the need for tempering. They also come in a wide array of premade colors, which is perfect for Valentine’s Day themes. If you prefer, you can certainly use regular vanilla almond bark or high-quality white chocolate chips. To achieve the desired festive colors, tint these with gel food coloring (liquid food coloring can cause the chocolate to seize). A pro tip for working with white chocolate chips: they can sometimes be a bit thick for dipping. If this happens, stir in a small amount (about 1 teaspoon per cup of chocolate) of coconut oil or vegetable oil to thin it out to a more dip-friendly consistency. This will ensure a smooth, even coating on your cake pops.
How to Make Adorable Valentine Cake Pops: Step-by-Step Guide
These step-by-step photos and detailed instructions are provided to help you visualize each stage of making this delightful recipe. For a convenient printable version of this recipe, complete with precise measurements and comprehensive instructions, simply jump to the recipe card at the bottom of the page.
- Preheat your oven to 325°F (160°C). This ensures your cake bakes evenly from the start. Lightly grease a 9 x 13-inch baking dish, then line two large baking sheets with parchment paper. Set these prepared items aside; they’ll be crucial for cooling and shaping your cake pops.
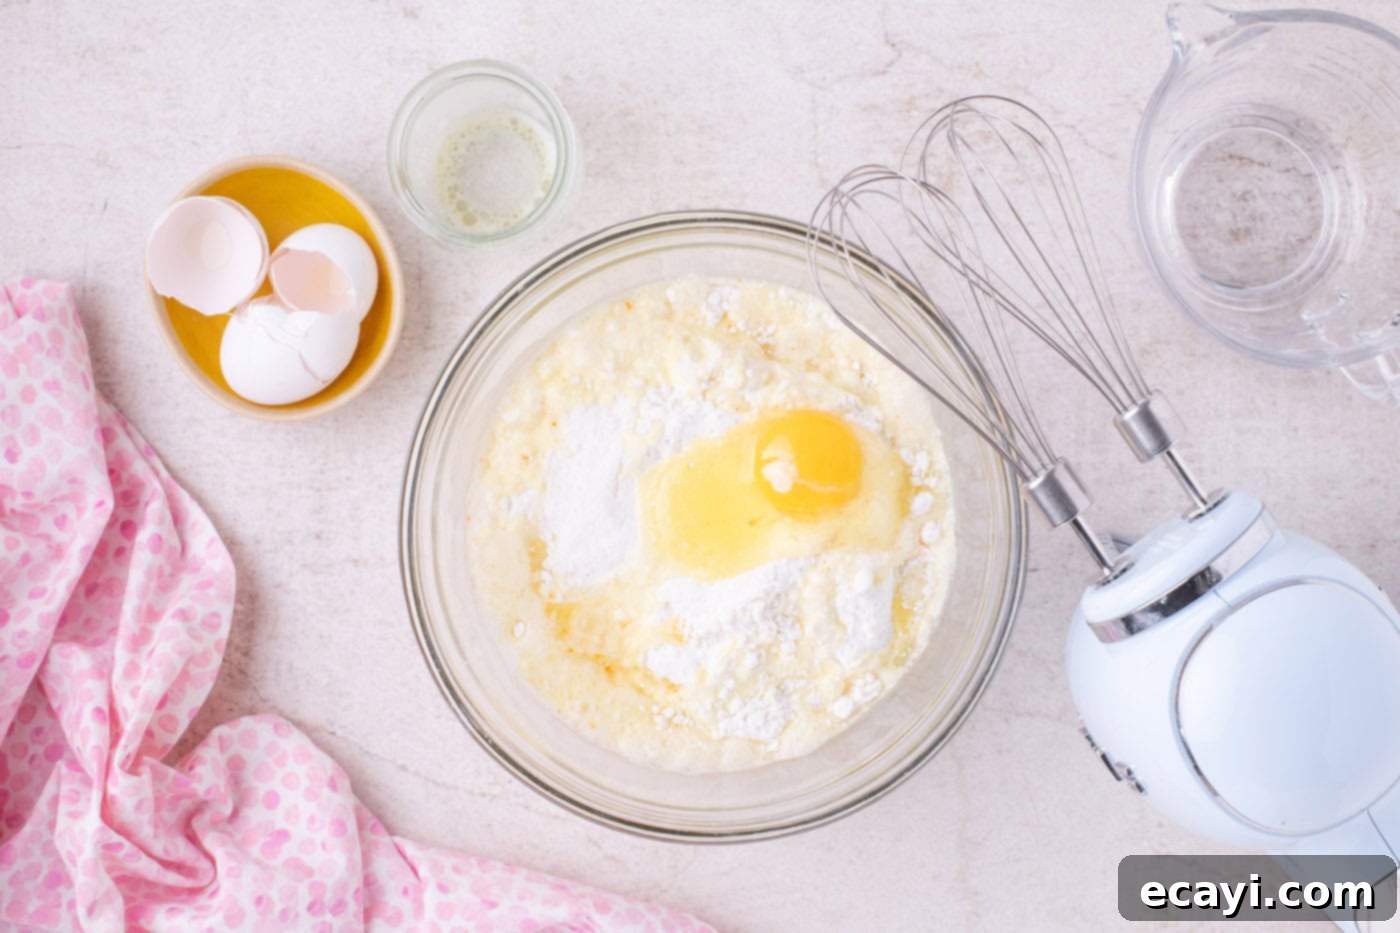
- In a generously sized mixing bowl, combine your dry cake mix, eggs, water, and the melted butter. Blend these ingredients thoroughly using an electric mixer until the batter is completely smooth and free of lumps. Ensure all components are well incorporated to create a consistent cake base.

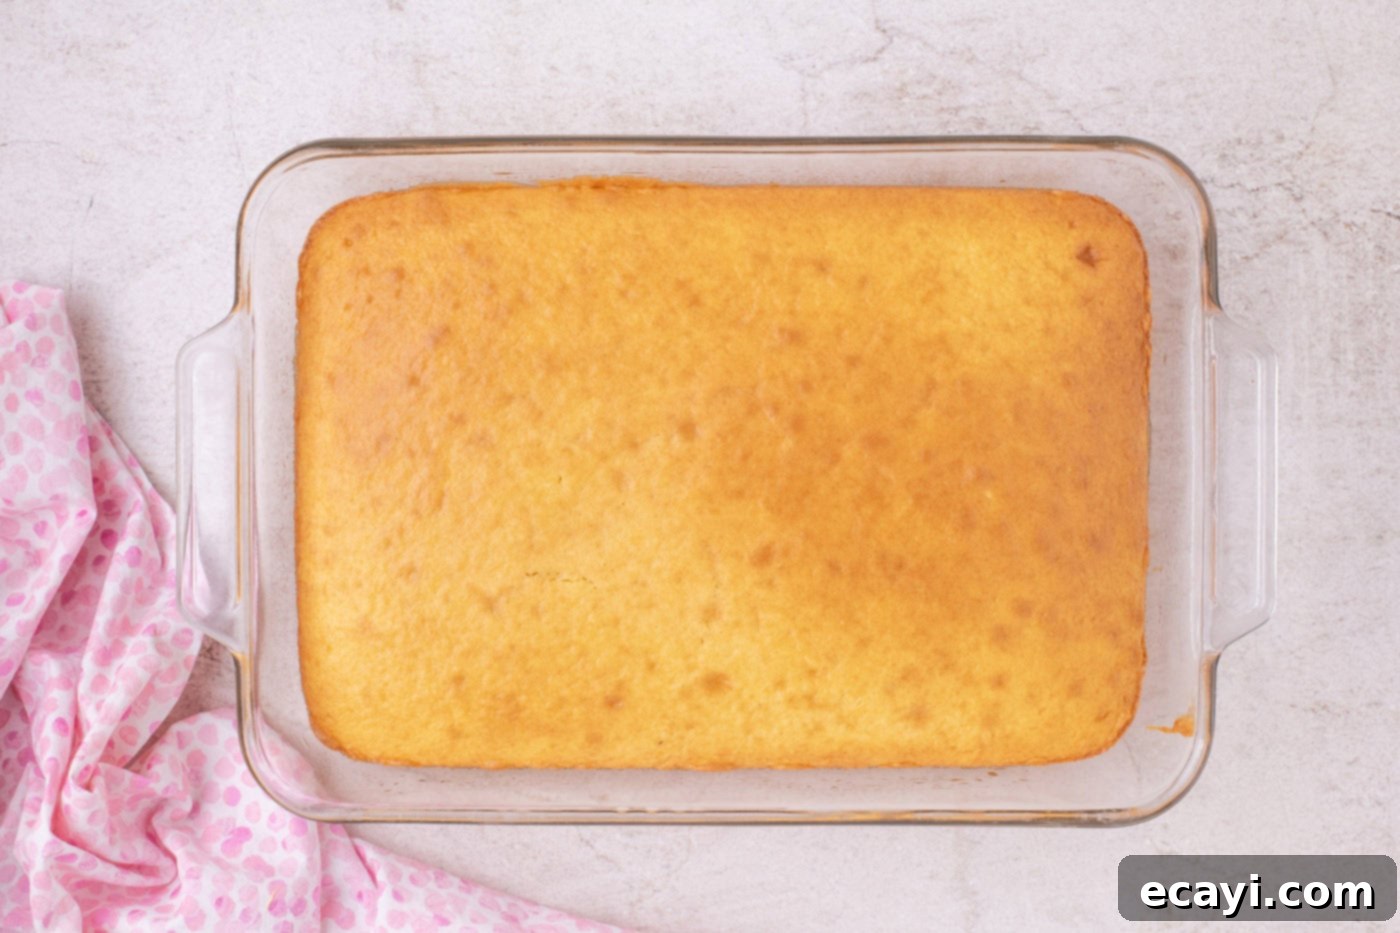
- Carefully transfer the prepared cake batter into your greased and lined baking dish. Spread it evenly to ensure uniform baking. Bake for approximately 20 to 22 minutes, or until a toothpick inserted into the center comes out clean. This indicates it’s perfectly baked. Once done, remove the cake from the oven and allow it to cool completely on a wire rack for 2 to 3 hours. Adequate cooling is essential for the next steps.

- After the cake has fully cooled, use your hands to gently break it into smaller pieces. Place these pieces into a large, clean mixing bowl. This initial breakdown makes the crumbling process much easier.
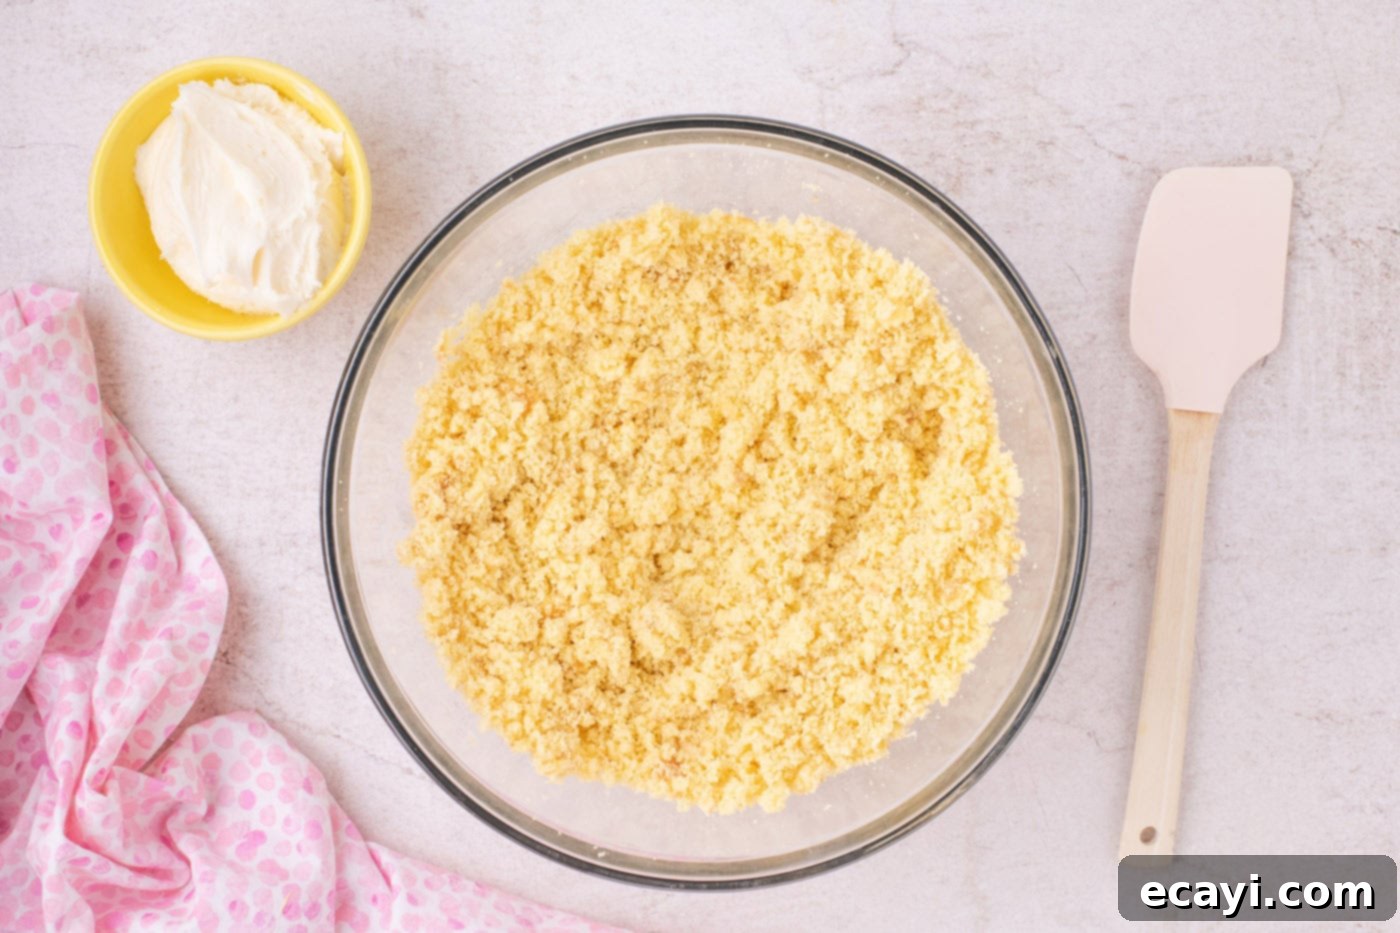
- Using a sturdy fork, further break down the cake pieces. Continue mashing and separating until the cake is reduced to fine, consistent crumbs. It’s important to eliminate any large chunks to ensure smooth cake balls.

- Now, gradually add the vanilla frosting to the cake crumbs, starting with about ½ cup at a time. Mix the frosting into the crumb mixture until it is thoroughly incorporated. The goal is a moist, pliable dough-like consistency that holds together when pressed, but isn’t overly sticky.

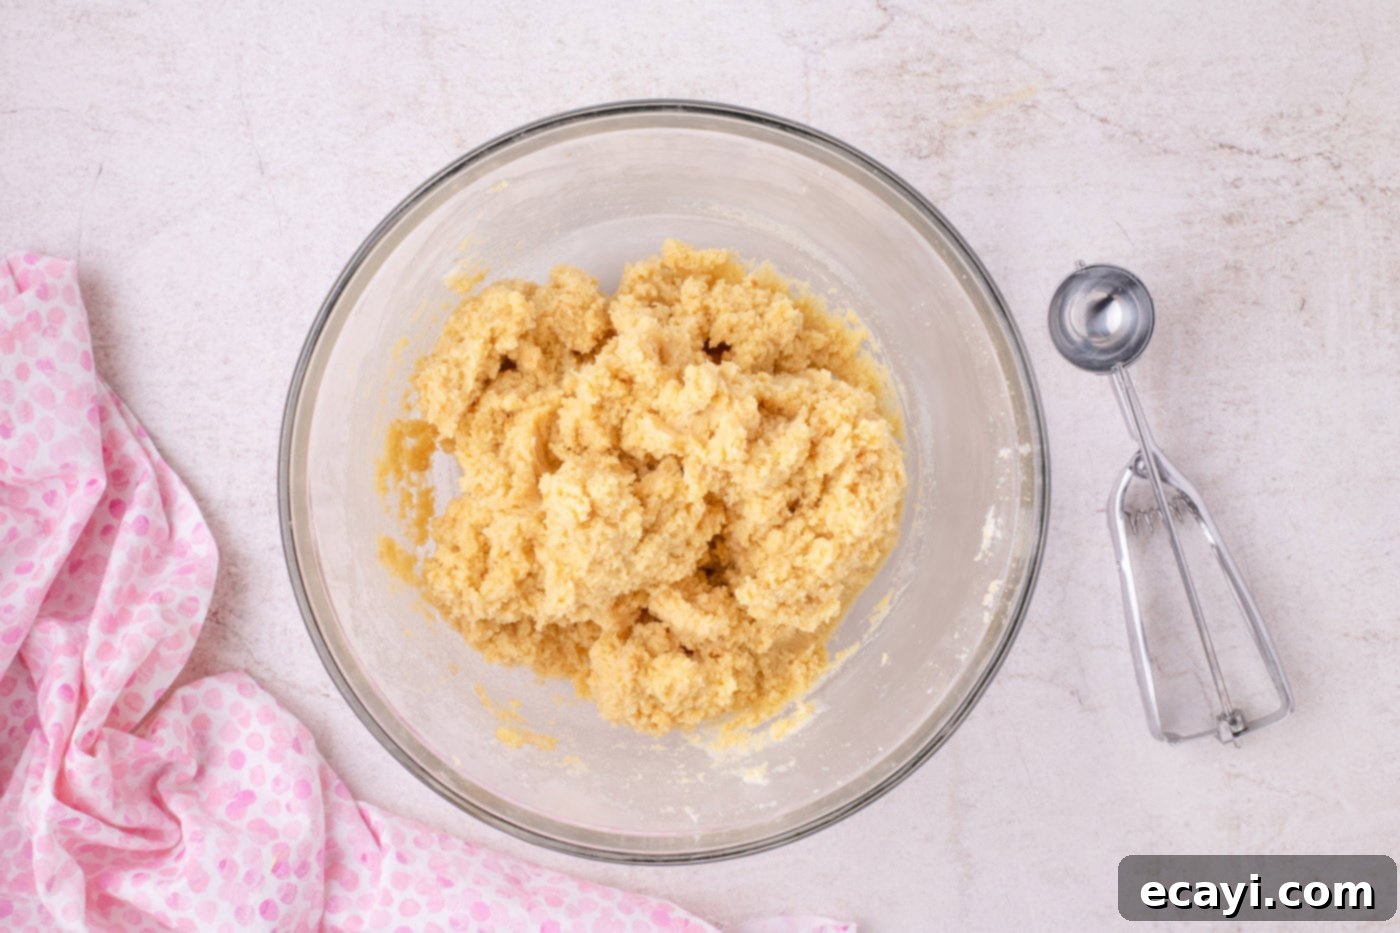
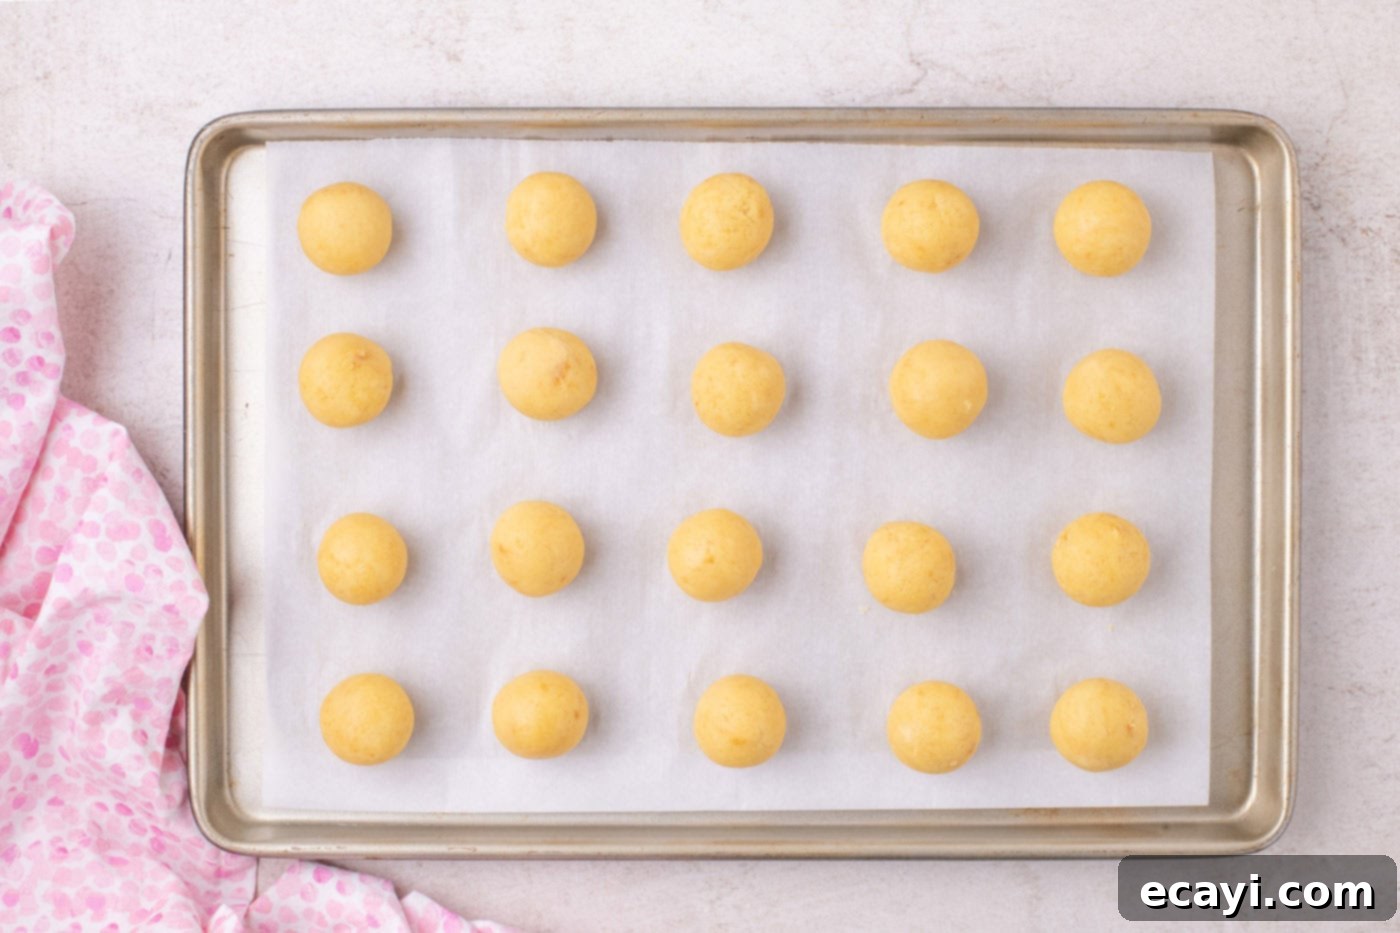
- Using a 2-tablespoon cookie scoop, portion out even-sized mounds of the cake mixture. Place these scoops onto the prepared baking sheet. Consistency in size ensures uniform cake pops.
- Take each mound and gently roll it between your palms to form a smooth, round cake ball. Place the formed cake balls back onto the baking sheet. Once all are shaped, refrigerate the cake balls for one to two hours. This chilling time is crucial as it allows them to firm up, preventing them from falling apart or melting when dipped into warm candy.

- Prepare your candy coatings: place each of the three colored candy melts (white, pink, red) into three separate microwave-safe bowls or glass jars. Heat the candy melts in the microwave in short 30-second increments, stirring well after each interval, until they are fully melted and perfectly smooth. Be careful not to overheat.
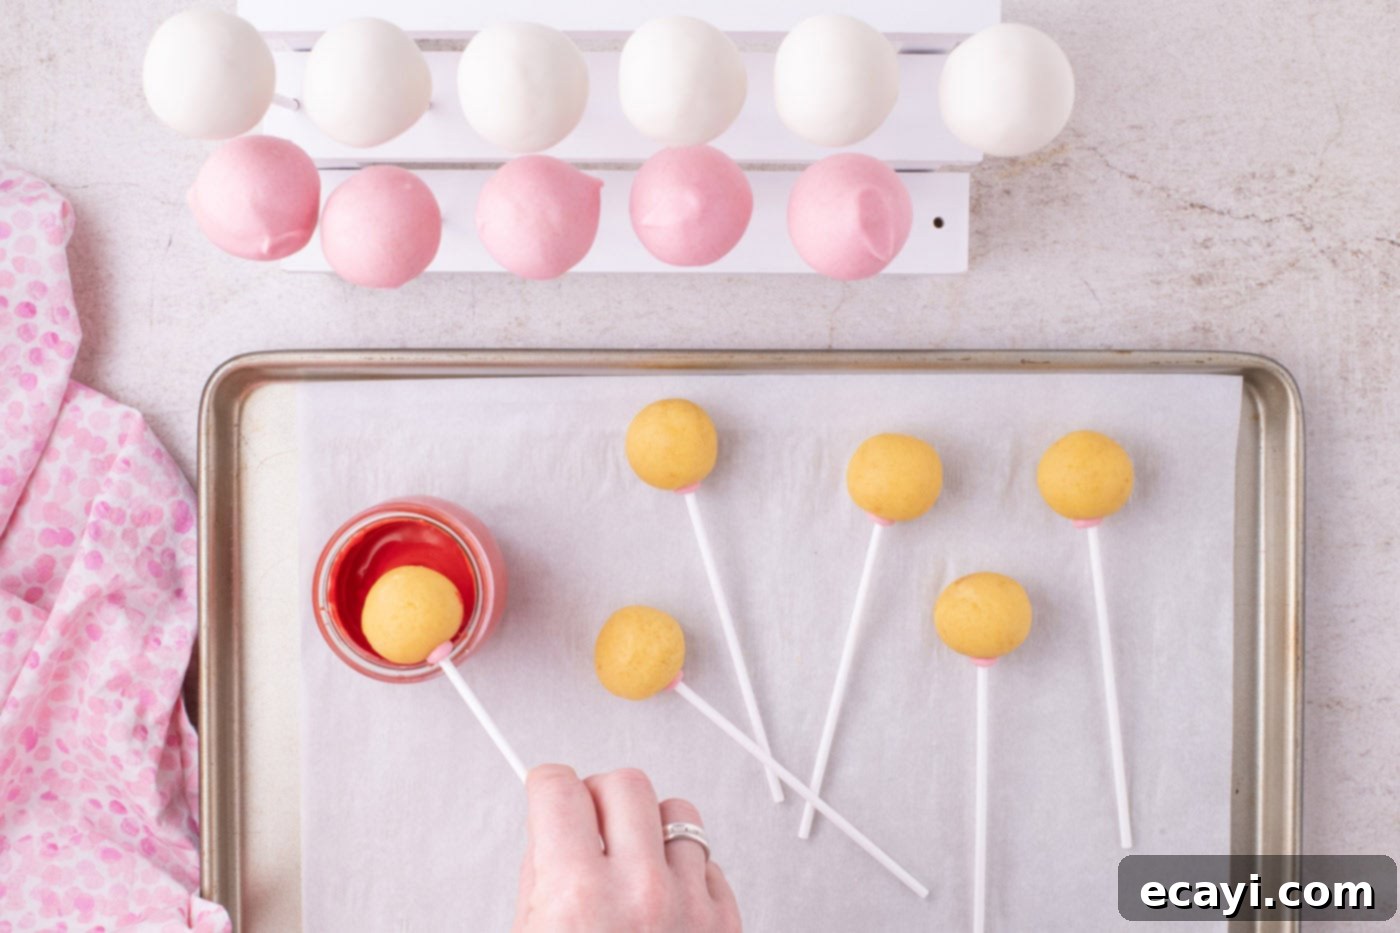
- Now, assemble your cake pops. Dip the tip of a cake pop stick into the melted candy coating, about 1/2 inch deep. This candy acts as “glue.” Immediately push the coated end of the stick firmly into the center of a chilled cake ball. Repeat this process for all remaining cake balls.
TIP – For optimal stability and to prevent the cake ball from detaching, ensure you push the cake stick into the cake ball past its middle point. This deeper insertion provides superior support during the dipping phase.
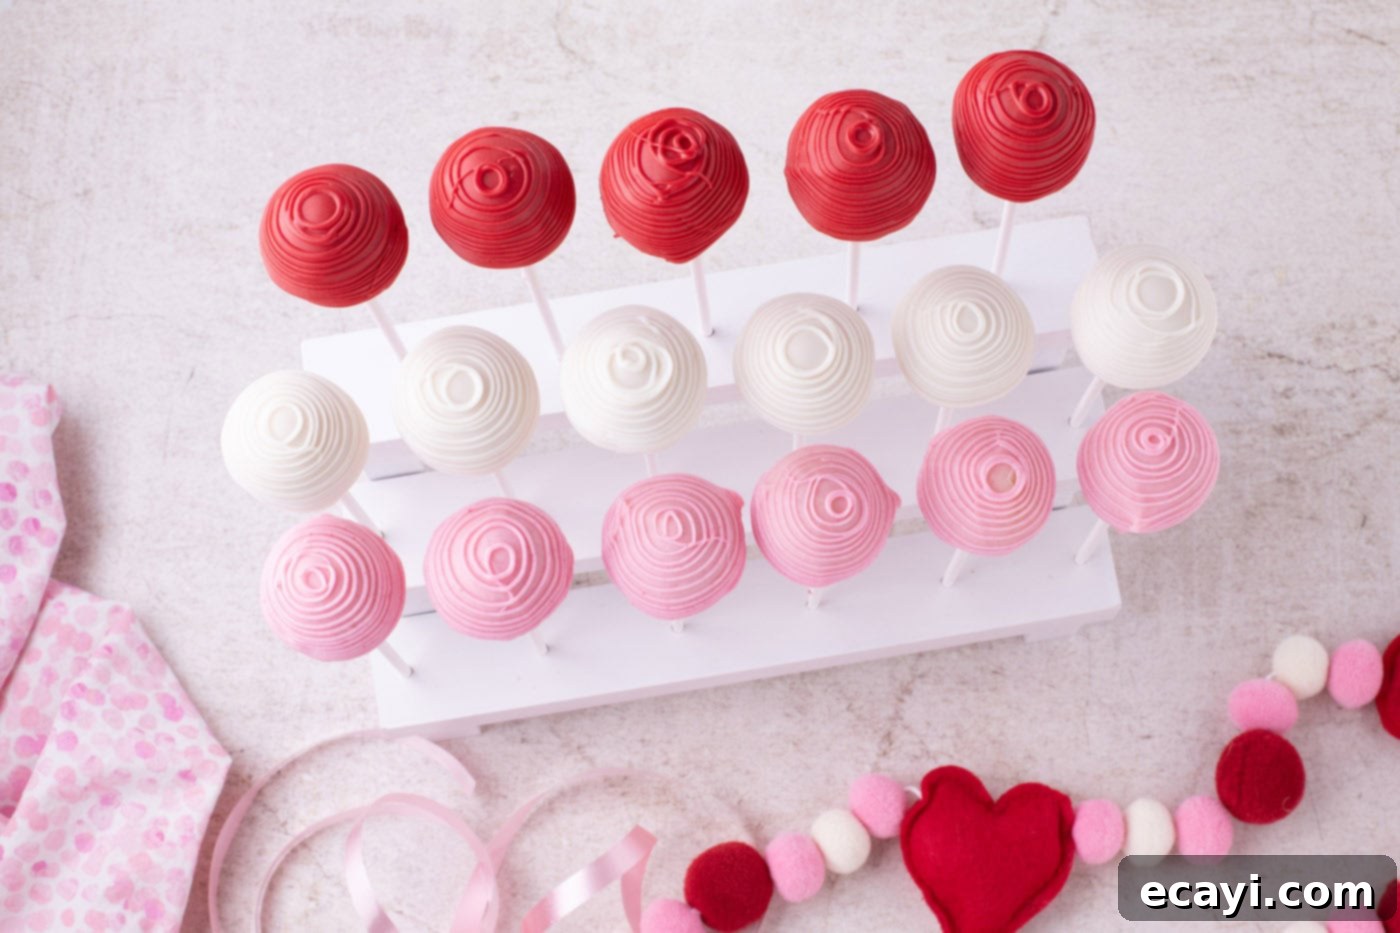
- Once the candy “glue” at the base of each stick has hardened (you can speed this up by briefly chilling), it’s time for the final coating. Dip each cake pop entirely into one of the melted candy colors. Gently tap off any excess coating against the edge of the bowl, rotating the pop as you do so, to achieve a smooth finish. Repeat this for all your cake pops, using the different colors as desired.

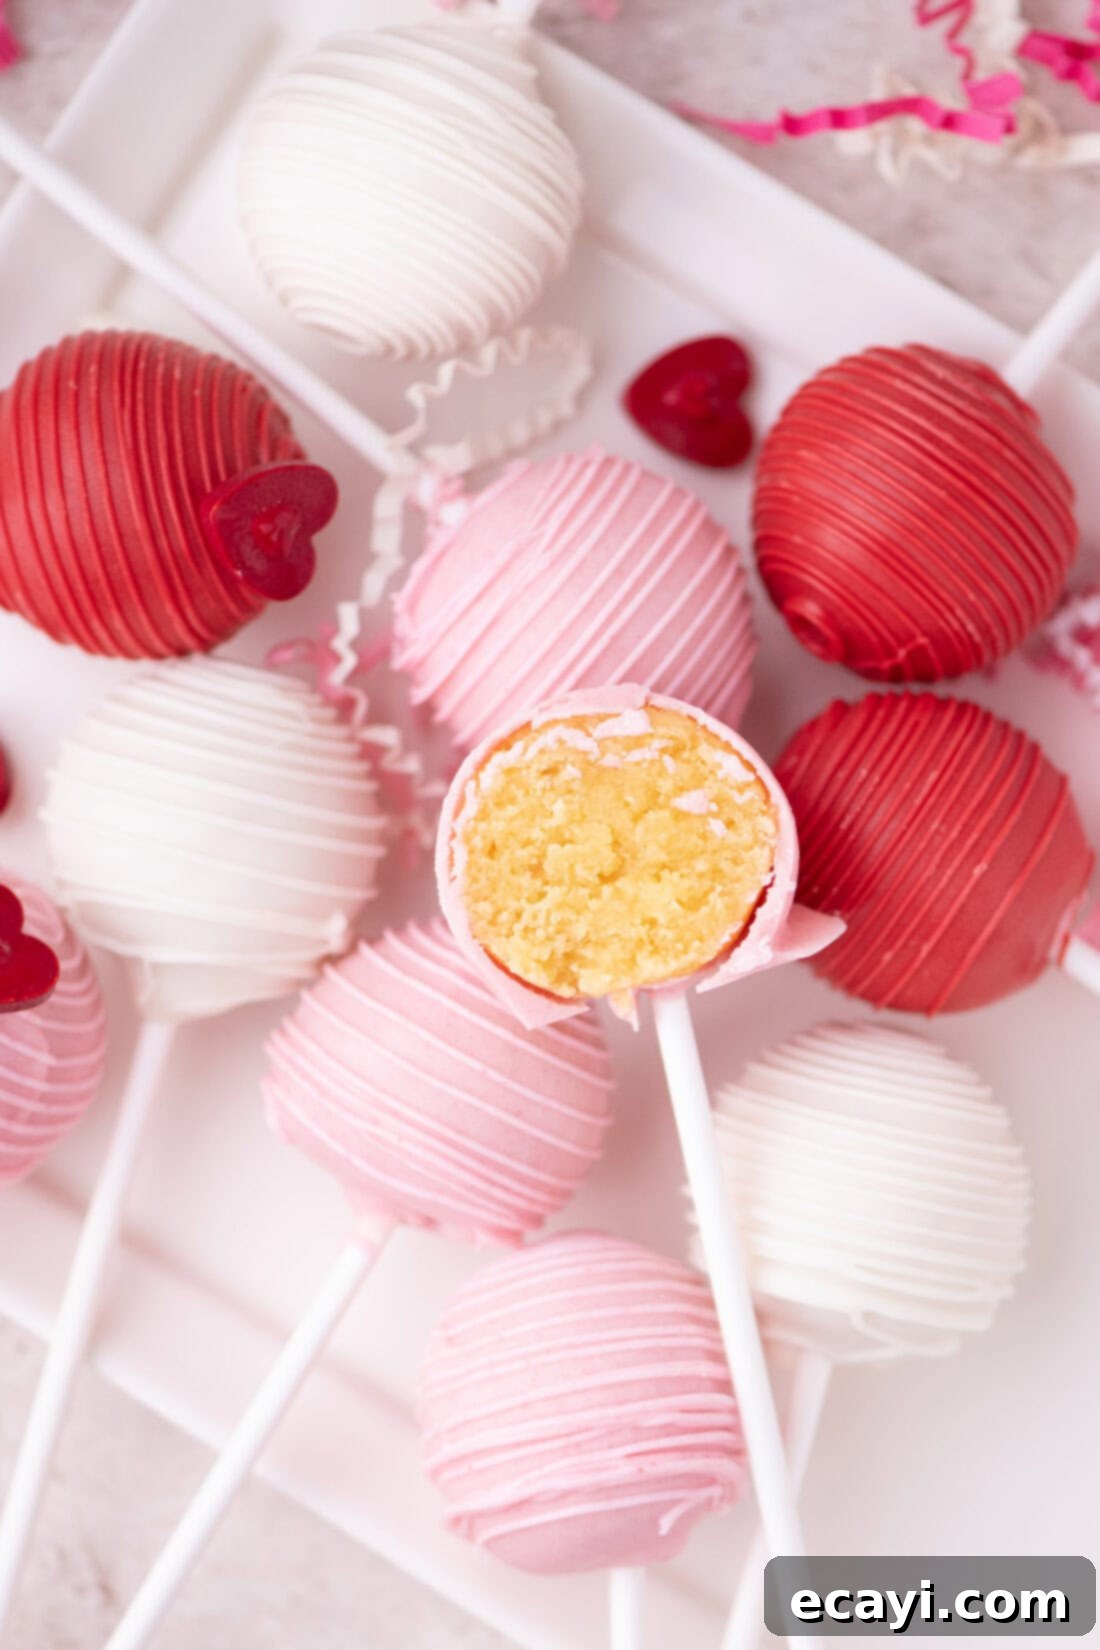
- For a decorative flourish, place the remaining melted candy (each color separately) into three disposable piping bags. Snip off a tiny bit from the end of each bag to create a small opening. Slowly drizzle fine, even lines of contrasting colors around each cake ball. If you wish to add a special touch, press a heart sprinkle onto the drizzle while it’s still wet. Repeat this with all your cake pops and then allow them to dry thoroughly on a cake pop stand or in a block of styrofoam before serving. This ensures the coating sets completely, preventing smudges and creating a professional finish.

Frequently Asked Questions & Expert Tips for Perfect Valentine Cake Pops
Even seasoned bakers encounter questions, especially when mastering a delightful treat like cake pops. Here are some common queries and our expert advice to ensure your Valentine cake pops turn out flawlessly every time.
Cracking is a common issue that often arises when there’s a significant temperature difference between the chilled cake pop and the melted candy coating. If the cake pop is too cold (straight from the freezer, for example) or if the melted candy is too hot, the sudden temperature shock can cause the coating to crack as it sets. To prevent this, ensure your cake balls have been refrigerated but are not frozen solid. Also, always allow your melted candy to cool slightly for a minute or two after heating before you begin dipping. It should be warm and fluid, but not scalding hot.
Melted candy coatings can sometimes thicken as they cool or if exposed to moisture. If your melted candy starts to become too viscous and isn’t coating the cake balls smoothly (and re-heating briefly isn’t solving the problem), you can easily thin it out. Stir in about 1 teaspoon of vegetable oil or coconut oil (which is particularly good for white candy melts as it won’t cause yellowing) per cup of candy melts. This will help reduce its viscosity, making it much easier to dip and achieve a perfectly smooth, thin coating on your cake pops. Add oil gradually until you reach the desired consistency.
To maintain their freshness and delicious texture, store your Valentine cake pops at room temperature. Place them in an airtight container or a sealed ziptop bag. Properly stored, they will remain wonderfully fresh and enjoyable for up to one week. If you need to store them longer, they can be kept in the refrigerator, but allow them to come to room temperature before serving for the best flavor and texture experience.
Absolutely! The beauty of cake pops is their incredible versatility. While our recipe features yellow cake for a classic taste, you can use virtually any flavor of cake mix to create delightful cake balls. Strawberry cake adds a lovely fruity tang, chocolate cake delivers a rich indulgence, while white cake, funfetti, or even red velvet cake will make divine little morsels when crumbled and mixed with frosting. Experiment with different cake and frosting combinations to create your own unique flavor profiles for any occasion!
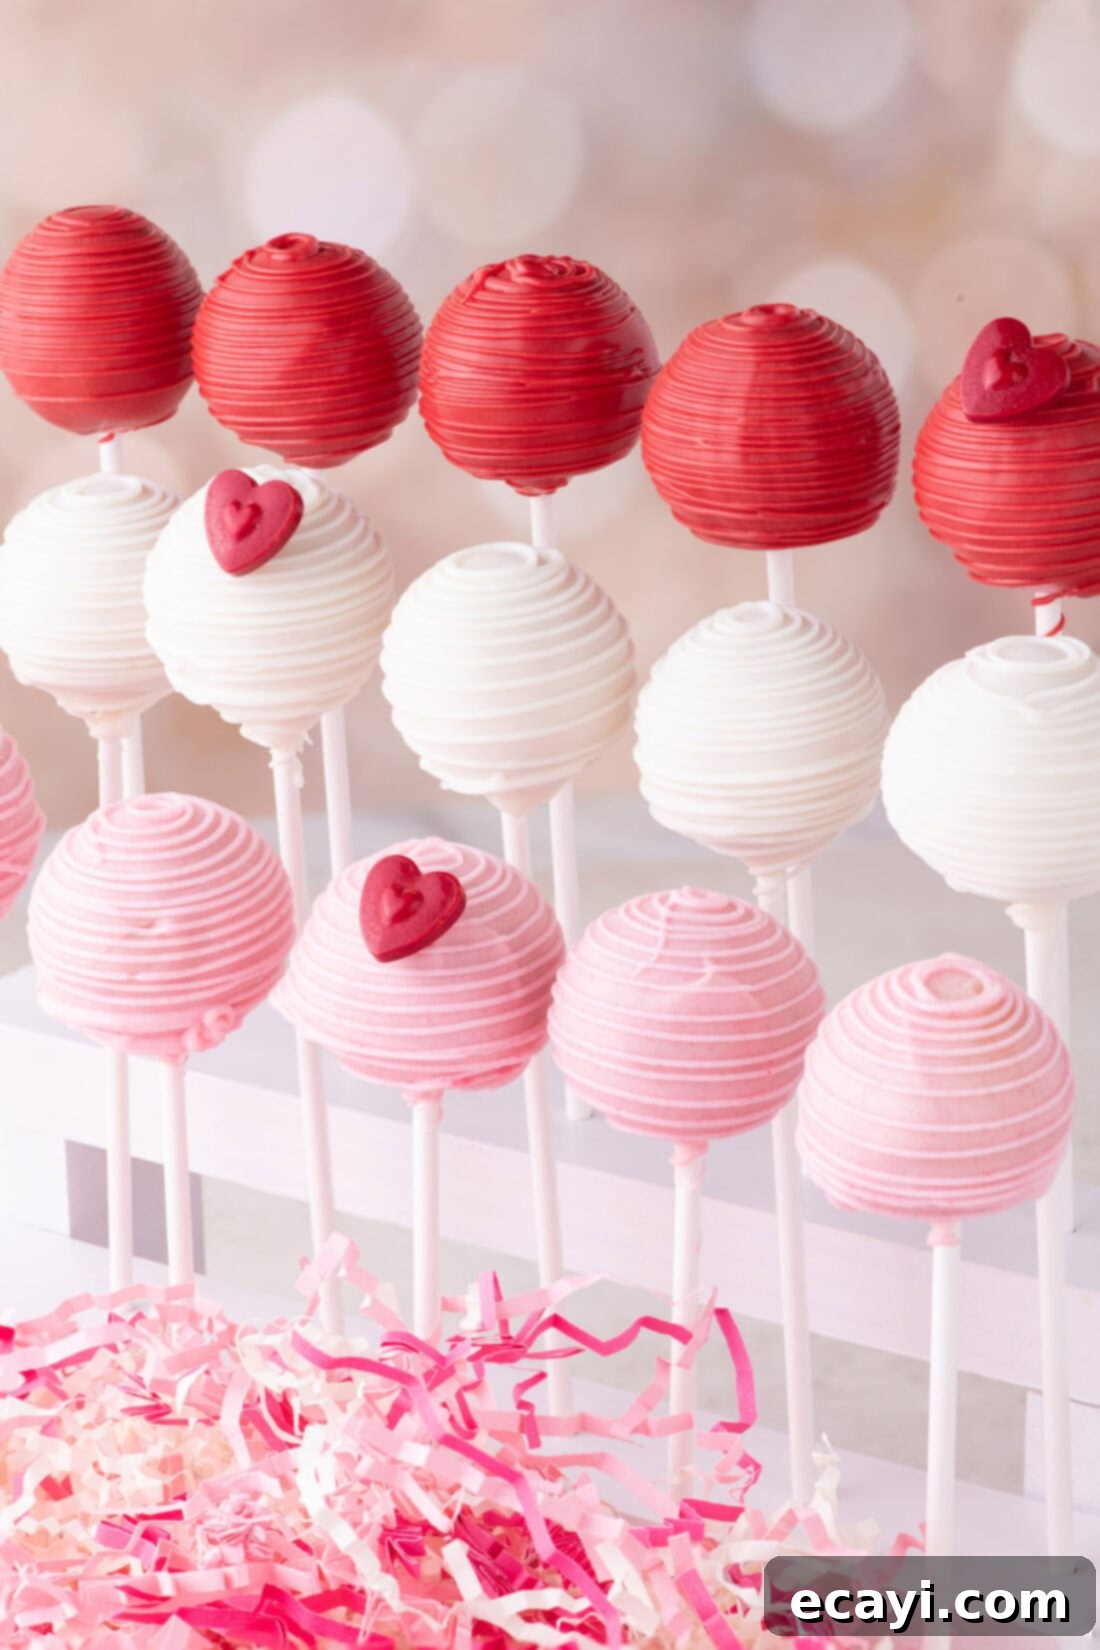
Serving & Gifting Suggestions for Your Valentine Cake Pops
Presentation is everything, especially when it comes to a treat as charming as Valentine cake pops! I can’t emphasize enough how much cute heart sprinkles elevate these treats. They add that irresistible final touch of love and festivity, making each cake pop a tiny work of art. For a truly special gift, consider wrapping the top of individual cake balls in clear cellophane treat bags and tying them with a beautiful ribbon or a personalized tag. This not only makes them look professionally made but also keeps them fresh.
While perfect for Valentine’s Day, these cake pops are incredibly adaptable. The combinations are endless! You can easily change the flavors of cake and frosting, and certainly the colors of the candy melts and sprinkles, to match any party theme or holiday. Imagine vibrant green and gold for St. Patrick’s Day, pastels for an Easter celebration or baby shower, blue and pink for a gender reveal party, or even team colors for a football party. This recipe provides a fantastic base for creativity, allowing you to personalize your cake pops for birthdays, graduations, or any festive occasion throughout the year.
More Delightful Valentine’s Day Recipes to Try
If you’ve enjoyed making these cake pops, you’ll love exploring other sweet ways to celebrate Valentine’s Day. Here are some more festive recipes that are sure to spread love and joy:
- Valentine Muddy Buddies: A fun, no-bake snack mix perfect for sharing.
- Valentine Cherry Hand Pies: Individual pies bursting with cherry flavor, great for a sweet surprise.
- Chocolate Peanut Butter Hearts: A classic flavor combination shaped into adorable hearts.
- Valentine’s Day Heart Cupcakes: Beautifully decorated cupcakes that are always a crowd-pleaser.
I genuinely love to bake and cook, and it brings me immense joy to share my kitchen experiences and cherished recipes with all of you! Remembering to come back each day for new culinary inspiration can sometimes be a challenge, which is precisely why I offer a convenient newsletter every time a new recipe is posted. Simply subscribe today and start receiving your free daily recipes directly to your inbox!

Valentine Cake Pops
IMPORTANT – There are often Frequently Asked Questions within the blog post that you may find helpful. Simply scroll back up to read them!
Print It
Pin It
Rate It
Save It
Saved!
Prevent your screen from going dark
Course:
Dessert
Cuisine:
American
32
cake pops
3 hours
5 minutes
176
Amanda Davis
Ingredients
-
13.25
ounce
package yellow cake mix
we used Betty Crocker -
3
eggs -
1
cup
water -
5
Tablespoons
unsalted butter
melted. 70g -
11
ounces
vanilla frosting
312g -
12
ounces
white candy melts
340g -
12
ounces
pink candy melts
340g -
12
ounces
red candy melts
340g -
heart shaped sprinkles
optional as decoration
Things You’ll Need
-
13×9 baking dish -
2 Tablespoon cookie scoop -
cake pop sticks -
Piping bags
or ziptop bag with the end snipped -
heart sprinkles
Before You Begin
- *Use the ingredients listed in the recipe card to prepare your cake mix.*
- When making the cake, it is important to replace the oil (called for on the back of the box) with butter. Doing so will ensure a more solid cake pop with less chance of it falling off the stick.
- Disregard the oven temperature or bake time on the back of the cake mix box; instead, follow the directions above. You don’t want to overbake or brown the cake too much.
- Don’t use all the frosting in the container; only use the required amount.
- If the melted candy starts to harden, reheat it in 10-second increments in the microwave until you reach the desired consistency.
Instructions
-
Preheat oven to 325°F. Grease a 9 x 13-inch baking dish and place parchment paper onto two large baking sheets. Set them aside.
-
In a large mixing bowl, combine the dry cake mix, eggs, water, and melted butter. Blend until smooth.
-
Transfer the cake batter to the prepared baking dish and bake for 20 to 22 minutes, or until a toothpick inserted comes out clean. Let the cake cool on a wire rack for 2 to 3 hours.
-
Once the cake has cooled, break it up with your hands and place the pieces in a large mixing bowl.
-
Using a fork, further break down the cake until it is crumbly.
-
Add the frosting ½ cup at a time, stirring it into the crumb mixture until fully incorporated.
-
Scoop out even-sized mounds of cake using a 2-tablespoon cookie scoop, placing them on the prepared baking sheet.
-
Form each mound into a smooth round cake ball. Refrigerate the cake balls for one to two hours to allow them to harden.
-
Place each of the three colored candy melts in three separate bowls or glass jars. Heat the candy melts in the microwave in 30-second increments until they melt, then stir until smooth.
-
Dip a cake pop stick into the melted candy coating about 1/2 inch deep. Then, push the coated end of the stick into the cake ball. Repeat with the remaining cake balls.
TIP – Make sure to push the cake stick into the cake ball past the middle point. This will provide better support when dipping it into the melted candy.
-
Once the candy base has hardened, dip the cake pop into the melted candy, gently tapping off any excess. Repeat with the remaining cake pops.
-
Place the remaining melted candy into three disposable piping bags. Snip off the end of each bag and slowly drizzle even lines around the cake ball. If desired, a heart sprinkle can be added when the drizzle is still wet. Repeat this with the remaining cake pops and let them dry thoroughly on a cake pop stand before serving.
Expert Tips & FAQs
- Store your Valentine cake pops at room temperature in an air-tight container or sealed ziptop bag for up to one week.
- If the melted candy is not coating the balls smoothly or starting to feel too thick to work with (and heating it again isn’t helping), stir in 1 teaspoon vegetable oil or coconut oil (which won’t yellow the white melted candy). Doing so will make the melted candy less viscous and easier to coat the cake pops.
Nutrition
Serving:
1
cake pop
|
Calories:
176
cal
|
Carbohydrates:
25
g
|
Protein:
1
g
|
Fat:
8
g
|
Saturated Fat:
5
g
|
Polyunsaturated Fat:
1
g
|
Monounsaturated Fat:
1
g
|
Trans Fat:
0.1
g
|
Cholesterol:
20
mg
|
Sodium:
124
mg
|
Potassium:
15
mg
|
Fiber:
0.1
g
|
Sugar:
20
g
|
Vitamin A:
77
IU
|
Calcium:
28
mg
|
Iron:
0.3
mg
Tried this Recipe? Pin it for Later!
Follow on Pinterest
@AmandasCookin or tag
#AmandasCookin!
The recipes on this blog are tested with a conventional gas oven and gas stovetop. It’s important to note that some ovens, especially as they age, can cook and bake inconsistently. Using an inexpensive oven thermometer can assure you that your oven is truly heating to the proper temperature. If you use a toaster oven or countertop oven, please keep in mind that they may not distribute heat the same as a conventional full sized oven and you may need to adjust your cooking/baking times. In the case of recipes made with a pressure cooker, air fryer, slow cooker, or other appliance, a link to the appliances we use is listed within each respective recipe. For baking recipes where measurements are given by weight, please note that results may not be the same if cups are used instead, and we can’t guarantee success with that method.

