Delicious Club-Style Pinwheel Sandwiches: The Ultimate Easy Appetizer & Lunch Idea
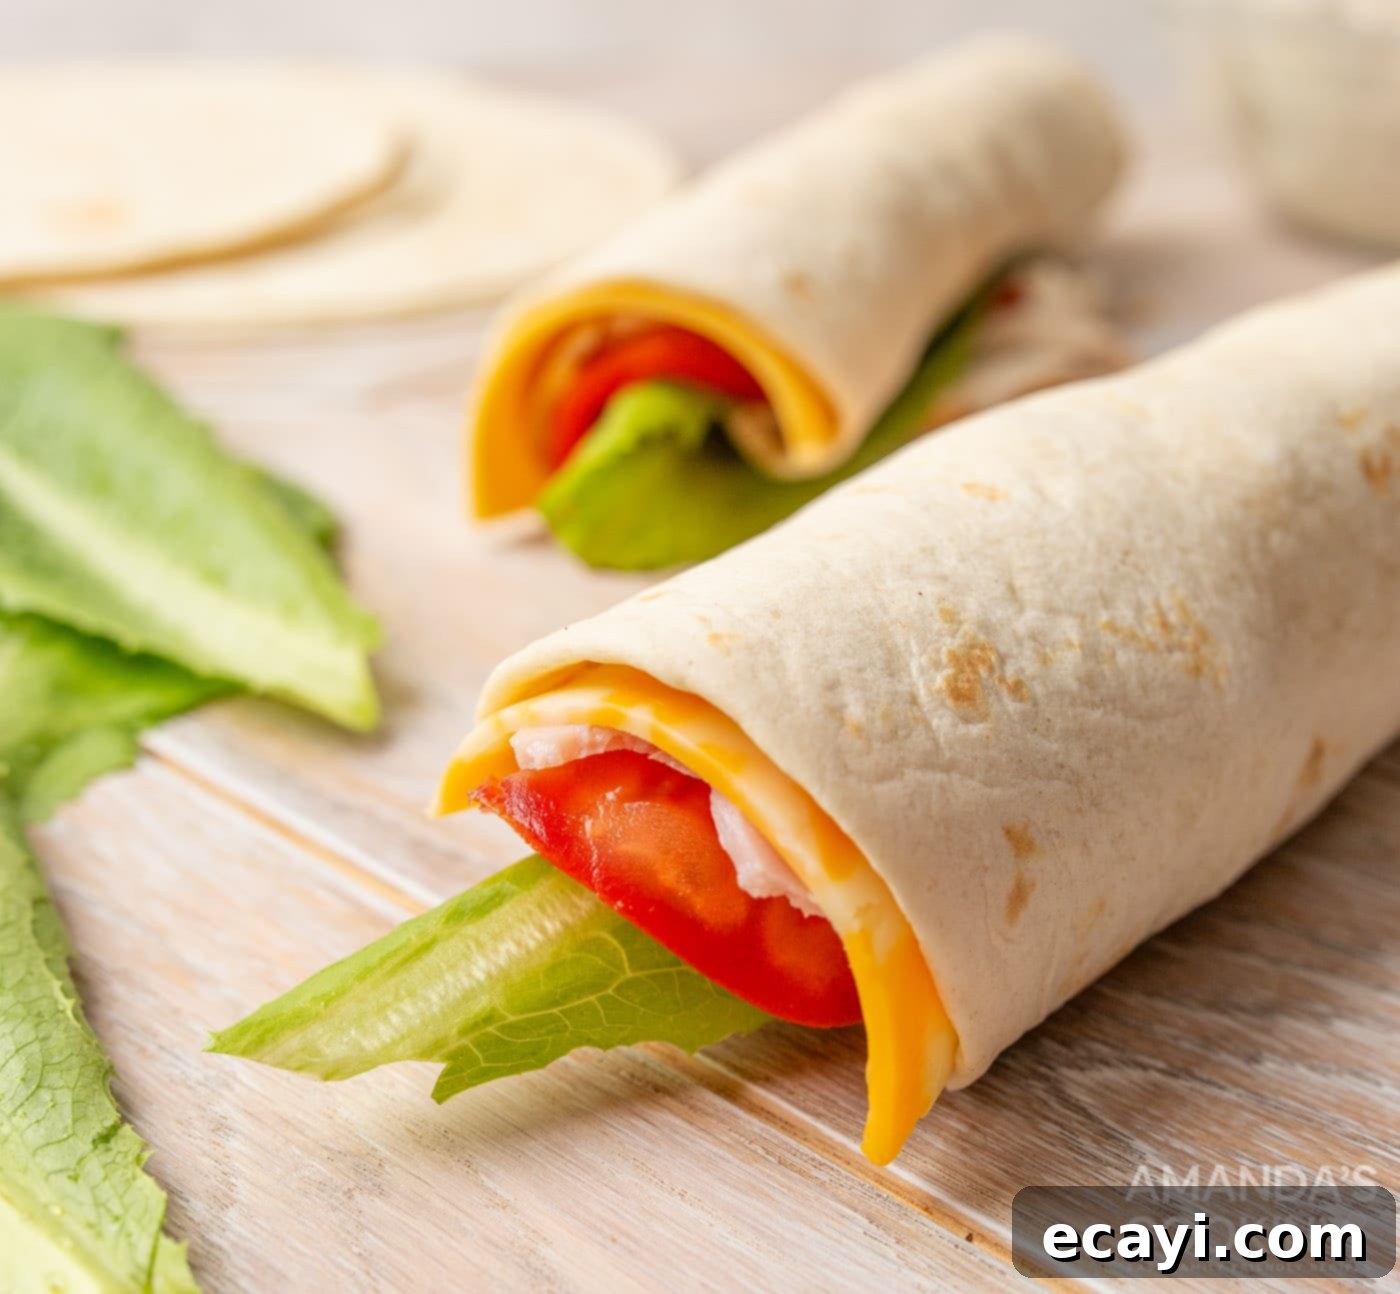
These delightful club-style pinwheel sandwiches offer a perfect blend of convenience, flavor, and visual appeal, making them an ideal choice for any gathering. Whether you’re planning a lively party, a casual BBQ, a leisurely picnic, or simply need a quick and satisfying lunch, these versatile roll-ups are guaranteed to be a hit. They’re incredibly simple to prepare, yet impressive enough to elevate any food spread. Their bite-sized format makes them the quintessential finger food, adored by both adults and children alike.

Why This Recipe Is a Must-Try
Pinwheel sandwiches stand out as an exceptional finger food for countless reasons. They are perfect for kid-friendly lunchboxes, effortless additions to barbeques and potlucks, or simply enjoyed as a wholesome, satisfying snack. The magic lies in their simplicity and customizable nature. Crafted with soft flour tortillas, they are generously filled with layers of your favorite deli meats—such as savory ham or tender turkey—crisp bacon bits, a selection of thinly sliced cheeses, fresh tomatoes, crunchy lettuce, and a delectable creamy spread. This spread, a tantalizing blend of cream cheese, zesty ranch seasoning, and smooth mayonnaise, ties all the classic club sandwich flavors together into one irresistible bite.
What truly makes these club-style pinwheel sandwiches a winner is their incredible ease of preparation. They can be whipped up as a fantastic last-minute appetizer, making party planning stress-free. The process is straightforward: lay out a tortilla, load it with the delicious toppings, roll it up tightly, and then slice it into charming pinwheels. Once assembled, they can be neatly tucked into a container, ready to grab and go for any occasion. Their compact form makes them mess-free and incredibly convenient for on-the-go enjoyment, ensuring everyone can enjoy a taste of a classic club sandwich without the fuss of traditional bread.

Essential Ingredients for Your Pinwheel Sandwiches
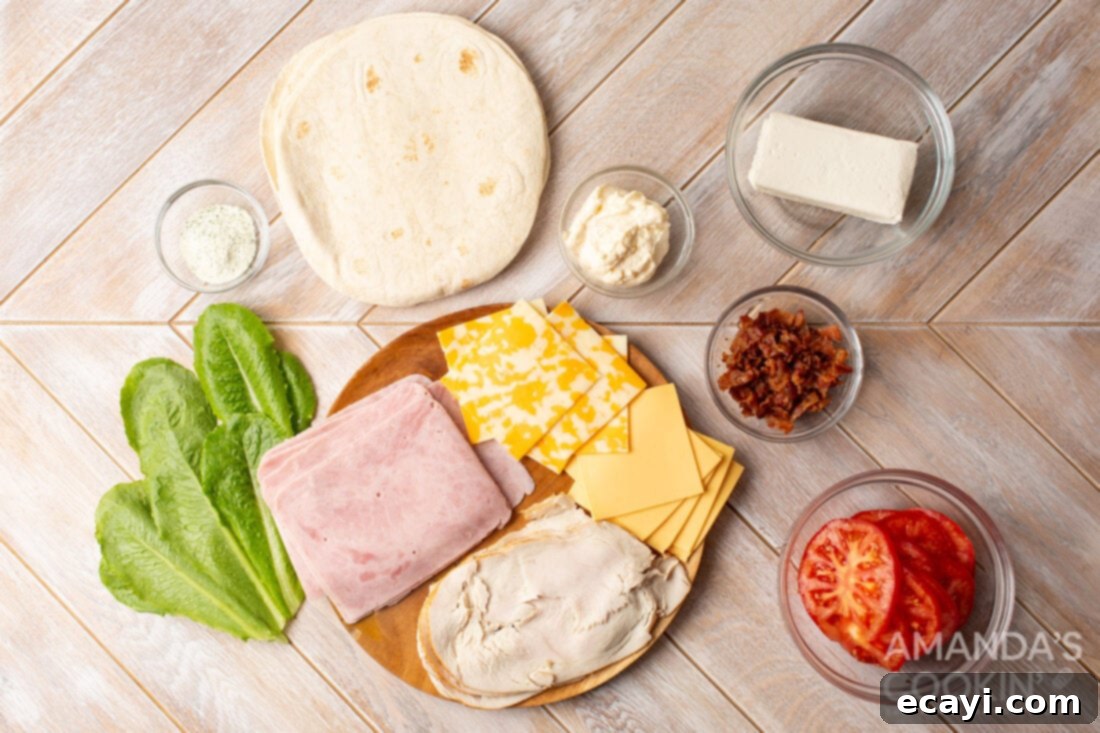
To create these mouth-watering pinwheel sandwiches, you’ll need a selection of fresh, high-quality ingredients. While the full list with precise measurements is conveniently provided in the printable recipe card at the conclusion of this post, let’s briefly highlight the key components. The beauty of this recipe lies in its adaptability, allowing you to tailor it to your personal preferences and dietary needs. Gather your tortillas, deli meats, cheeses, and fresh vegetables, along with the ingredients for our signature creamy ranch spread, and get ready to assemble some truly delicious bites. Don’t forget that fresh ingredients make all the difference in achieving the best flavor and texture in your pinwheels!
Ingredient Insights and Creative Substitutions
The beauty of pinwheel sandwiches lies in their incredible versatility, allowing for endless customization to suit any taste or dietary requirement. Here’s a deeper dive into the main ingredients and how you can get creative with substitutions:
TOPPINGS: When it comes to the meat, you have a vast array of options. Beyond the classic turkey and ham, consider thinly sliced roast beef, seasoned chicken breast, or even a flavorful chicken salad for a different texture. Feel free to mix and match different deli meats to create a diverse platter of pinwheels. For those seeking a vegetarian option, simply omit the meat entirely. You can boost the flavor and substance by adding roasted red peppers, sautéed spinach, or thinly sliced cucumbers. The tomatoes are indeed optional; while they add a burst of freshness, they can lead to soggy tortillas if left too long. If you plan on preparing these pinwheels several hours or a day in advance, consider replacing fresh tomatoes with sun-dried tomatoes (patted dry) or thinly sliced roasted bell peppers for a similar flavor profile without the moisture risk.
CHEESE: The cheese component offers another layer of customization. Our recipe typically uses Colby Jack or American cheese for their melt-in-your-mouth texture and mild flavor. However, don’t hesitate to experiment with other varieties like spicy Pepper Jack for a kick, provolone for its subtle nuttiness, sharp cheddar for a more pronounced flavor, or even a smoked gouda for an elevated taste. For the creamy spread, which forms the delicious base, we combine cream cheese with ranch seasoning and mayonnaise. This creates a classic, tangy flavor. For an even quicker preparation, you could use an already flavored cream cheese, such as chive and onion, garden vegetable, or even a spicy jalapeño cream cheese. Alternatively, mix in your own herbs and spices like dill, garlic powder, onion powder, or a pinch of smoked paprika to craft a unique spread.
TORTILLA: Flour burrito-sized tortillas are our go-to for their flexibility and large surface area, which allows for substantial fillings and generous pinwheels. However, you can easily substitute these for smaller fajita-sized tortillas if you prefer smaller bites. To add a vibrant touch and extra flavor, try using colored or flavored tortillas such as spinach, tomato basil, or whole wheat varieties. For those who enjoy a true culinary adventure, we can also show you how to make your own flavored flour tortillas from scratch. This is also a great opportunity to cater to dietary needs; opt for gluten-free tortillas if required, ensuring everyone can enjoy these delicious treats.
Crafting Your Club-Style Pinwheel Sandwiches: Step-by-Step Guide
These step-by-step photos and instructions are here to help you visualize how to make this recipe perfectly. For a concise, printable version of this recipe, complete with precise measurements and comprehensive instructions, you can easily jump directly to the recipe card at the bottom of this post.
- Begin by preparing your bacon. If you’re not using pre-cooked bacon, cook it until crispy. Once cooled, finely chop the bacon into small, uniform bits. The smaller the pieces, the easier it will be to spread evenly in your pinwheels.
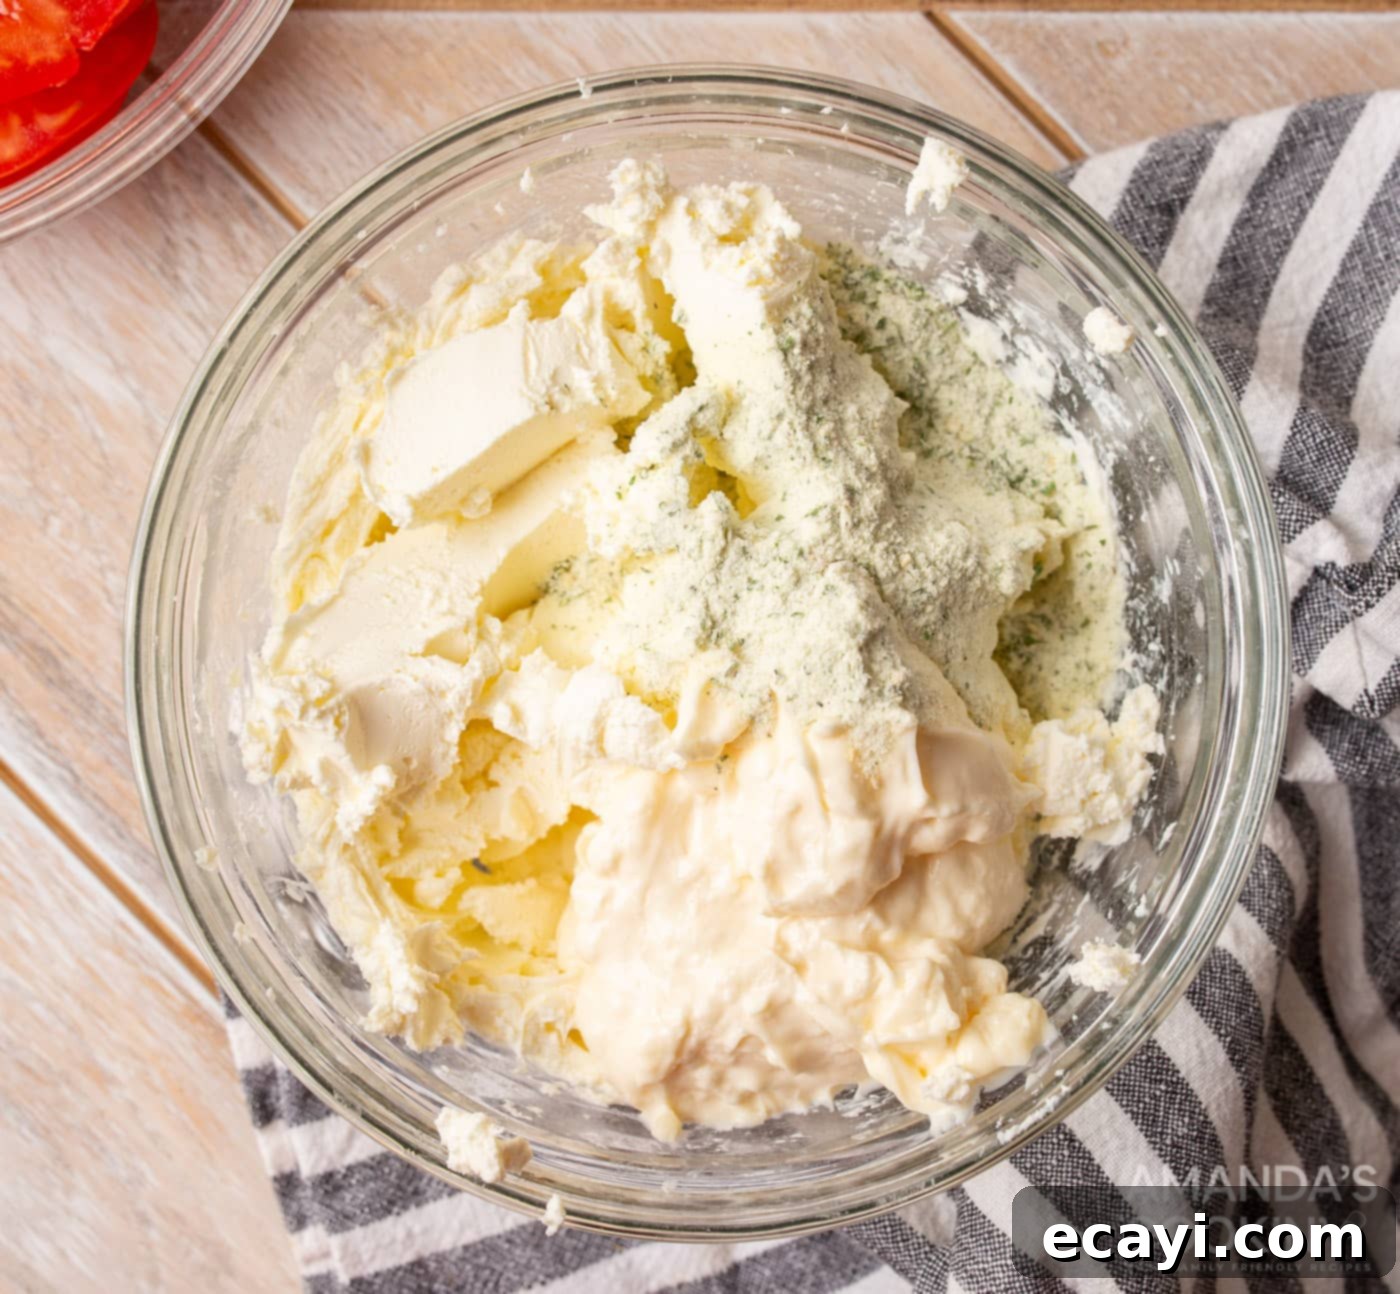
- In a mixing bowl, use an electric hand mixer to beat the softened cream cheese until it’s smooth and creamy. This ensures a lump-free base for your spread. Next, add in the mayonnaise and the ranch seasoning packet. Mix thoroughly until all ingredients are well combined, creating a flavorful and cohesive spread.

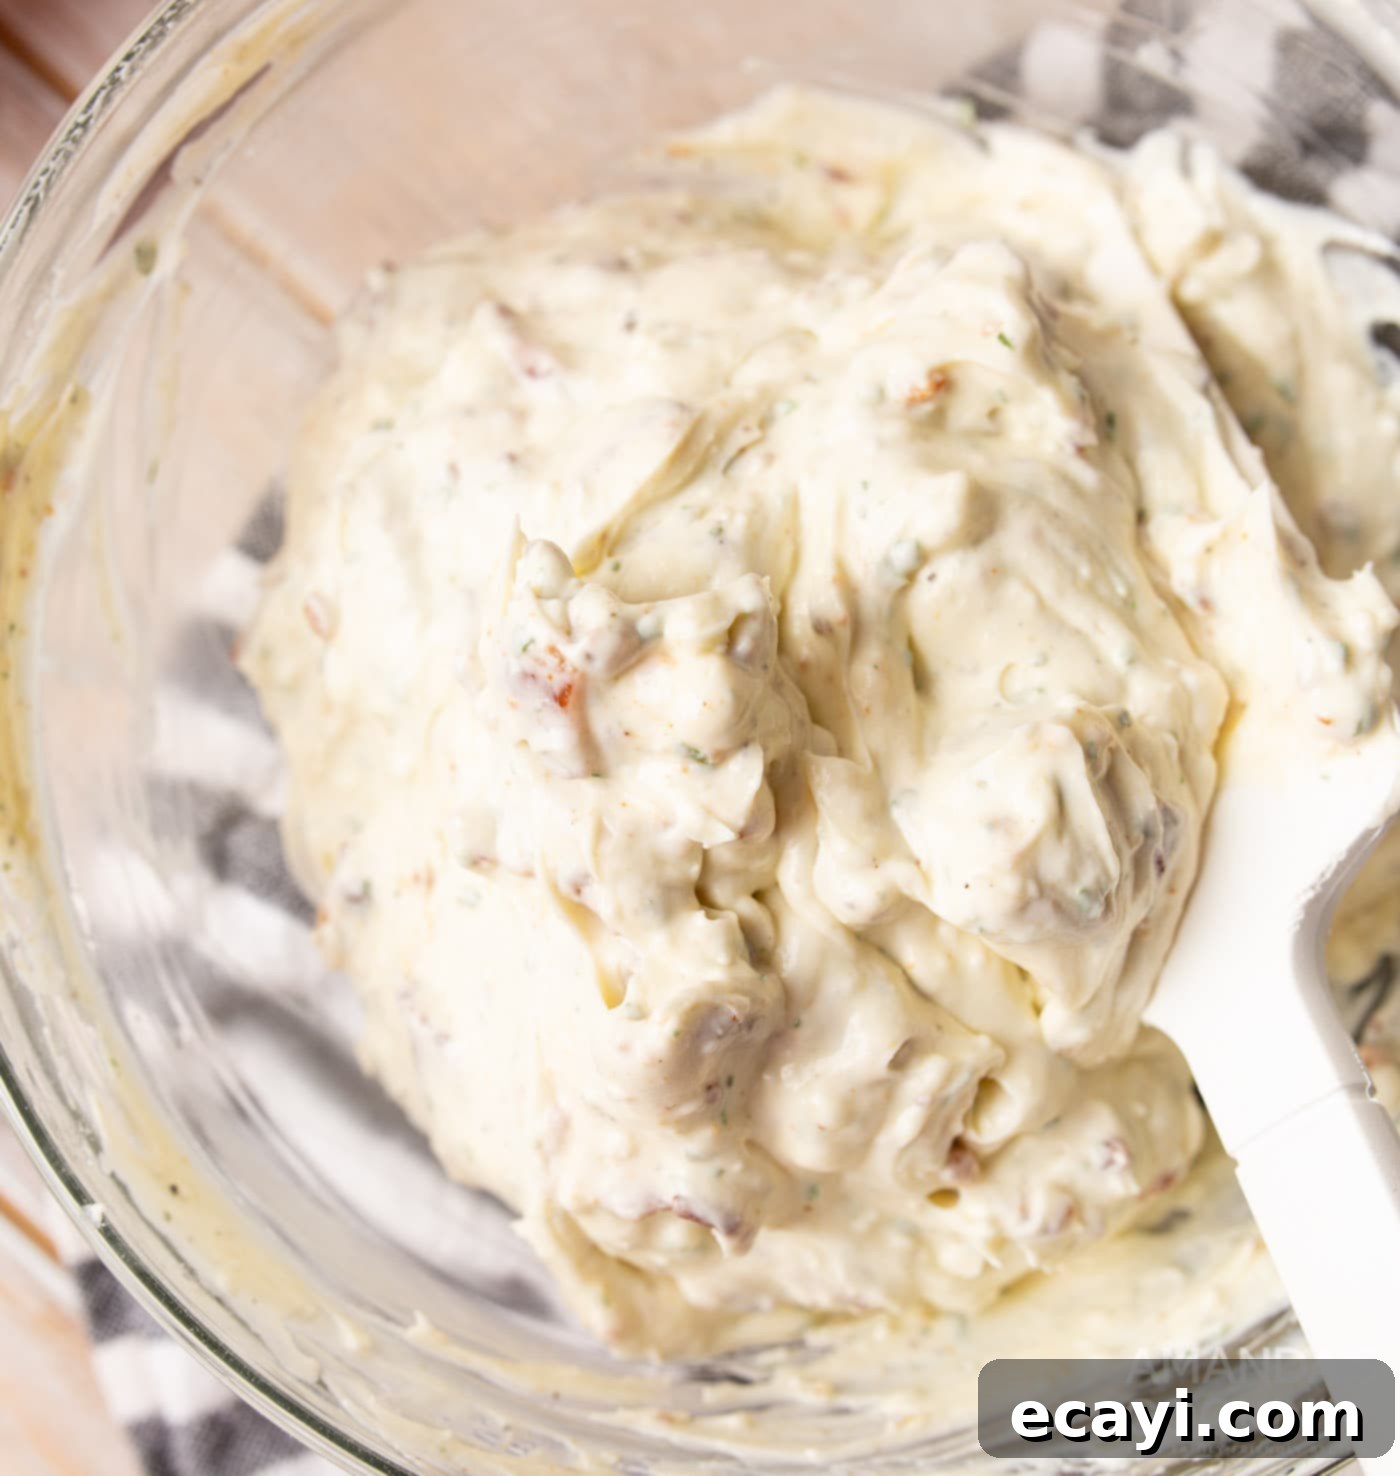
- Once the base spread is ready, incorporate the finely chopped bacon. Using a rubber spatula, gently fold the bacon bits into the cream cheese mixture until they are evenly distributed. This ensures every bite of your pinwheel will have that delightful smoky bacon flavor.

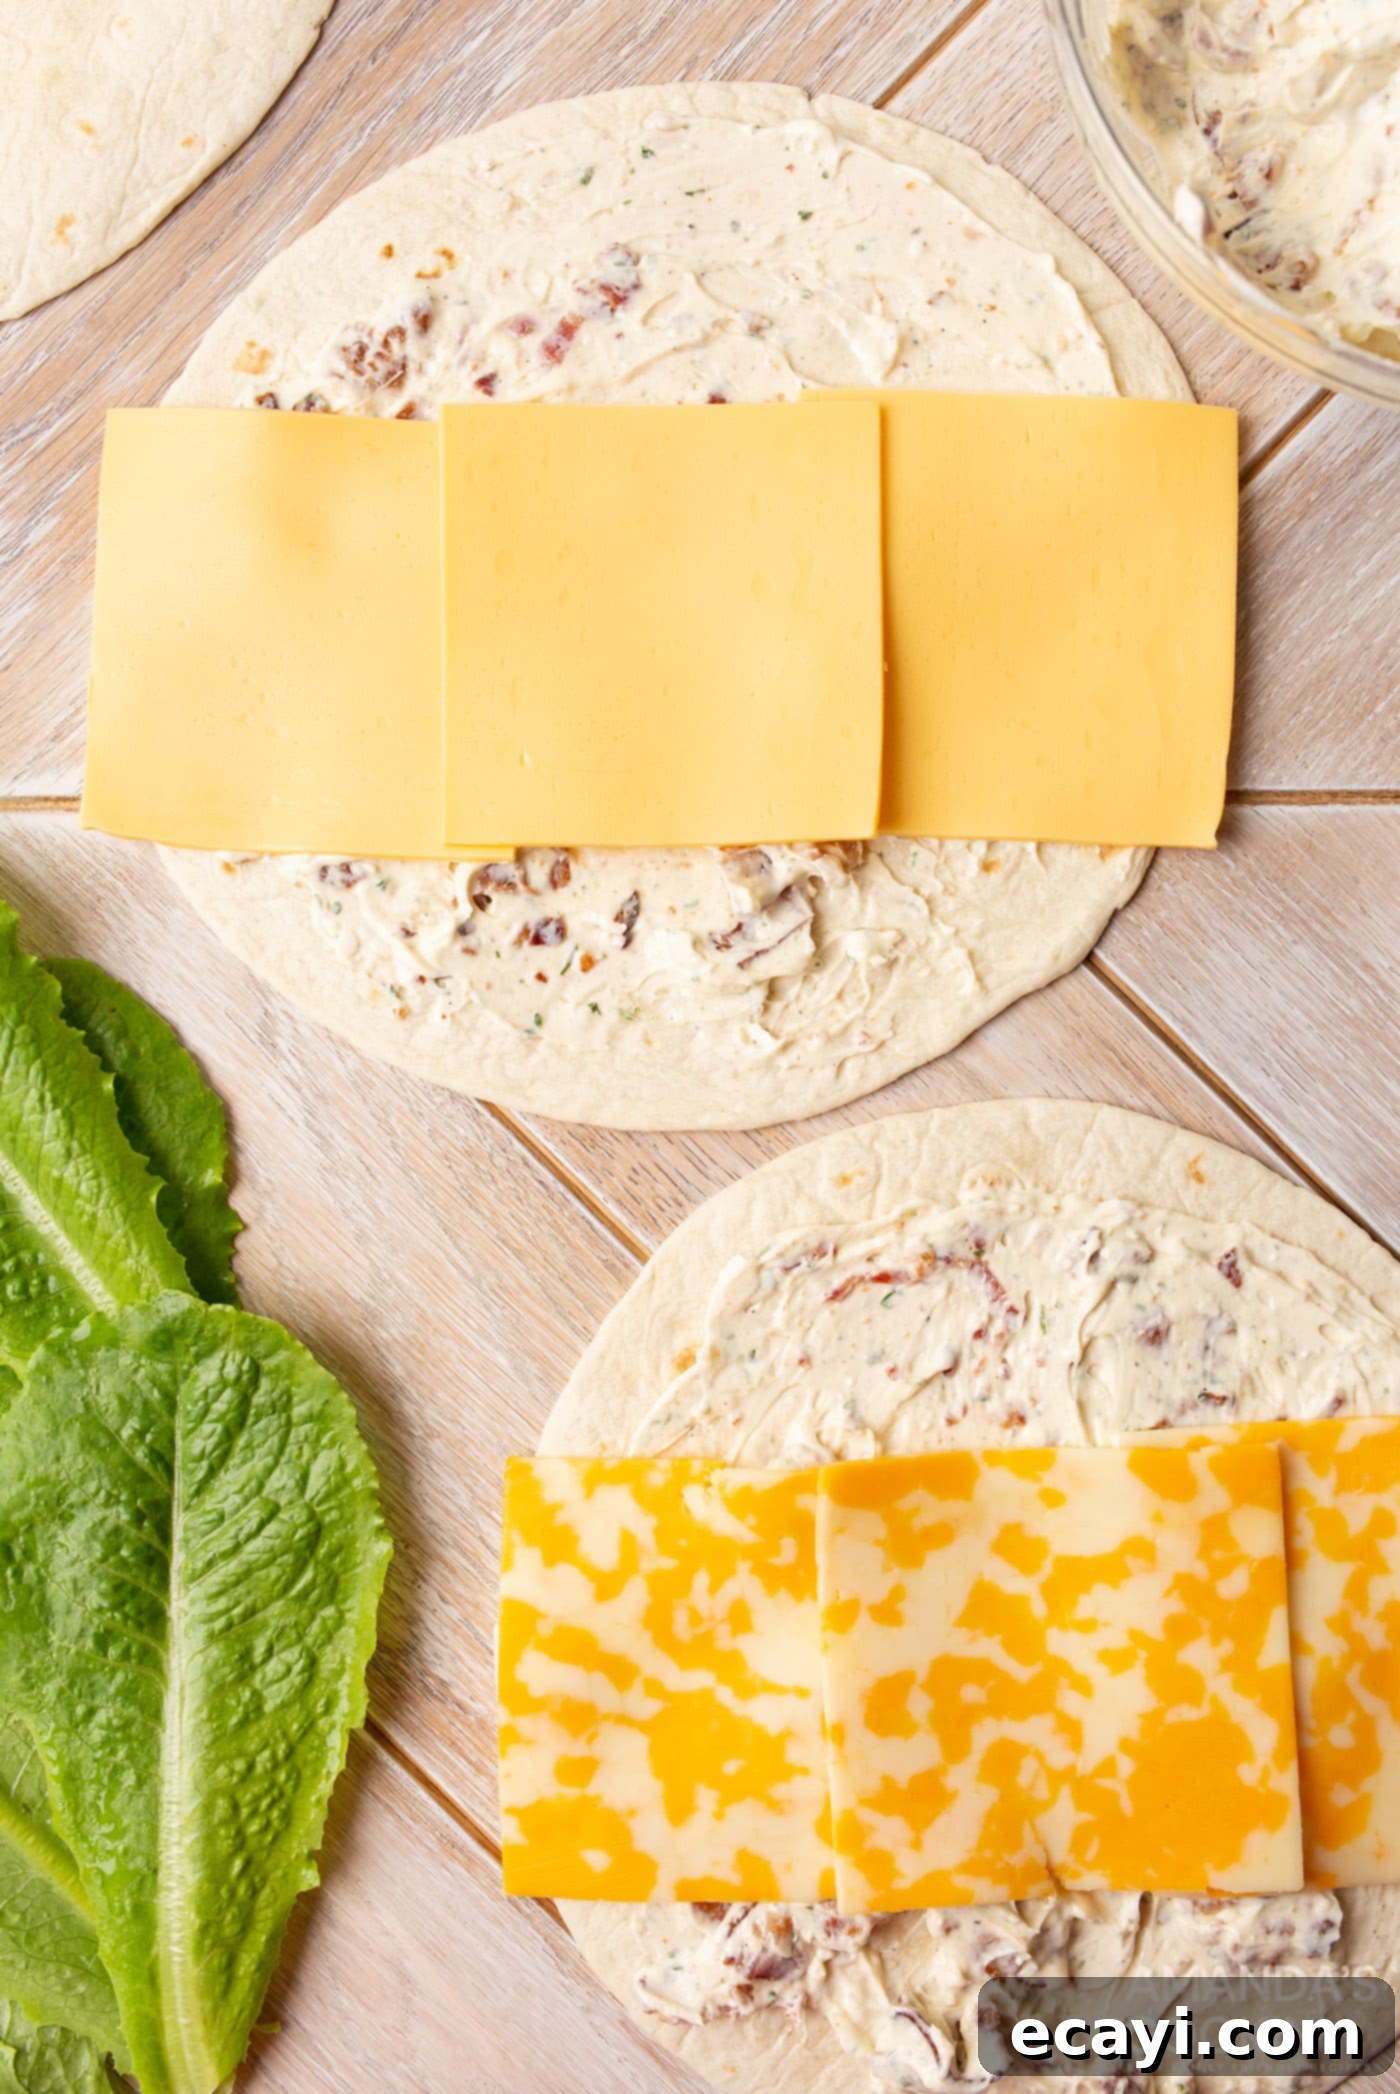
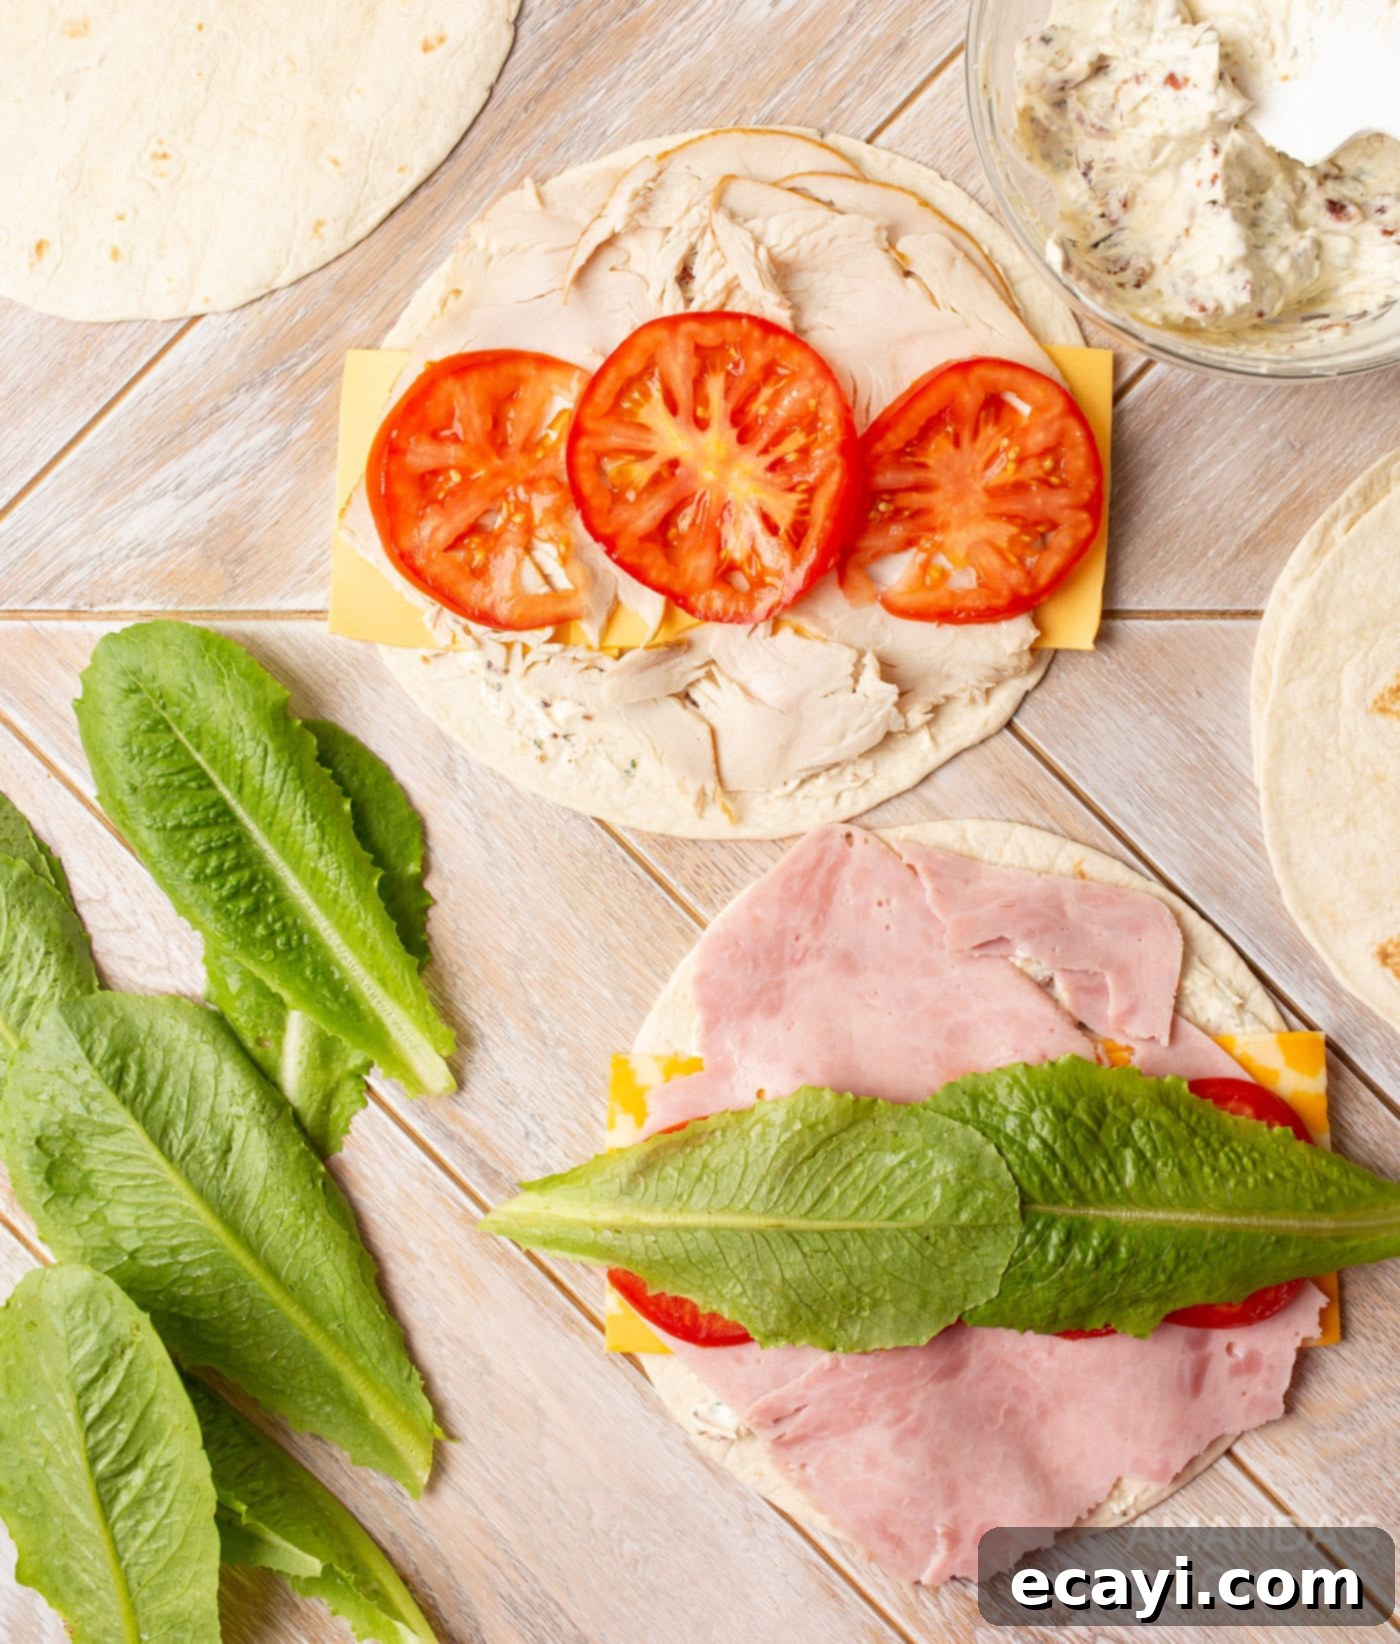
- Now, it’s time to assemble your pinwheels. Lay out your 10 burrito-sized tortillas on a clean work surface. Take the prepared cream cheese and bacon mixture and spread it evenly across each tortilla, ensuring a consistent layer from edge to edge. Dividing the mixture evenly among all tortillas will help maintain uniform flavor and texture.
- Next, place three slices of cheese in a horizontal line across the center of each tortilla, directly on top of the cream cheese spread. This creates a solid base for your deli meat and ensures cheese in every slice of the pinwheel.

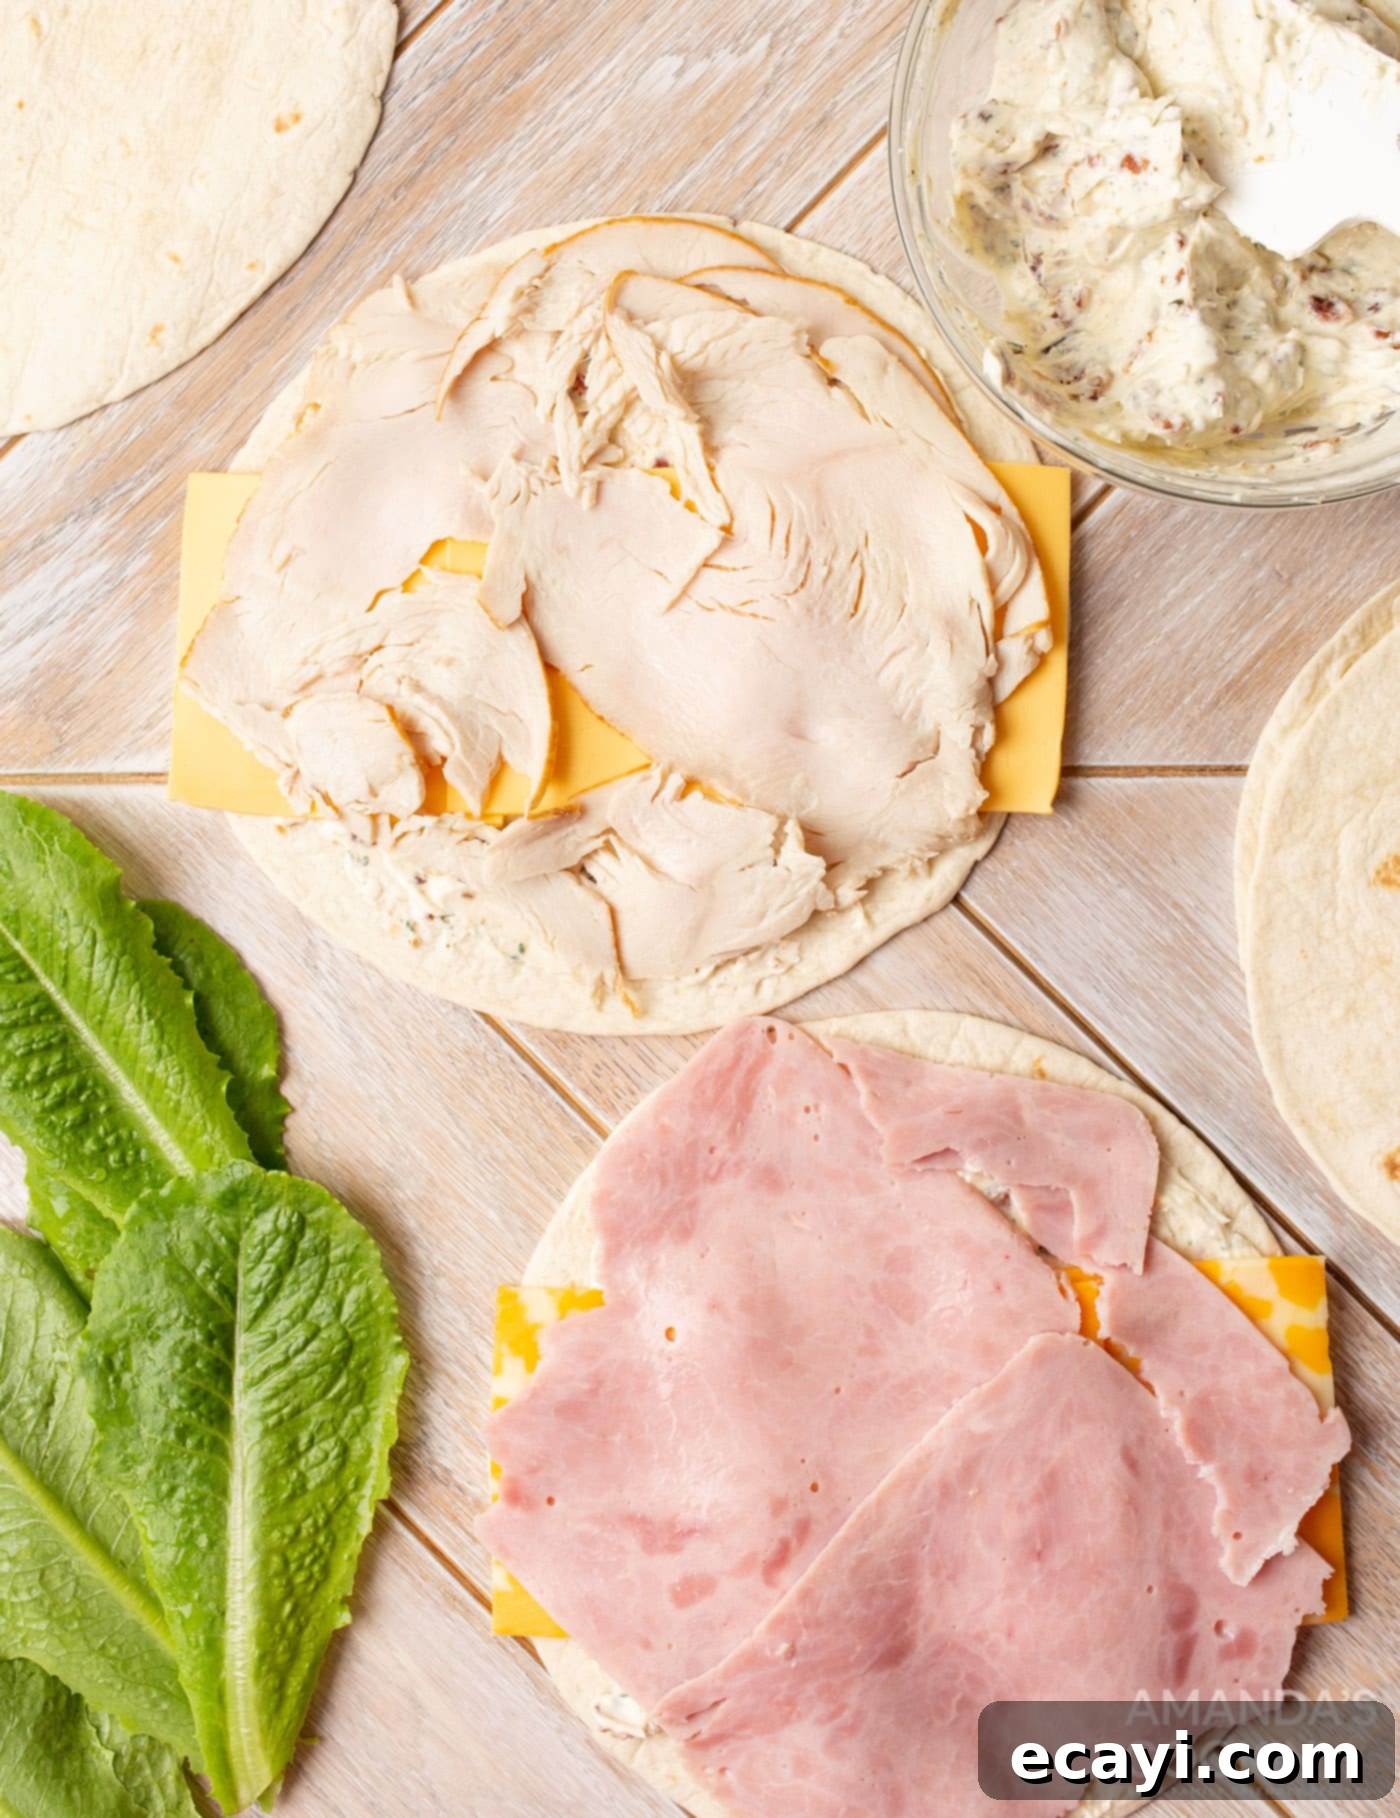
- Generously cover the cheese layer with your chosen deli meat. Arrange the slices neatly, leaving a small margin (about half an inch to an inch) at the top edge of the tortilla. This prevents the fillings from spilling out when you begin to roll, as the contents will naturally shift and compress.

- Finally, add the fresh vegetables. Lay the thinly sliced tomatoes and crisp lettuce leaves in the same fashion as the cheese and meat layers. Distribute them evenly to ensure a burst of freshness in every bite. Remember the note about tomatoes potentially causing sogginess if made too far in advance.

- Starting from the bottom edge, roll each tortilla tightly upwards. A tight roll is crucial for ensuring the pinwheels hold their shape and don’t unravel when sliced. Press firmly as you roll to compact the fillings.

- Once rolled, place the tortillas seam-side down in a casserole dish or wrap each roll individually in plastic wrap. Refrigerate them for at least 1-2 hours. This chilling period is essential as it allows the cream cheese mixture to firm up and all the ingredients to meld together, making the rolls much easier to slice cleanly.
- When you’re ready to serve, use a very sharp knife to slice each chilled roll into approximately 1-inch thick pinwheels. Each tortilla roll typically yields 7-8 individual pinwheels. For an extra touch of presentation and ease of handling, especially when serving as appetizers or with a dip, you can secure each pinwheel with a decorative toothpick. Arrange them artfully on a platter for an inviting display.
Frequently Asked Questions & Expert Tips
Absolutely! Pinwheel sandwiches are an excellent make-ahead appetizer, ideal for busy hosts. Preparing them a few hours in advance, and allowing them to set in the refrigerator, helps the rolls firm up, seals the ends, and makes for neat, easy slicing. However, a crucial tip: if you plan on making them further in advance (more than 4-6 hours), or even the day before, it’s highly recommended to omit the fresh tomatoes from the ingredient list. Tomatoes release moisture over time, which can unfortunately lead to soggy tortillas on the ends. If fresh tomato flavor is a must, consider adding them just before serving, or opt for sun-dried tomatoes which have a lower moisture content.
To keep your pinwheel sandwiches fresh and delicious, store them in an airtight container in the refrigerator. Properly stored, they will last for 2-3 days. For optimal taste and texture, these delightful little sandwiches are truly best enjoyed on the day they are made, especially if they contain fresh vegetables like lettuce and tomato. If you’ve omitted the tomatoes, they tend to hold up slightly better for longer storage. Always ensure they are kept chilled until ready to serve to maintain their integrity and food safety.
Expert Tips for Perfect Pinwheel Sandwiches:
- Chilling is Non-Negotiable: The chilling step is arguably the most important for achieving perfectly neat pinwheels. Don’t skip it! A minimum of 1 hour, or ideally 2-3 hours, will firm up the spread and contents, making for cleaner cuts and preventing your pinwheels from squishing.
- Sharp Knife is Your Best Friend: For the cleanest, most attractive slices, use a very sharp knife, preferably a serrated one for effortless cutting through the tortilla and fillings without tearing. Wipe your knife clean between slices if the spread starts to accumulate.
- Don’t Overfill: While it’s tempting to load up on fillings, overfilling can make it difficult to roll the tortillas tightly and keep them intact. Aim for a balanced layer of spread, meat, and vegetables.
- Roll Them Tight: A firm, tight roll is essential for the pinwheels to hold their shape. Apply gentle but consistent pressure as you roll to compress the ingredients.
- Customization is Key: Feel free to experiment with different types of deli meats, cheeses, and even add-ins like finely chopped pickles, black olives, or bell peppers. This recipe is a fantastic base for your creativity!
- Portion Control and Presentation: Securing pinwheels with toothpicks not only makes them easier for guests to pick up but also adds a charming visual touch. Arrange them on a platter in a circular pattern for a beautiful display.
- Dietary Adaptations: For gluten-free guests, simply use gluten-free tortillas. For dairy-free options, choose plant-based cream cheese and cheese slices.
Delightful Serving Suggestions
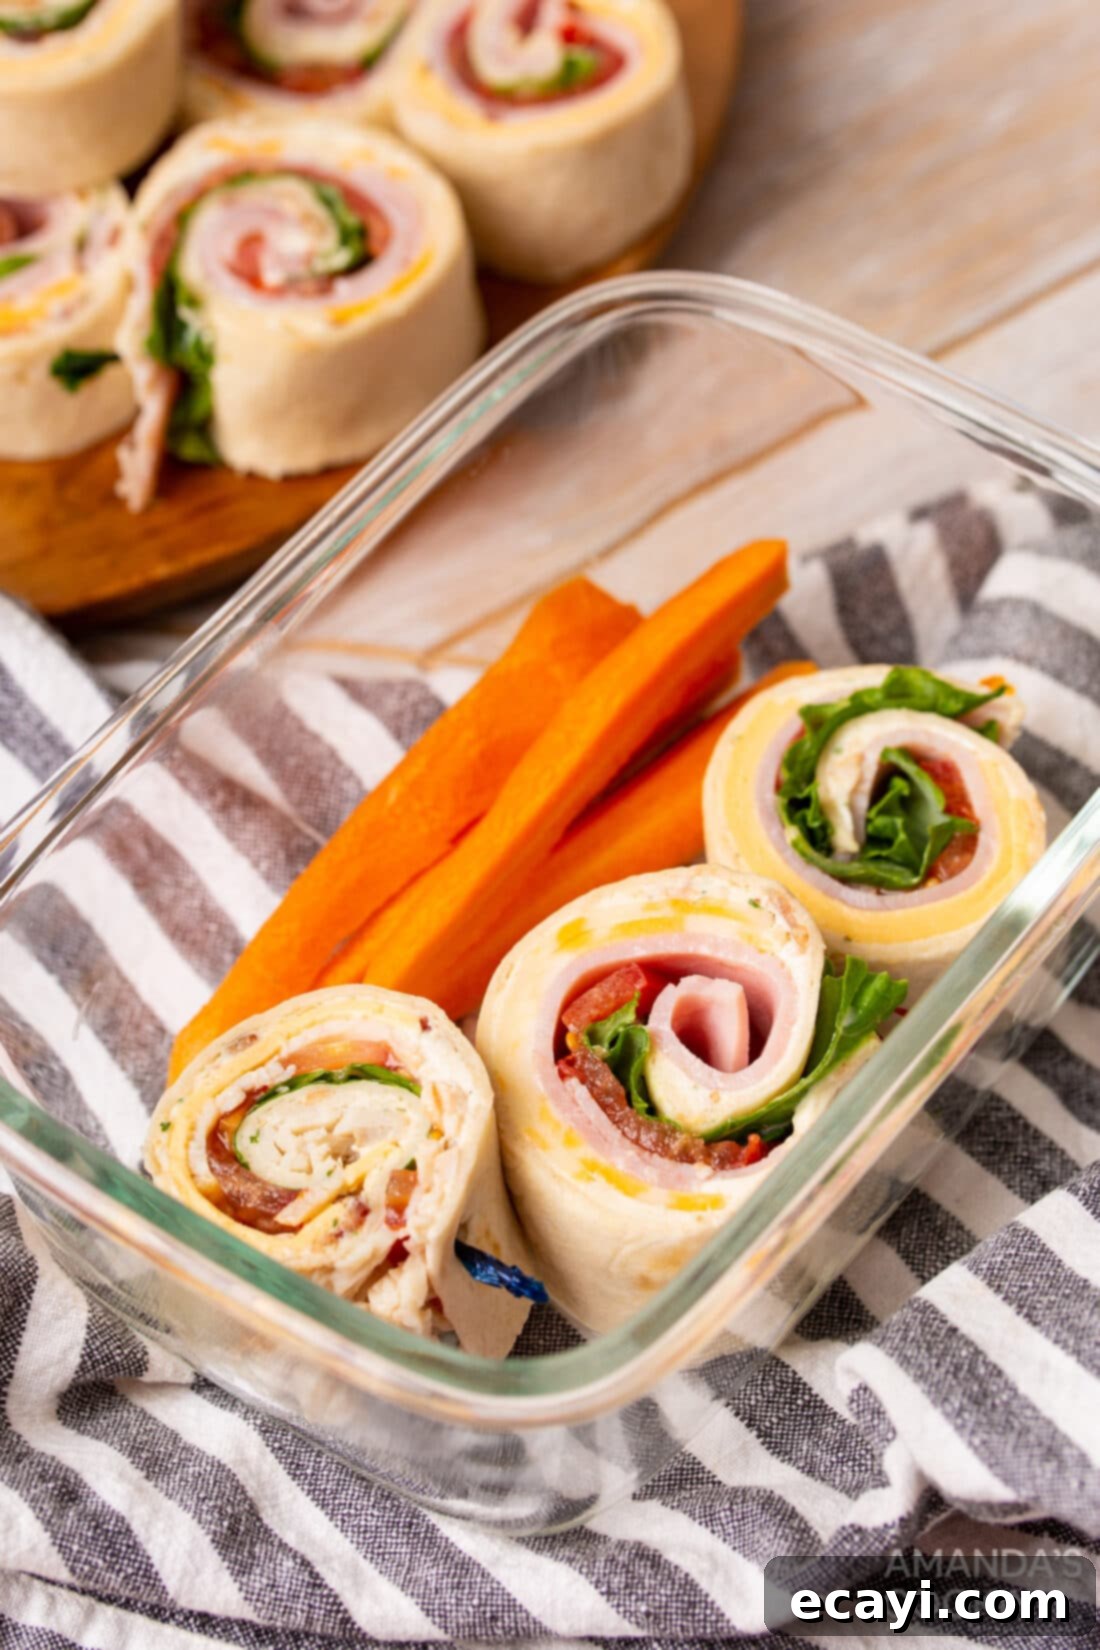
Pinwheel sandwiches are incredibly versatile and perfectly suited for a multitude of occasions, offering a convenient and crowd-pleasing option for any event. They shine as a star appetizer for all sorts of gatherings, from elegant bridal showers and festive baby showers to casual backyard cookouts and lively game day parties. One of our favorite ways to enjoy them, given how effortless they are to prepare, is for a quick and satisfying lunch or as a healthy snack, especially when paired with some fresh, crunchy veggies like carrot sticks, cucumber slices, or bell pepper strips. Their neat, bite-sized form makes them ideal for packing into lunchboxes for school or the office, or for taking along to picnics and potlucks.
For an enhanced flavor experience, don’t forget to serve your pinwheels with a side of delicious dip! Classic choices like Thousand Island dressing or extra ranch dressing always complement the club sandwich flavors beautifully. However, feel free to get creative with other options such as a zesty honey mustard, a smoky BBQ ranch, a creamy avocado ranch, or even a spicy sriracha mayo for those who enjoy a little heat. These pinwheels also pair wonderfully with other finger foods, a light green salad, or a bowl of soup, making them a fantastic addition to any meal spread. Their universal appeal and adaptability ensure they’ll be a welcome sight at any table.
More Irresistible Appetizer Recipes
If you’re a fan of easy, delicious appetizers, you’re in luck! We have a treasure trove of recipes perfect for parties, snacks, and gatherings. Here are some of our other top picks that are just as simple and satisfying as these Club-Style Pinwheel Sandwiches:
- Cucumber Sandwiches
- Appetizer Veggie Pizza
- Ham and Cheese Sliders
- Bacon Cheeseburger Meatballs
- Dill Pickle Pinwheels
- Mexican Pinwheels
- Pigs in a Blanket
I absolutely adore cooking and baking, and my passion is sharing my kitchen experiences and delicious recipes with all of you! Remembering to visit the blog daily for new ideas can be tricky, which is why I’ve made it easy for you. I offer a convenient newsletter that delivers a brand-new recipe straight to your inbox every time one posts. Simply subscribe today and start receiving your free daily recipes, ensuring you never miss out on your next favorite dish!

Club-Style Pinwheel Sandwiches
IMPORTANT – There are often Frequently Asked Questions and Expert Tips within the blog post that you may find incredibly helpful. Simply scroll back up to read them for additional insights and guidance!
Print It
Pin It
Rate It
Save ItSaved!
Ingredients
- ½ lb bacon about 6 slices, cooked until crispy and crumbled
- 8 oz cream cheese softened at room temperature for easy mixing
- ½ cup mayonnaise
- 1 packet ranch seasoning (dry mix)
- 10 burrito tortillas 9 inch, flour or flavored varieties
- 30 slices American cheese or preferred alternatives like Colby Jack, provolone, or cheddar
- 2 lbs sliced turkey or ham, thinly sliced deli meat
- 3 beefsteak tomatoes optional; or better boy tomatoes, sliced thinly to about 1/16th thickness, ideally with a mandoline
- 1 head buttercrunch lettuce or crisp kale leaves
Things You’ll Need
-
Hand mixer
-
Rubber spatula
Before You Begin
- Chop the bacon as small as you possibly can. This is important because the bacon bits will be spread onto the tortillas in a thin layer, and smaller pieces integrate better and prevent lumps.
- The use of fresh tomatoes can and likely will make these pinwheels soggy if they sit for an extended period. You have a few options: either omit them entirely for make-ahead pinwheels, or simply plan to assemble and serve these fresh on the same day. Allowing the pinwheels to set in the fridge for a few hours prior to serving is beneficial for sealing the ends and makes for a great make-ahead appetizer; however, if you do include tomato in the wrap, the longer it sits, the more juice it will release, which will inevitably make the tortilla ends soggy.
Instructions
-
Cook the bacon until crispy if you are not starting with pre-cooked bacon. Once cooled, chop the bacon into very fine bits.
-
Using an electric hand mixer, beat the softened cream cheese until smooth. Add in the mayonnaise and ranch seasoning packet. Mix thoroughly to combine all ingredients into a creamy spread. Then, add the finely chopped bacon and mix gently with a rubber spatula until evenly distributed.
-
Lay out all 10 tortillas on a clean work surface and begin assembly. Spread the prepared cream cheese mixture evenly onto each tortilla, ensuring the spread is divided equally among them for consistent flavor.
-
Place three slices of cheese in a line across the center of each tortilla, directly on top of the cream cheese spread. Follow this by covering the cheese layer with your choice of deli meat. Remember to leave a small open margin (about 1/2 to 1 inch) at the top edge of the tortilla, as the fillings will shift when rolled.
-
Now, add the fresh vegetables: layer the thinly sliced tomato and crisp lettuce leaves in the same manner as the cheese and meat, ensuring even distribution.
-
Starting from the bottom edge, roll each tortilla upwards as tightly as possible. A firm roll is key for compact pinwheels that hold their shape.
-
Once rolled, place the tortillas seam-side down in a casserole dish or wrap each roll tightly with plastic wrap. Store them in the refrigerator for at least 1-2 hours (or up to overnight) until they are firm and ready to be sliced.
-
When chilled, each roll should be sliced into pieces about 1 inch in thickness. You can typically get 7-8 pinwheels from one tortilla roll. For optimal presentation and ease of dipping, secure each pinwheel with a toothpick if desired.
Nutrition Information
The recipes on this blog are meticulously tested with a conventional gas oven and gas stovetop. It’s important to acknowledge that some ovens, particularly as they age, can cook and bake inconsistently. Using an inexpensive oven thermometer can provide assurance that your oven is truly heating to the proper, set temperature. If you opt to use a toaster oven or countertop oven, please bear in mind that these appliances may not distribute heat in the same manner as a conventional full-sized oven, and consequently, you may need to make adjustments to your cooking or baking times. In the case of recipes prepared with a pressure cooker, air fryer, slow cooker, or other specialized appliance, a direct link to the specific appliances we use is typically listed within each respective recipe for your reference. For baking recipes where measurements are primarily given by weight, please note that results may not be identical if volumetric cups are used instead, and we cannot guarantee the same level of success with that measurement method.

