Elevate Your Table: Mastering the Art of Decorative Vegetable Platters and Crudités
Imagine a holiday table or a casual gathering where every dish not only tantalizes the taste buds but also captivates the eye. A vibrant display of beautifully arranged and creatively cut vegetables can do just that! Far from being mundane, fresh vegetables can be transformed into stunning decorative elements that are as pleasing to look at as they are appetizing and healthy. You don’t need to be a professional chef to achieve these impressive results; with a few simple techniques and a little creativity, anyone can elevate their food presentation game.
Unlocking the Secrets to Beautiful Vegetable Presentation
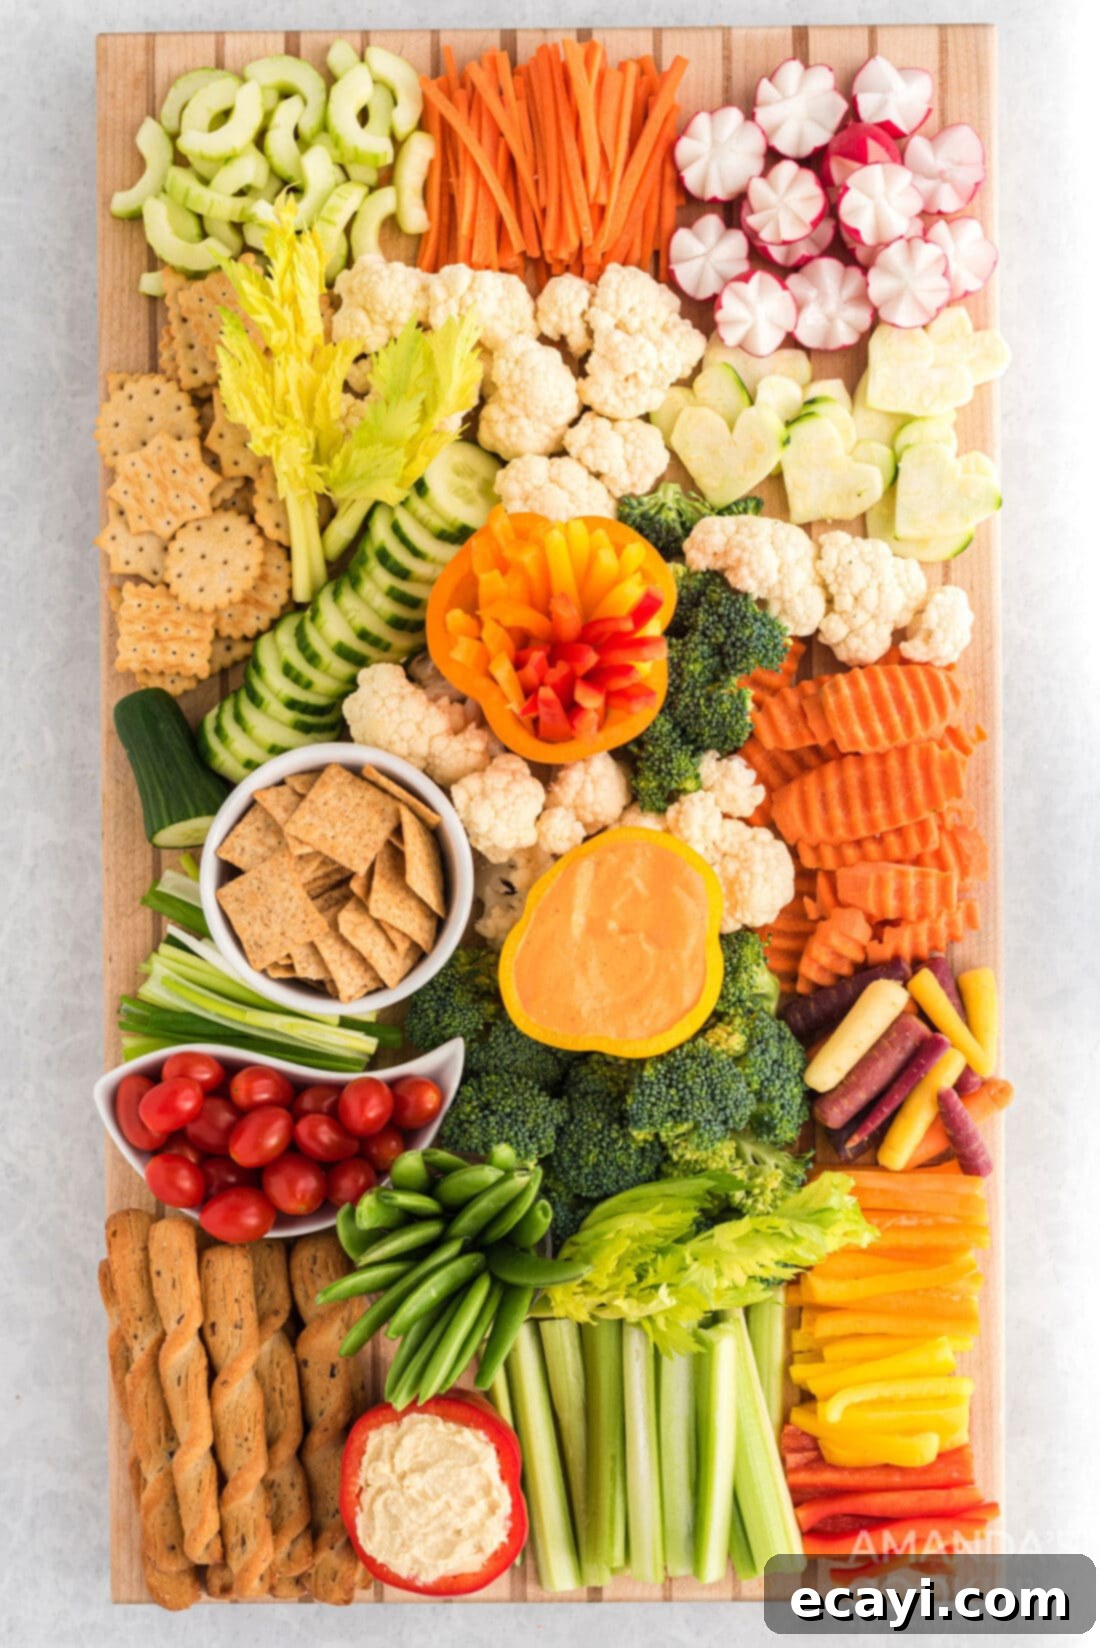
Whether it’s a festive holiday feast, a joyous birthday celebration, a laid-back summer barbecue, or simply a weeknight dinner, a meticulously prepared board brimming with colorful, creatively cut raw vegetables is always a guaranteed showstopper. Beyond their inherent nutritional value – which, let’s be honest, we often struggle to incorporate enough of into our daily diets – there’s an undeniable allure to food that looks exquisite. When vegetables are presented artfully, they become incredibly inviting, encouraging everyone, especially children, to reach for more healthy options. By following these decorative vegetable tips and ideas, you can easily entice your family and guests to enjoy a wholesome and visually appealing spread, making healthy eating a delightful experience.
The secret lies in transforming ordinary vegetables into culinary art. This not only enhances the aesthetic appeal of your table but also makes healthy eating more enjoyable and accessible. With a little effort, you can turn a simple veggie platter into a sophisticated crudités display that earns compliments and encourages consumption of nutrient-rich foods.
Classic Striped Cucumbers: A Touch of Elegance
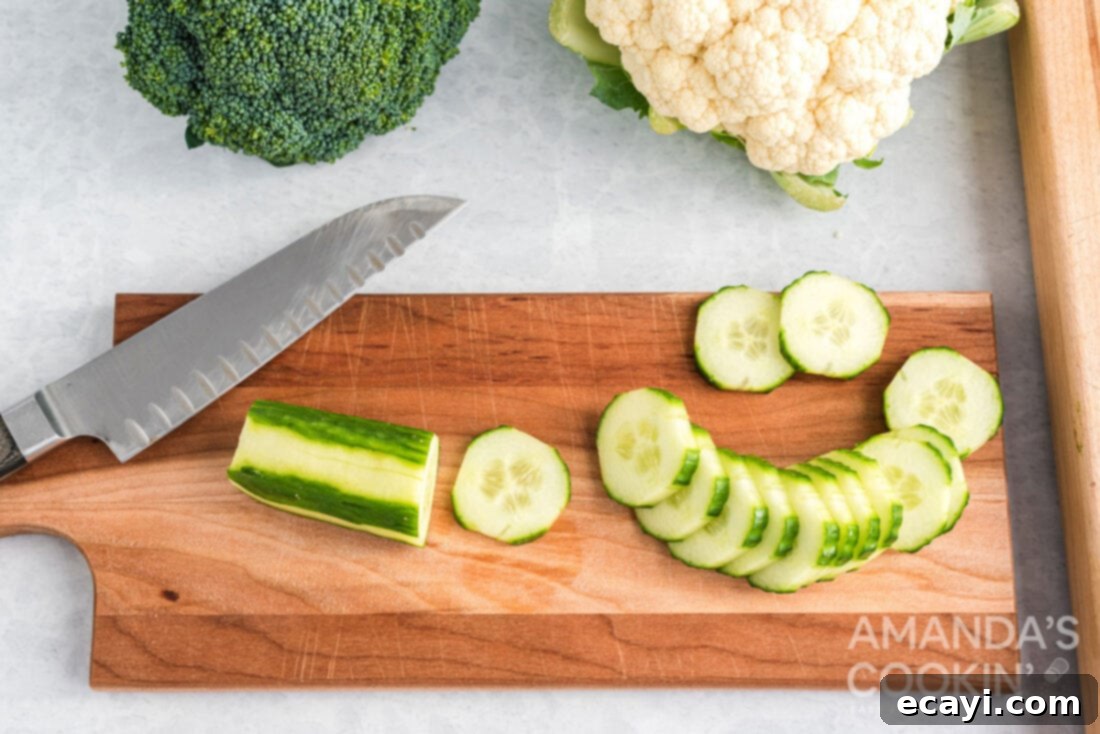
Cucumbers are a versatile and refreshing addition to any vegetable platter, and with a simple technique, they can be made to look incredibly elegant. Start by thoroughly washing a firm cucumber and trimming both ends. Using a standard potato peeler, carefully peel one long strip all the way down the cucumber. Now, here’s the trick for the striped effect: move your peeler over by approximately the width of the strip you just removed, ensuring you leave a segment of the green skin intact. Then, peel another strip. Continue this alternating pattern of peeling a strip and leaving a strip of skin until you’ve worked your way around the entire cucumber. This creates a beautiful, visually appealing striped pattern. Once peeled, slice the cucumber into uniform 1/4-inch thick rounds. The contrasting green skin and pale flesh will make each slice a miniature work of art, perfect for arranging on your platter or serving with dips.
Creative Cored Cucumbers: Perfect for Fillings
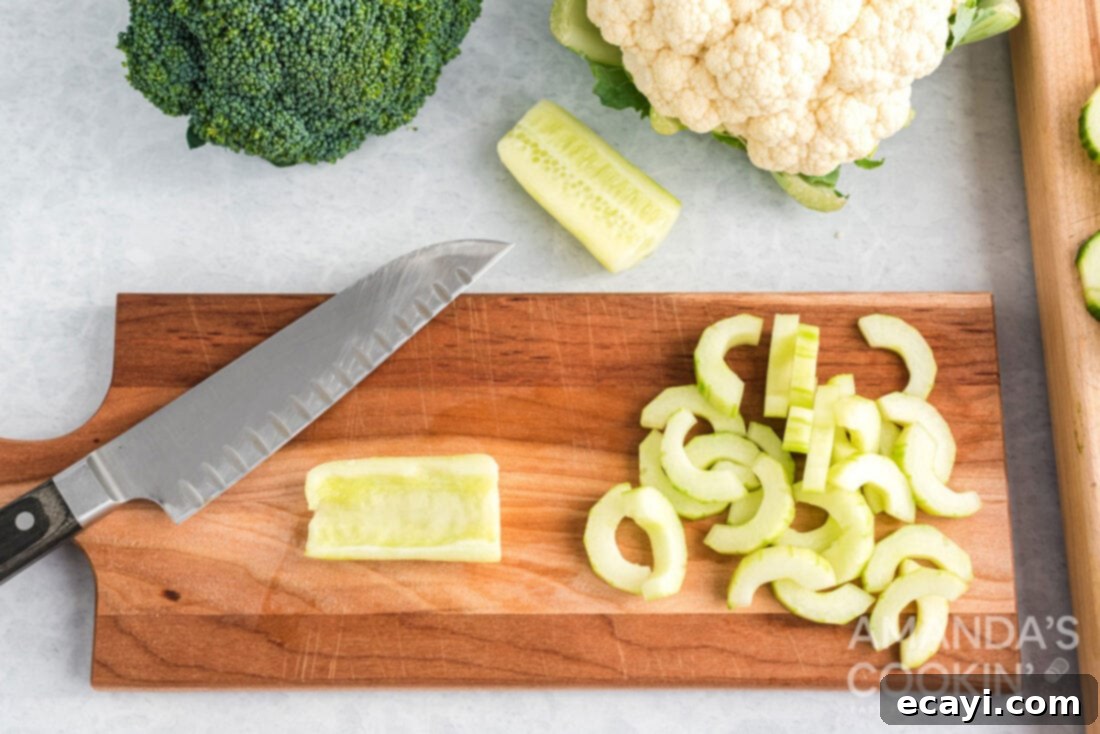
Taking cucumber presentation a step further, cored cucumbers offer an exciting opportunity for creative fillings and unique shapes. Begin by cutting off both ends of a washed cucumber and peeling the entire vegetable with a potato peeler. For a classic cored effect, slice the cucumber in half lengthwise. Then, using a small spoon or the tip of a knife, gently scoop out the watery seeds from the center of each half. Once the seeds are removed, slice these hollowed-out halves into 1/4-inch thick pieces, which will form elegant “half moons.” These half-moon shapes are ideal for serving with a dollop of dip or a small spoonful of cream cheese. For an even more unique presentation, you can create “donut hole” style slices. Cut the peeled cucumber into thick segments (about 2-3 inches long), then slice each segment in half (not lengthwise). Carefully remove the pulp from the center of each half to create a small cavity. These can be filled with savory spreads like tuna salad, herbed cream cheese, or a vibrant pesto, adding both flavor and visual intrigue to your crudités platter. The crispness of the cucumber combined with a creamy filling is a delightful textural contrast.
Playful Crinkle Carrots: Adding Texture and Fun
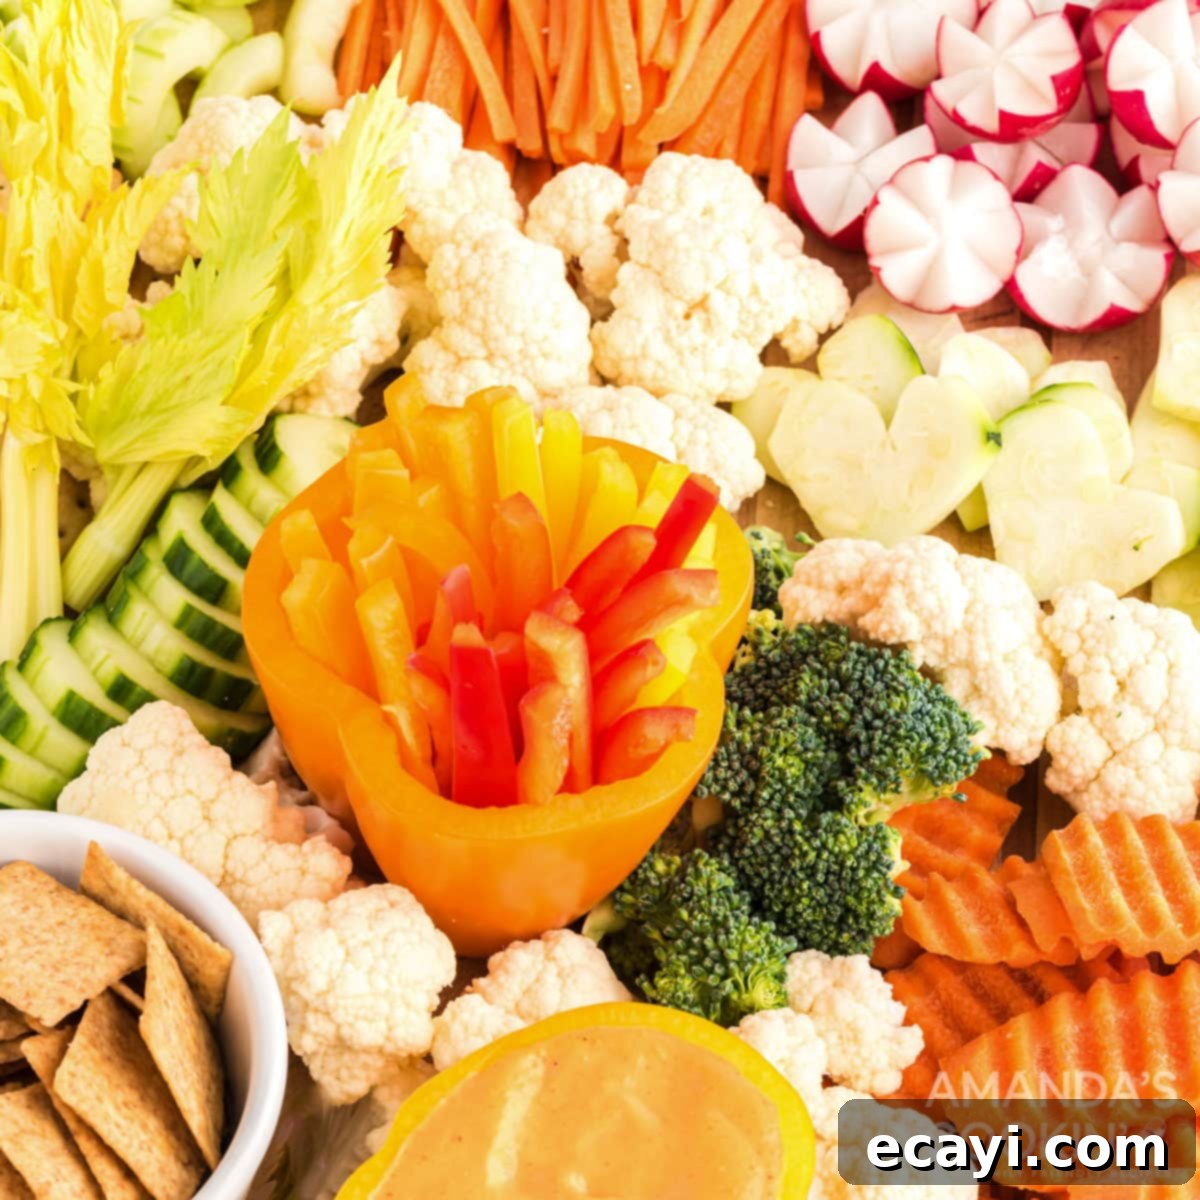
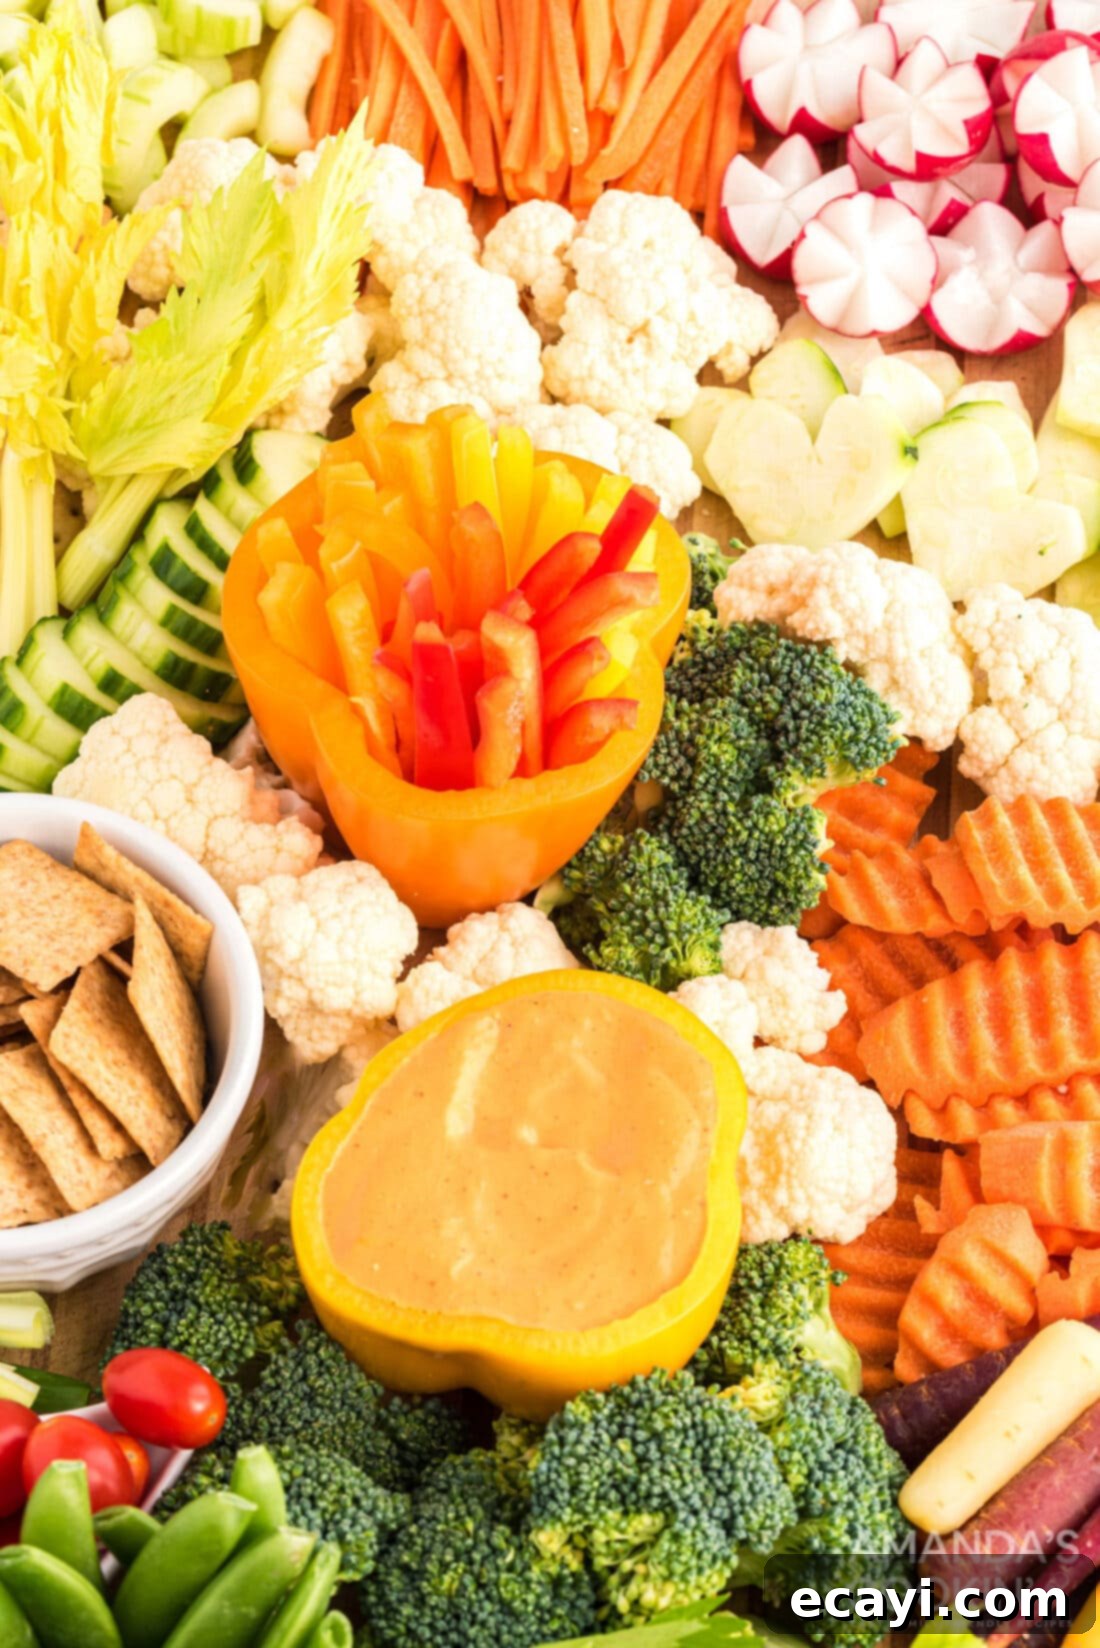
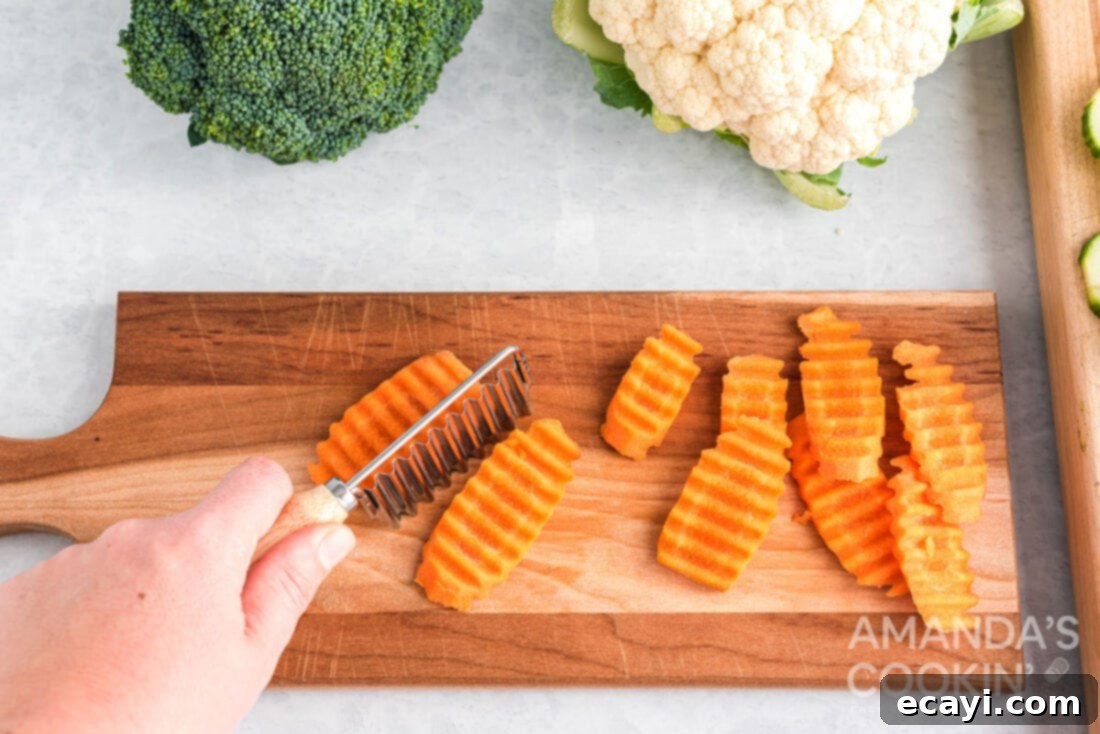
Carrots are a staple on any veggie tray, but you can easily elevate their appearance and appeal with a fun crinkle cut. Start by peeling your carrots and trimming both ends. For longer crinkle sticks, you can leave them whole or cut them in half lengthwise. The key to achieving these attractive, wavy vegetables (as pictured) is a specialized tool called a potato crinkler, also known as a crinkle cutter. Simply press the crinkle cutter firmly through the carrot, applying even pressure, to create delightful zigzag edges. These unique cuts not only add a playful element to your platter but also increase the surface area, making them excellent for scooping up dips. Consider using different colored carrots – orange, purple, yellow – to add an even greater visual pop to your decorative vegetable arrangement. Crinkle-cut carrots offer a satisfying crunch and are a favorite among both children and adults.
Sophisticated Julienne Carrots: Fine and Flavorful
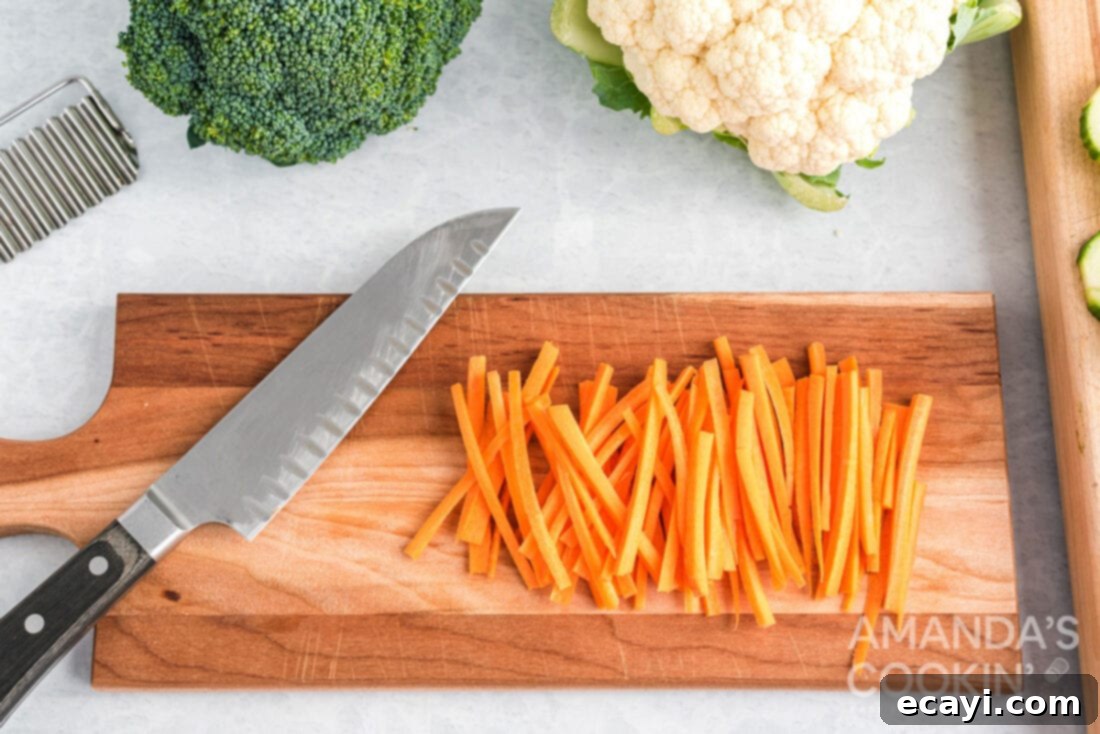
For a more refined and delicate presentation, julienne carrots are an excellent choice. This classic culinary cut creates uniform, thin matchstick-sized strips that add a touch of sophistication to your decorative vegetable display. Begin by peeling your carrots and cutting off the ends. To achieve consistent julienne strips, first slice the carrot into thin planks, about 1/4 inch thick. Then, stack a few planks and slice them lengthwise into thin strips, aiming for about 1/4 inch thick. The goal is uniformity, which gives a professional and polished look to your crudités. Julienne carrots are not only beautiful on a platter but also incredibly versatile; they’re perfect for salads, stir-fries, or as a garnish. You can apply this same technique to other firm vegetables like bell peppers or celery for a varied array of fine strips.
Charming Zucchini Hearts: A Whimsical Touch
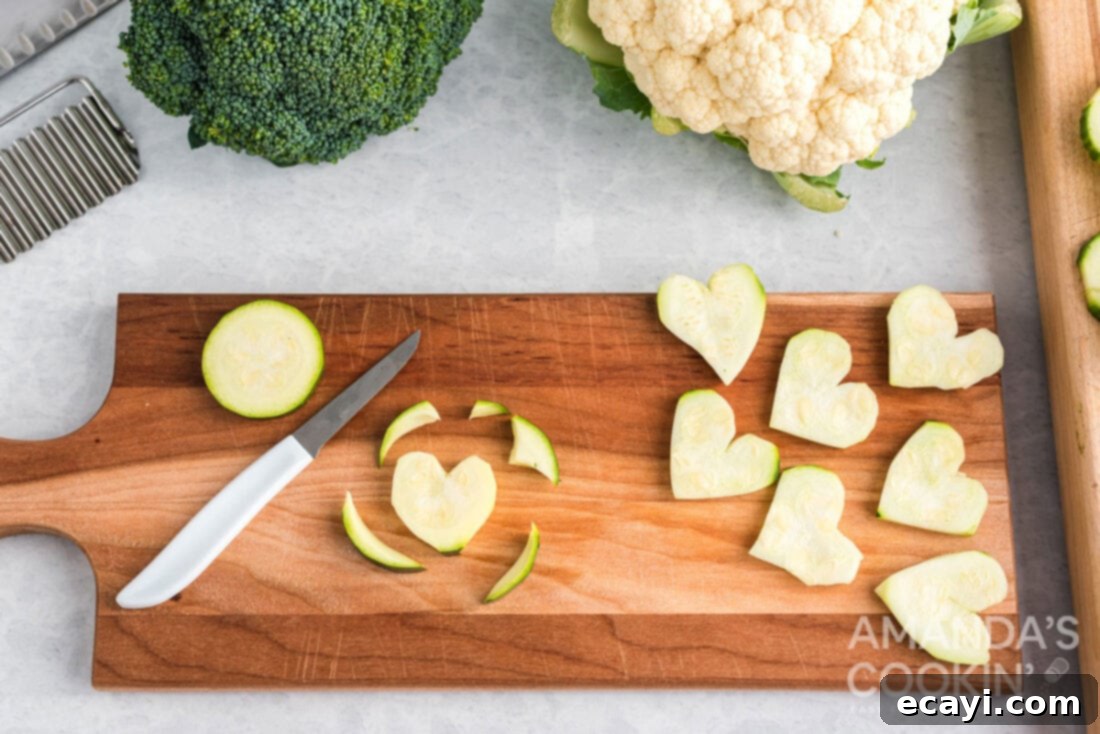
Add a touch of whimsy and unexpected charm to your vegetable platter with zucchini cut into adorable heart shapes. This technique is especially delightful for romantic dinners, kid-friendly parties, or any occasion where you want to infuse a little extra love. Start by washing a medium-sized zucchini and cutting off both ends. Slice the zucchini into uniform rounds, about 1/4 inch thick. Then, using a small heart-shaped cookie cutter, firmly press down on each zucchini slice to cut out perfect heart shapes. If you don’t have a cookie cutter, a sharp paring knife can be used to carefully freehand cut heart shapes, though it may take a bit more practice. These tender zucchini hearts provide a gentle flavor and a soft texture that contrasts beautifully with crunchier vegetables. You can also experiment with other small cookie cutter shapes, like stars or flowers, to create an even more diverse and enchanting decorative vegetable display.
Exquisite Radish Flowers: Blooming Beauty
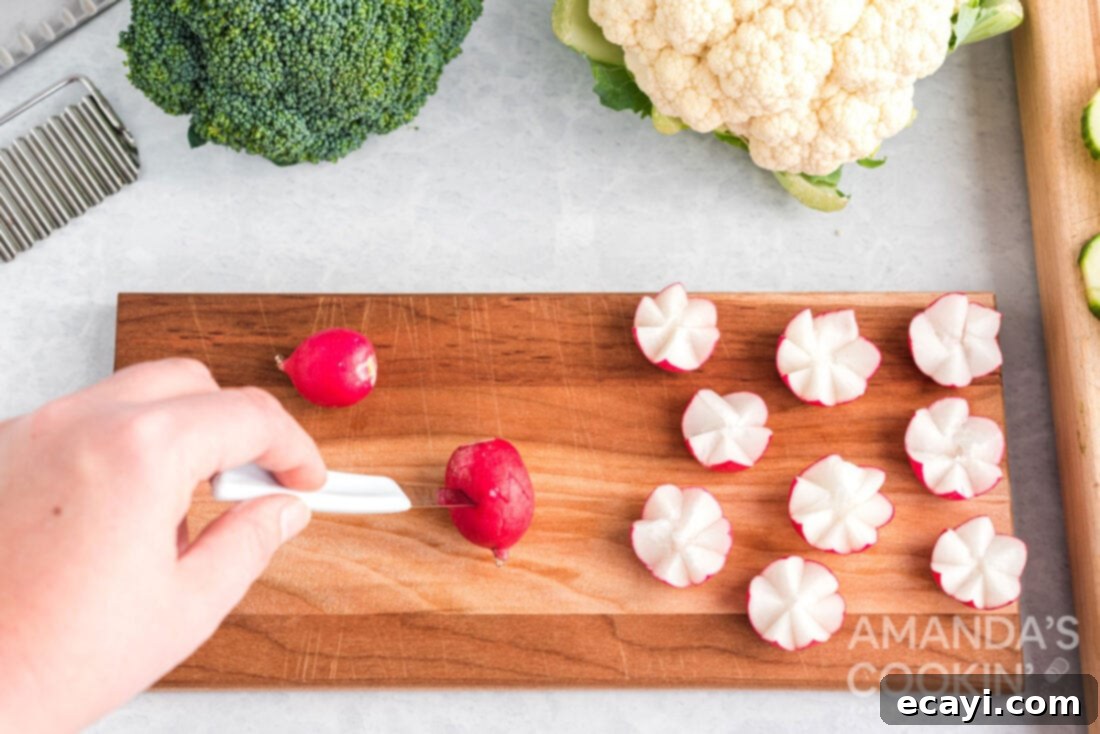
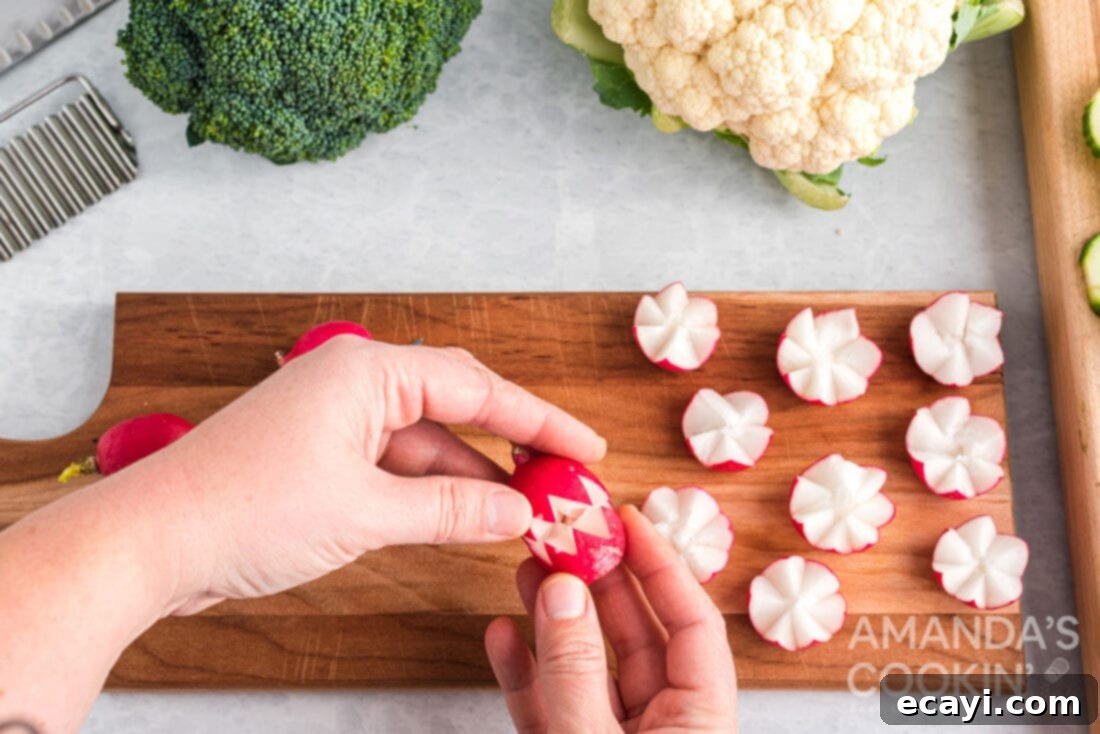
Radishes, with their vibrant color and peppery bite, can be transformed into stunning edible flowers that will instantly elevate the elegance of your crudités platter. To create these beautiful blossoms, you’ll need a sharp paring knife and a steady hand. Start with firm, round radishes. Holding the radish firmly, make a vertical zigzag cut through it, starting from the top and working your way around the center. The key is to cut only halfway through the radish, ensuring the two halves remain connected at the base. Continue this zigzag pattern all the way around the radish until your cuts meet. Once the cuts are complete, gently pull the two halves apart. The alternating cuts will cause the radish to “bloom” open, revealing delicate petal-like segments. For the best effect and to help the petals fully open and crisp up, immediately place the cut radishes in a bowl of iced water for at least 30 minutes. The cold water will cause the radish to absorb moisture, making the “petals” stiffen and curl outwards, creating a truly spectacular edible flower. These radish flowers are not just a garnish; they are a statement piece for your decorative vegetable arrangement.
Simple Enhancements for Other Vegetables
While some vegetables benefit from intricate carving, many popular choices already possess natural beauty that can be highlighted with minimal effort. Here are some ideas for incorporating other vegetables into your decorative spread:
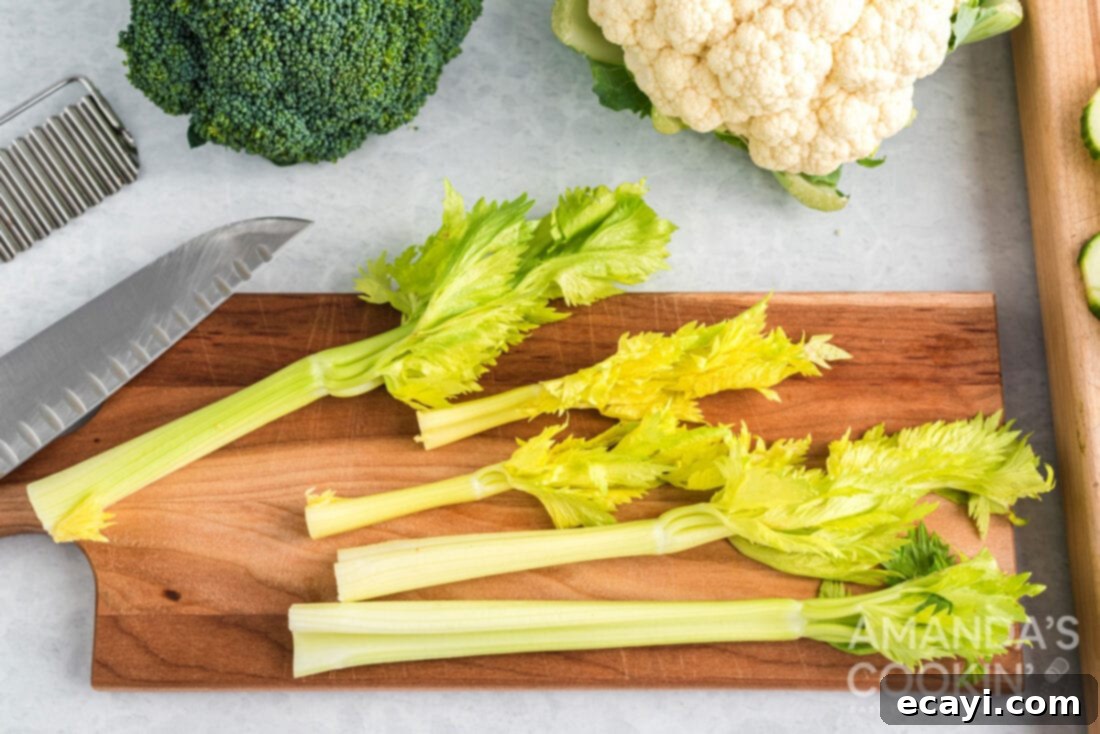
- Celery: For a more rustic and appealing look, leave the leafy ends on your celery stalks. The vibrant green foliage adds a fresh, organic touch that is both beautiful and appetizing. You can also cut celery into attractive sticks or even use wider pieces as edible scoops for dips.
- Scallions (Green Onions) and Sliced Bell Peppers: These vegetables are inherently colorful and striking. Scallions, with their long, slender green and white stalks, can be trimmed and laid out elegantly. Bell peppers, available in a rainbow of colors (red, yellow, orange, green), look beautiful when sliced into thin strips or rings. Their vibrant hues alone are enough to brighten any platter and require no further embellishment.
- Cherry Tomatoes: These bite-sized bursts of flavor are lovely on their own. For an extra touch, you might slice them in half, gently scoop out the seeds, and fill the hollowed centers with a savory mixture like tuna fish salad, herbed cream cheese, or even a dollop of pesto. This transforms a simple tomato into a delightful, two-bite appetizer.
- Broccoli and Cauliflower Spears: These cruciferous vegetables are perfect for dipping. Simply break them into uniformly sized florets or spears. Their natural texture and distinct shapes need no dressing up. To make them even more appealing and slightly tender, you can blanch them briefly in boiling water and then plunge them into ice water to retain their vibrant color and crispness.
- Sliced Boiled Eggs: Don’t forget the humble boiled egg! When sliced, hard-boiled eggs add a creamy texture and a boost of protein to your vegetable platter. They pair wonderfully with crisp vegetables and dips. For an extra flourish, sprinkle them with a pinch of paprika or fresh herbs.
Innovative Edible Veggie Holders
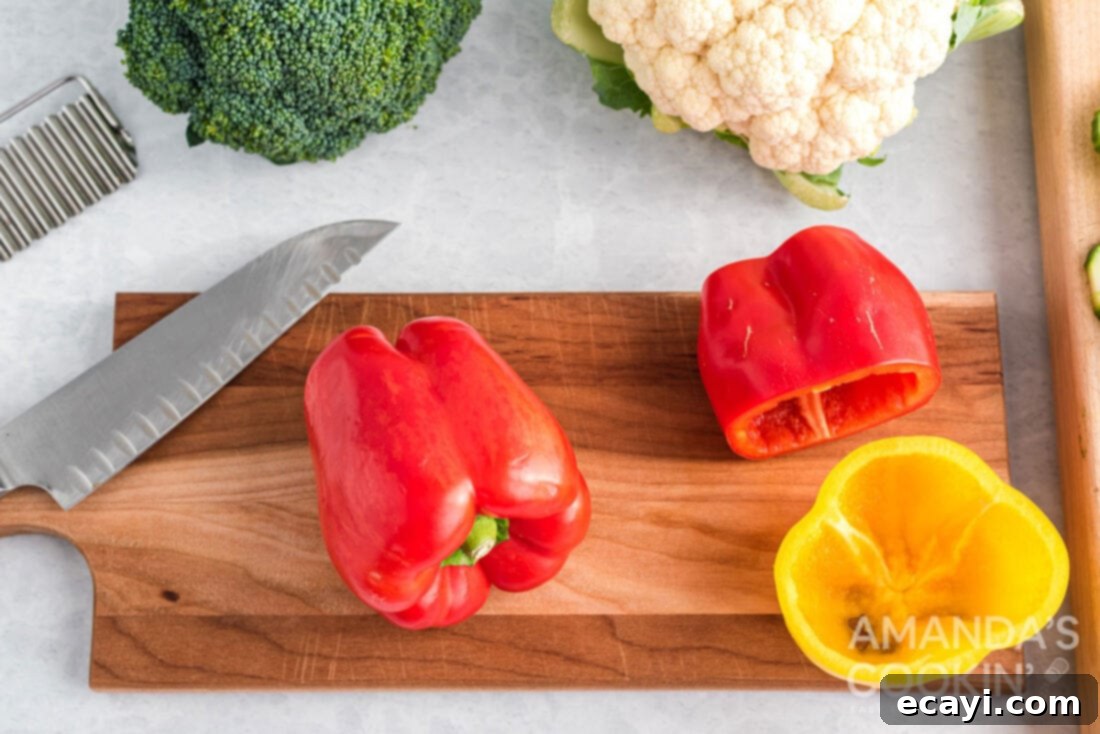
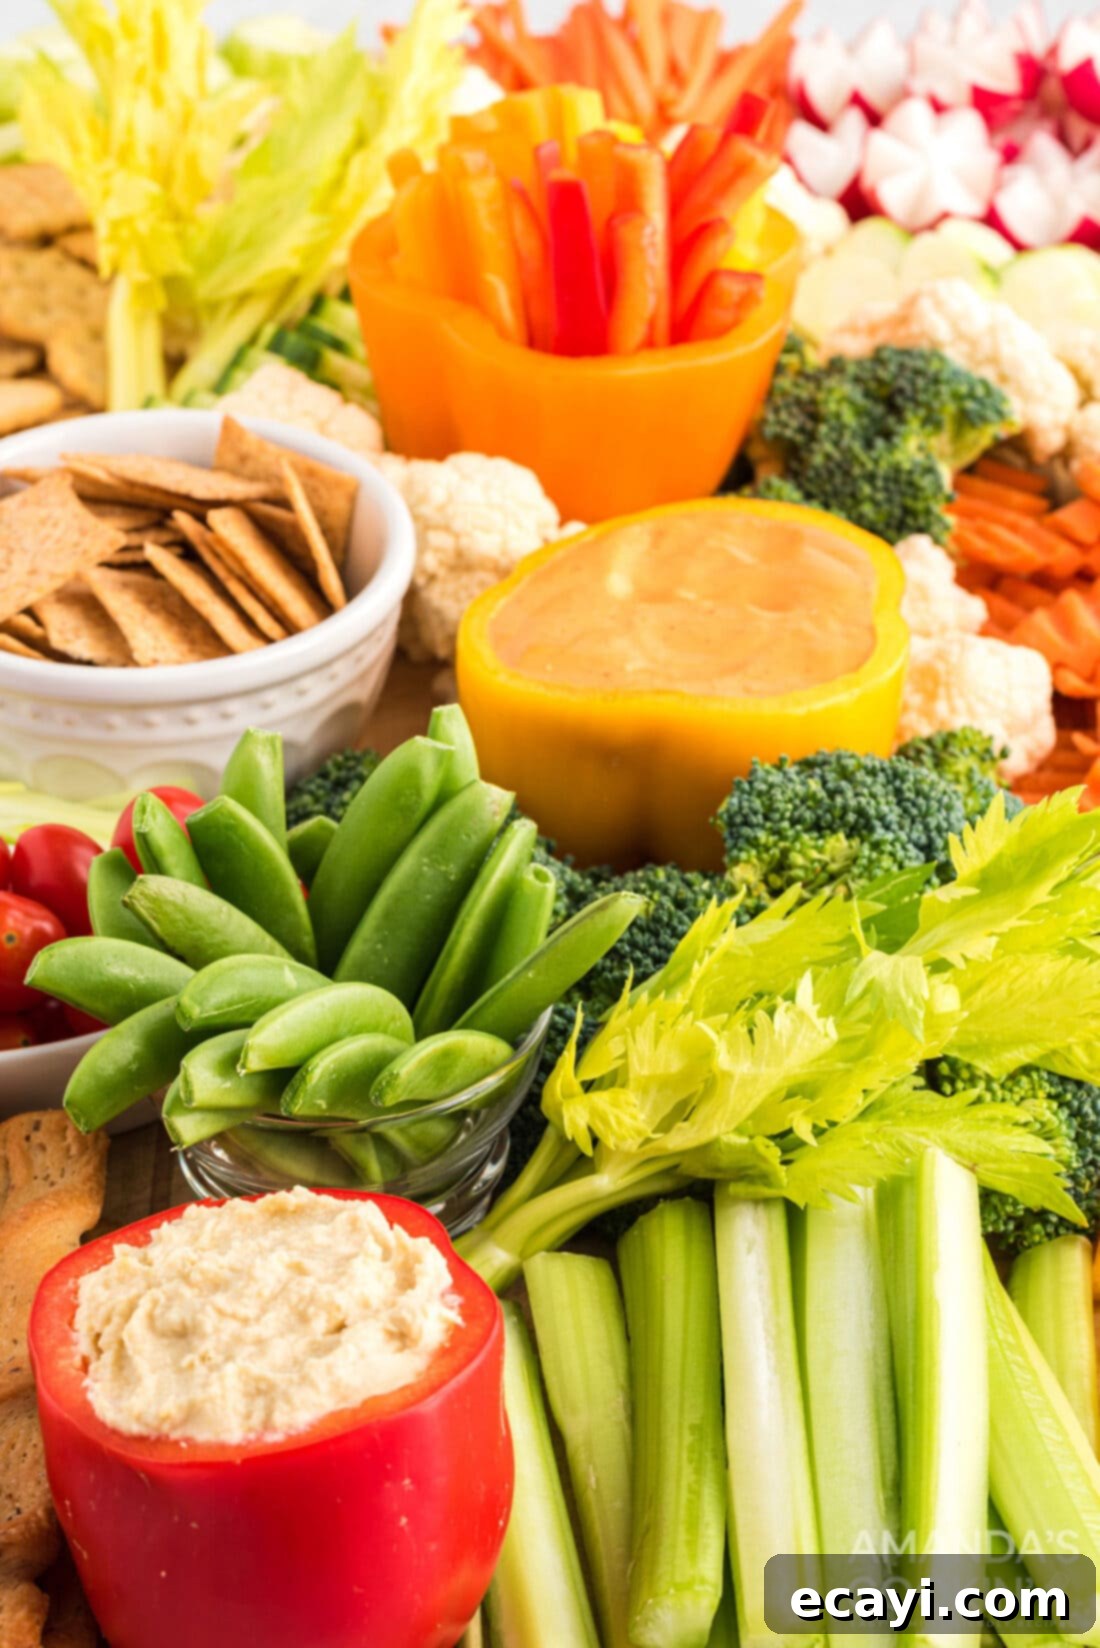
Beyond simply arranging vegetables on a platter, you can use certain vegetables as creative and edible containers to hold other crudités or even breadsticks. This adds another layer of visual interest and functionality to your spread. Yellow, red, and/or green bell peppers are particularly excellent for this purpose, providing a brilliant accent to your picnic or holiday table. To create a bell pepper holder, simply cut off the top of the pepper, clean out all the seeds and white membranes, creating a hollow cup. You can then fill this colorful “bowl” with an array of sliced vegetables of another color, such as thin carrot sticks, celery spears, or even breadsticks. The vibrant contrast of colors – for example, a red bell pepper filled with green celery sticks – is incredibly striking. The possibilities are truly endless; consider using small hollowed-out gourds or even large cucumber segments as unique, natural vessels to hold your decorative vegetable creations. This technique is not only practical but also adds a dynamic, sculptural element to your food presentation.
As you can see, creating a gorgeous, healthy, and edible display is far from difficult. With a little imagination and these straightforward techniques, you can transform a basic vegetable platter into an artful centerpiece. And if you’re looking to impress your guests with a touch of culinary sophistication, the French term for such a beautiful arrangement of raw vegetables and dips is a “crudité platter.” So, this holiday season, or for your next gathering, step beyond the ordinary and truly impress your guests with a dazzling array of decorative vegetables!
Delicious Dip Recipes to Complement Your Veggie Tray
No decorative vegetable platter is complete without a selection of delectable dips. These flavorful accompaniments enhance the taste of your crudités and add another layer of enjoyment to your spread. Here are some fantastic dip recipes that pair perfectly with beautifully presented vegetables:
- Buttermilk Ranch Dressing
- Creamy Dill Dressing
- How to Make Hummus
- Cranberry Cheese Ball
- Baba Ganoush Hummus
- Creamy Onion Dip
- Gouda & Sun-Dried Tomato Cheese Ball
- Skinny French Onion Dip
I love to bake and cook and share my kitchen experience with all of you! Remembering to come back each day can be tough, that’s why I offer a convenient newsletter every time a new recipe posts. Simply subscribe and start receiving your free daily recipes!

How to Create Decorative Vegetables
IMPORTANT – There are often Frequently Asked Questions within the blog post that you may find helpful. Simply scroll back up to read them!
Print It
Pin It
Rate It
Save ItSaved!
Ingredients
- Cucumbers
- Carrots
- Zucchini
- Radishes
- Bell Peppers
- Celery
Things You’ll Need
-
Potato peeler
-
Paring knife
-
Crinkle cutter
Instructions
Cucumbers
-
To create striped cucumbers, cut off both ends of a thoroughly washed cucumber. With a potato peeler, peel one strip all the way down the cucumber. Then, move over about the width of the strip you just peeled and leave the skin intact. Repeat the peeling and leaving pattern to create a striped effect all the way down the cucumber. Finally, slice the cucumber into uniform 1/4-inch thick rounds for an attractive presentation.
Cored Cucumbers
-
For cored cucumbers, begin by cutting off both ends of a cucumber and peeling the entire skin with a potato peeler. Slice the cucumber in half lengthwise. Gently scoop out the seeds of the cucumber by loosening them with a knife and removing them with a spoon. Slice these hollowed halves into 1/4 inch thick slices to create elegant half moons. Alternatively, for donut-hole-like slices, cut the peeled cucumber into thick segments, then slice each segment in half (not lengthwise). Carefully remove the pulp from the center of each piece with a knife. Slice as above for a unique, fillable vegetable shape.
Crinkle Carrots
-
Prepare crinkle carrots by peeling them and cutting off the ends. For longer sticks, cut them in half lengthwise. Utilize a potato crinkler (a specialized tool for making crinkle fries) to press firmly through the carrot, creating attractive zigzag edges and a fun, textured vegetable as pictured in the article.
Julienne Carrots
-
To make julienne carrots, peel them and cut off their ends. Carefully slice the carrots into thin, uniform strips, approximately 1/4 inch thick and 2-3 inches long, resembling matchsticks. This precise cut adds a sophisticated touch to your vegetable platter.
Zucchini Hearts
-
Create charming zucchini hearts by cutting off the ends of a zucchini and slicing it into uniform rounds. Using a small heart-shaped cookie cutter or a sharp knife, carefully cut each zucchini ring into a delicate heart shape. These are perfect for adding a whimsical touch to your decorative display.
Radish Flowers
-
Fashion elegant radish flowers by using a paring knife to make vertical zigzag cuts halfway through the radish, working all the way around its center until the cuts meet. Ensure the base remains connected. Immediately place the cut radishes in iced water for 30 minutes to allow them to “bloom” and crisp up. (A visual guide can be found at https://cookpad.com/uk/recipes/9906159-how-to-carve-flower-radish)
Other Vegetables
-
Enhance other vegetables easily: leave the leafy ends on celery stalks for a wonderful, natural look. Scallions (green onions) and sliced bell peppers boast natural beauty and require no further decoration beyond slicing. Cherry tomatoes are lovely as is, but can be halved, gently emptied, and filled with tuna fish or other savory spreads for an appetizer. Broccoli and cauliflower spears need no dressing up; simply break them into neat florets. Don’t forget sliced hard-boiled eggs for an added protein and creamy texture.
Veggie Holders
-
Utilize yellow, red, and/or green bell peppers as creative and colorful accents or holders for your picnic or holiday table. Simply cut open the top of a bell pepper and carefully clean out all seeds and membranes. Fill these natural cups with sliced peppers of another contrasting color, crisp celery or carrot spears, or even breadsticks. This technique adds both visual appeal and practical serving functionality, making the possibilities for creative presentation endless!
The recipes on this blog are tested with a conventional gas oven and gas stovetop. It’s important to note that some ovens, especially as they age, can cook and bake inconsistently. Using an inexpensive oven thermometer can assure you that your oven is truly heating to the proper temperature. If you use a toaster oven or countertop oven, please keep in mind that they may not distribute heat the same as a conventional full sized oven and you may need to adjust your cooking/baking times. In the case of recipes made with a pressure cooker, air fryer, slow cooker, or other appliance, a link to the appliances we use is listed within each respective recipe. For baking recipes where measurements are given by weight, please note that results may not be the same if cups are used instead, and we can’t guarantee success with that method.
