Easy & Adorable Cookie Monster Freak Shakes: The Ultimate Blue Milkshake Recipe!
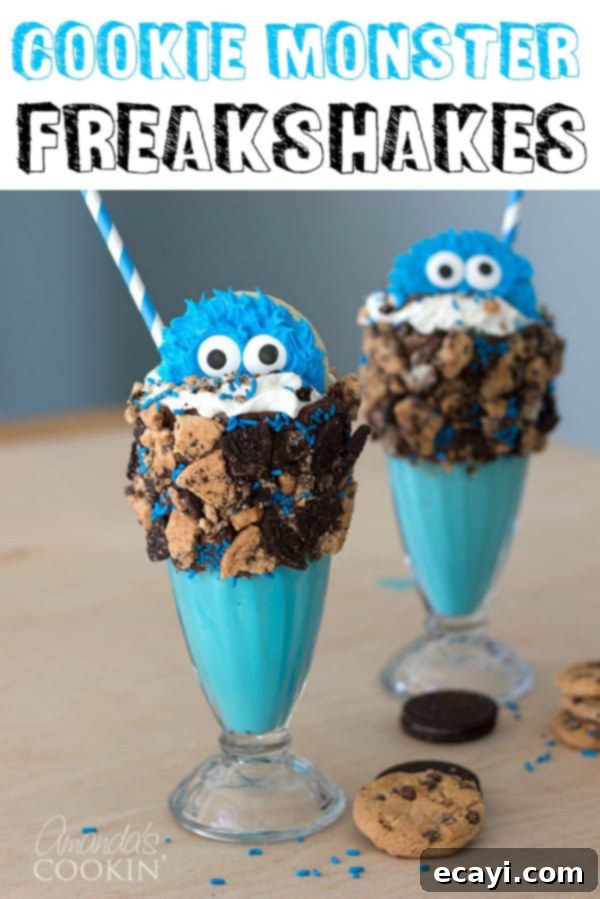
Get ready to unleash your inner child and dive into the whimsical world of Sesame Street with these incredibly fun and utterly delicious Cookie Monster Freak Shakes! Lately, the internet has been overflowing with charming Cookie Monster-themed desserts – from fluffy donuts and rich chocolate bark to delightful cupcakes and custom Cookie Monster cookies. But nothing quite captures the playful spirit of our favorite cookie-loving monster like these extreme milkshakes. Perfect for a vibrant birthday party, a fun weekend treat, or simply a spontaneous indulgence, these freak shakes are guaranteed to bring smiles to faces of all ages. And here’s the best part: you’ll be amazed at just how simple they are to whip up, even with their impressive, over-the-top appearance!
Unleash Your Creativity with Cookie Monster Freak Shakes
Freak shakes are more than just milkshakes; they are an artistic expression, a culinary canvas that invites you to go wild with your imagination! They give you full permission to pile on as many sweet treats as your heart desires, turning a simple drink into an edible spectacle. The beauty of a freak shake lies in its limitless possibilities, allowing for personalized creations that perfectly match any theme or craving. When conceptualizing these Cookie Monster Freak Shakes, my mind instantly gravitated towards classic cookie favorites: Oreo cookies and Chips Ahoy cookies. These iconic treats are synonymous with Cookie Monster himself, making them essential components for an authentic and delicious experience.
However, the biggest challenge was figuring out how to recreate Cookie Monster’s famously goofy face directly on the milkshake. My initial thought was to simply color whipped cream blue. While visually appealing, the logistics of attaching those signature edible eyeballs without them sinking into the depths of the milkshake proved tricky. Nobody wants their Cookie Monster’s eyes disappearing into a blue abyss! That’s where the brilliance of my wonderfully crafty and idea-rich Mom (Amanda herself!) came into play. She ingeniously suggested using sugar cookies to craft Cookie Monster’s face. And just like that, a lightbulb moment! What better way to depict the cookie-loving monster than by making his face out of a cookie? Her clever suggestion not only solved the aesthetic dilemma but also added another layer of cookie goodness to this already epic dessert. I truly don’t know what I’d do without her creative input!
A Sweet Indulgence: Balancing Fun and Flavor
It’s important to acknowledge that these Cookie Monster Freak Shakes are, indeed, a sweet treat. They are designed for indulgence and fun! If you’re looking to reduce the sugar content, there are certainly ways to customize this recipe to your preferences. You could opt for sugar-free vanilla ice cream, use a lighter hand with the frosting, or even make your own homemade sugar cookies and chocolate chip cookies with less sugar. Additionally, a homemade white frosting or homemade vanilla ice cream can give you more control over the ingredients.
However, I personally believe that everyone deserves a delightful indulgence now and then. These freak shakes are not meant for daily consumption, but rather for those special occasions or moments when you want to create something truly memorable and fun. The joy and excitement these vibrant, cookie-filled milkshakes bring to children (and adults!) make every single calorie worth it. The sheer delight and wide smiles you’ll receive are an invaluable reward. For the sake of convenience and accessibility, I’ve primarily used store-bought cookies, frosting, and ice cream in this recipe, ensuring that anyone can easily recreate this show-stopping dessert without extensive baking. But feel absolutely free to swap in your favorite homemade versions if you prefer a more from-scratch approach!
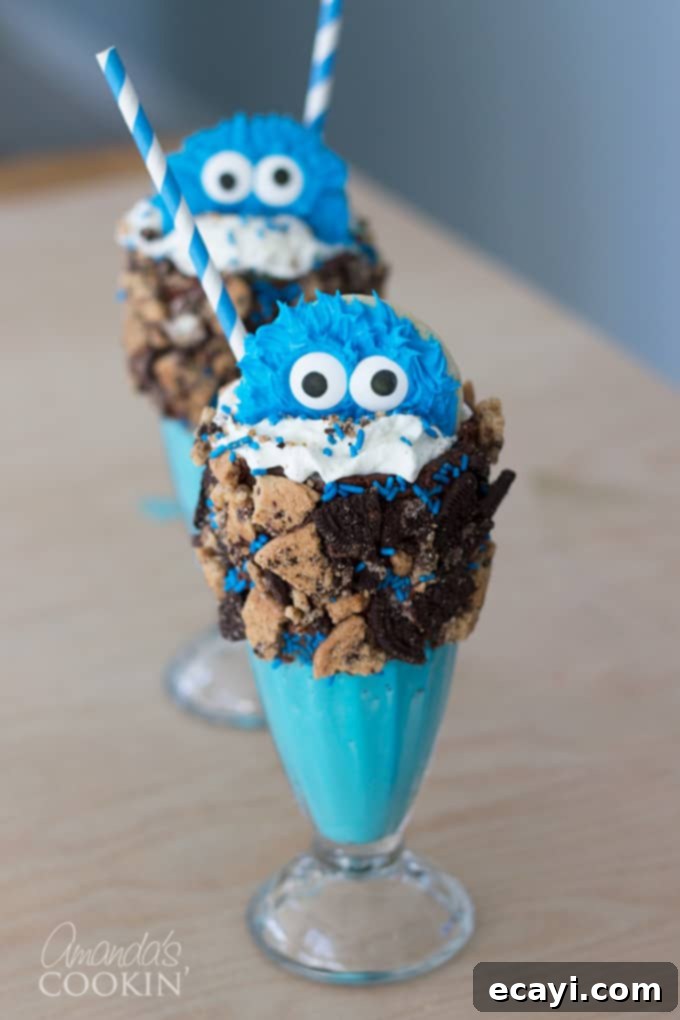
The full printable version of this recipe, complete with precise measurements and detailed steps, can be found at the end of this post.
Essential Ingredients for Your Cookie Monster Freak Shakes
Gathering your ingredients is the first step to creating these magnificent Cookie Monster Freak Shakes. Most items are readily available at any grocery store, making this a convenient and exciting project for any home chef. Remember, this recipe yields two sensational milkshakes, so feel free to double or triple the quantities if you’re hosting a larger gathering or simply want more monster-sized fun!
For the Milkshake:
- 5 scoops vanilla ice cream of your choice: A high-quality vanilla ice cream provides the perfect creamy, neutral base to showcase the vibrant blue color and cookie flavors.
- Reddi Whip whipped topping: Essential for that iconic tall, fluffy crown on top of your freak shake.
- Blue sprinkles: Adds a festive touch and extra texture, enhancing the Cookie Monster theme.
- 6 Chips Ahoy cookies: These classic chocolate chip cookies are crushed for the glass rim and topping, providing a familiar and beloved flavor.
- 6 Oreo cookies: Another Cookie Monster favorite, crushed alongside the Chips Ahoy for a delightful mix of chocolatey goodness.
- Blue gel food coloring (I used sky blue): Gel food coloring is crucial here! It provides a much more vibrant and intense blue hue compared to liquid food coloring, giving your milkshake that unmistakable Cookie Monster shade.
- Chocolate frosting: Used to create a sticky base on the milkshake glass for the cookie crumbles to adhere to.
- 1/2 cup milk: Any type of milk (dairy or non-dairy) will work to achieve the desired milkshake consistency.
- Parchment paper: Useful for neatly crushing and applying the cookie crumbles to the glasses.
- Large Ziploc bag: For crushing the cookies easily and mess-free.
For the Cookie Monster Cookies (or simply use pre-made):
For a detailed, printable recipe specifically for the Cookie Monster Cookies, including Elmo variations, you can find it here. This section briefly covers the components:
- 1 package of refrigerated Pillsbury sugar cookies: The quickest and easiest route to delicious sugar cookies. Of course, you can always make your own sugar cookies from scratch for a homemade touch!
- Blue gel food coloring (I used sky blue): Again, gel food coloring is key for that vivid blue monster color.
- Tub of white/Vanilla frosting: This will be dyed blue to create Cookie Monster’s fur.
- Edible jumbo candy eyeballs: These are absolutely essential for giving your Cookie Monster cookies their characteristic goofy, wide-eyed look. They truly bring the character to life!
*This recipe is designed to make 2 generous milkshakes. If you plan to serve more guests, simply double or triple the ingredients as needed to create a bigger batch of these fantastic treats.*
Helpful Kitchen Tools for Freak Shake Success
Having the right tools can make the freak shake creation process even smoother and more enjoyable. Here are a few items that will come in handy:
- Jumbo candy eyeballs: These are non-negotiable for achieving that signature, animated Cookie Monster expression on your sugar cookies. The larger size makes them really pop!
- Milkshake glasses: Tall, sturdy glasses are ideal for showcasing the layers of your freak shake and holding all the generous toppings.
- Sky blue gel food coloring: As mentioned, gel coloring provides superior color vibrancy, which is crucial for achieving Cookie Monster’s iconic blue hue.
- Blender or milkshake machine: A powerful blender ensures a perfectly smooth and creamy milkshake consistency, free from ice cream chunks.
- Striped paper straws: Adds a charming, decorative touch that complements the fun and festive aesthetic of the freak shakes.
Crafting Your Adorable Cookie Monster Cookies
The first delightful step in creating these freak shakes is preparing the iconic Cookie Monster cookies that will adorn the top. Begin by taking your package of refrigerated sugar cookie dough. Follow the package directions for baking, placing them on a baking sheet and into the oven. While they bake, you can start preparing the other components of your milkshakes. Once baked, remove them from the oven and allow them to cool completely on a wire rack. Cooling is crucial before frosting to prevent melting.
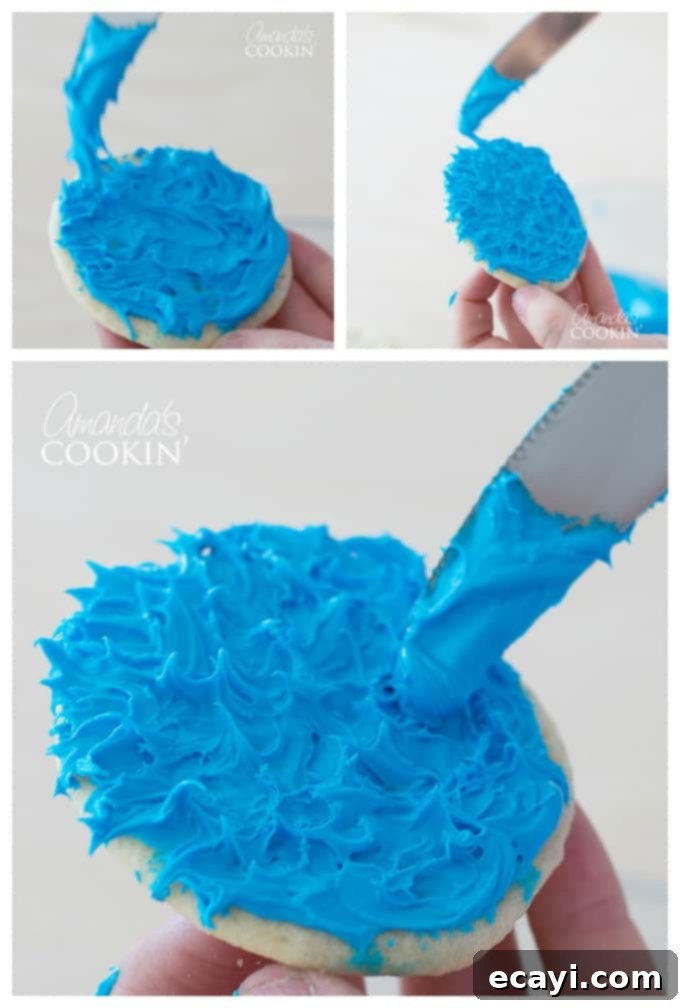
To transform your plain sugar cookies into Cookie Monster’s cheerful face, refer to the detailed instructions for making Cookie Monster Cookies here. The process is quite straightforward: simply mix a few drops of your sky blue gel food coloring into your white or vanilla frosting until you achieve a vibrant, uniform blue. Once the cookies are cool, spread a generous amount of this blue frosting onto each one. Then, using a butter knife or a small offset spatula, gently whisp the frosting upwards around the edges to create Cookie Monster’s signature fluffy, furry texture. Finish by adding two edible candy eyeballs in a wonderfully crazy, off-kilter fashion – this truly brings his playful personality to life! These cookies are not only adorable but surprisingly easy to make, adding a personalized touch to your freak shakes.

Decorating the Milkshake Glass: The Ultimate Cookie Canvas
Now it’s time to prepare the show-stopping decorated glasses for your freak shakes. First, grab six Chips Ahoy cookies and six Oreo cookies. Place them together in a large, sturdy Ziploc bag. Using your hands or a rolling pin, gently crush the cookies. The key is to create crumbles, not fine dust; you want distinct cookie pieces for texture and visual appeal, so be careful not to over-crush them. A good mix of larger and smaller crumbs works best.
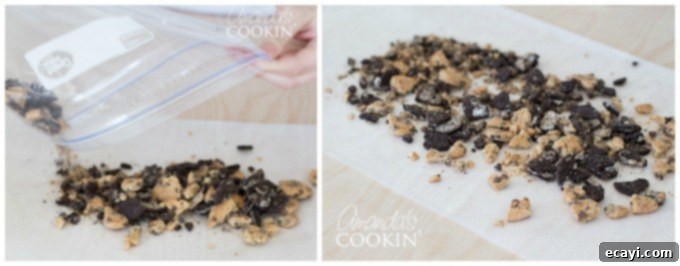
Once your cookies are perfectly crushed, lay out a piece of parchment paper on a clean, flat surface. Pour the cookie crumbles onto the parchment paper and spread them out evenly. This creates a wide, accessible bed of crumbs, perfect for coating your milkshake glasses.
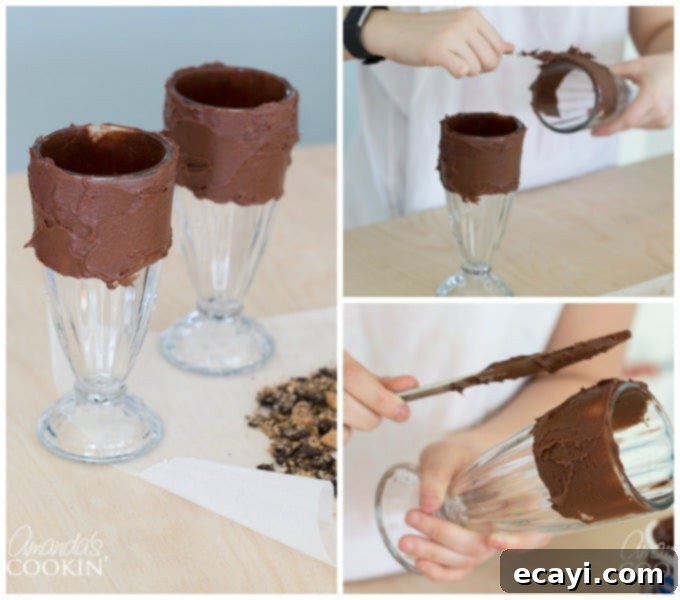
Next, take your chosen milkshake glasses, your chocolate frosting, and either a butter knife or a rubber spatula. Carefully spread a generous, even layer of chocolate frosting around the entire top rim of each milkshake glass. This frosting acts as the essential adhesive for your cookie crumbles. I’ve found that applying a slightly thicker coat of frosting significantly improves adhesion, ensuring your cookie crumbles stick firmly and create a robust, impressive border. Don’t be shy with the frosting – load it on for the best results!
Adding Cookies to the Glass
With your milkshake glasses freshly frosted, it’s time for the cookie crumble application. Take one of your frosted glasses and gently roll its rim into the bed of cookie crumbles you prepared on the parchment paper. Be sure to apply light, even pressure; pressing too hard can smear the frosting and prevent the crumbles from sticking properly. Roll the glass once to get an initial coating.
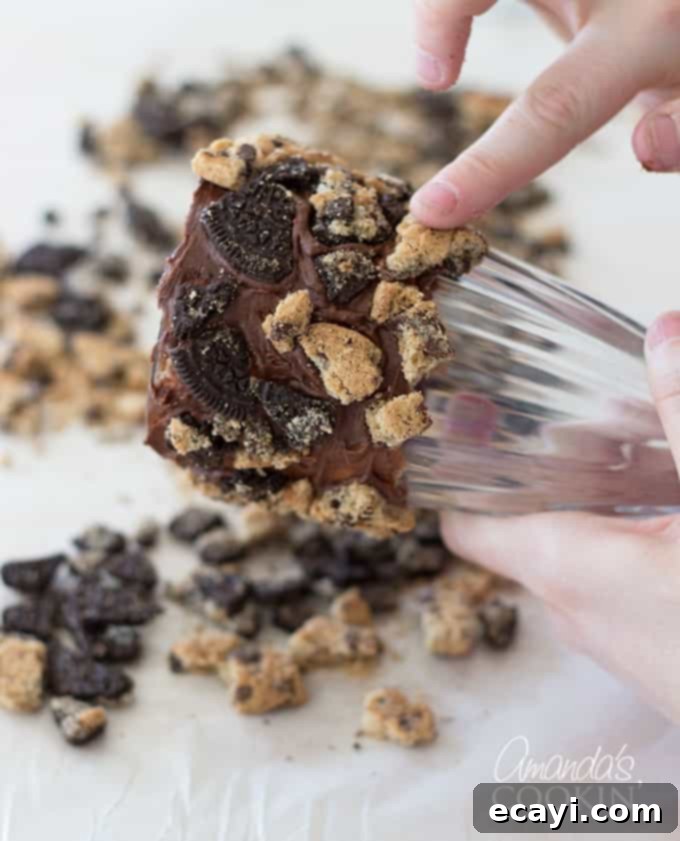
After the initial roll, you might notice a few bare spots on the glass. This is perfectly normal! You can easily piece in additional cookie crumbles by hand, pressing them gently into any open frosted areas to ensure full coverage. You should have a good amount of cookie crumbles leftover – set these aside, as they will be used later as a delicious topping for your finished milkshakes.
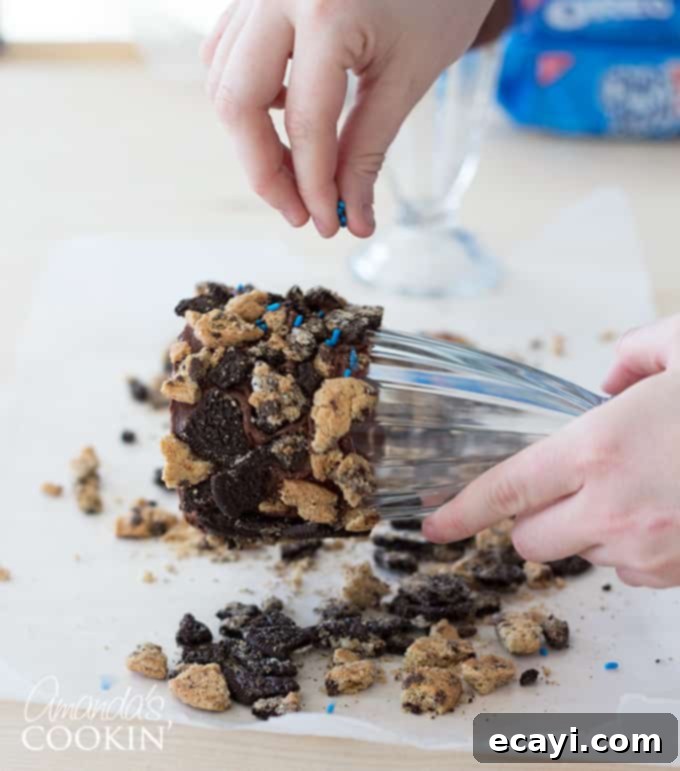
Next, go through and gently press all the cookie crumbles firmly into the frosting to ensure they are securely in place. Then, take your blue sprinkles and generously sprinkle them over any remaining open frosted spots on the glass, or even over the cookie crumbles for added color and sparkle. Gently press these sprinkles down slightly to help them adhere. Once your milkshake glasses are beautifully adorned with cookie crumbles and sprinkles, immediately place them in the freezer. This crucial step allows the frosting to firm up and the decorations to set and harden, preventing them from sliding off when you add the milkshake. Leave them in the freezer for the duration it takes to prepare the actual milkshakes.
Making the Blue Milkshakes
With your decorated glasses chilling, it’s time to create the vibrant blue milkshake base. This step is quick and straightforward, bringing all the creamy goodness together.
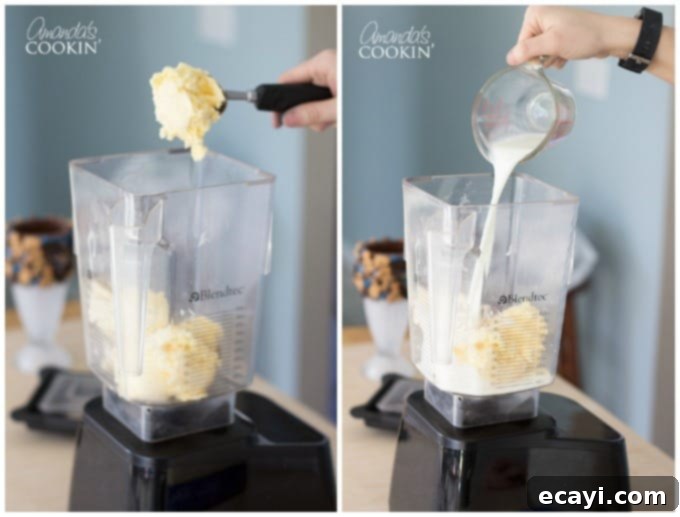
Carefully add your five scoops of vanilla ice cream into a high-powered blender. Follow this with 1/2 cup of milk. For an extra thick shake, you can reduce the milk slightly, or add a bit more if you prefer a thinner consistency. It’s all about personal preference!
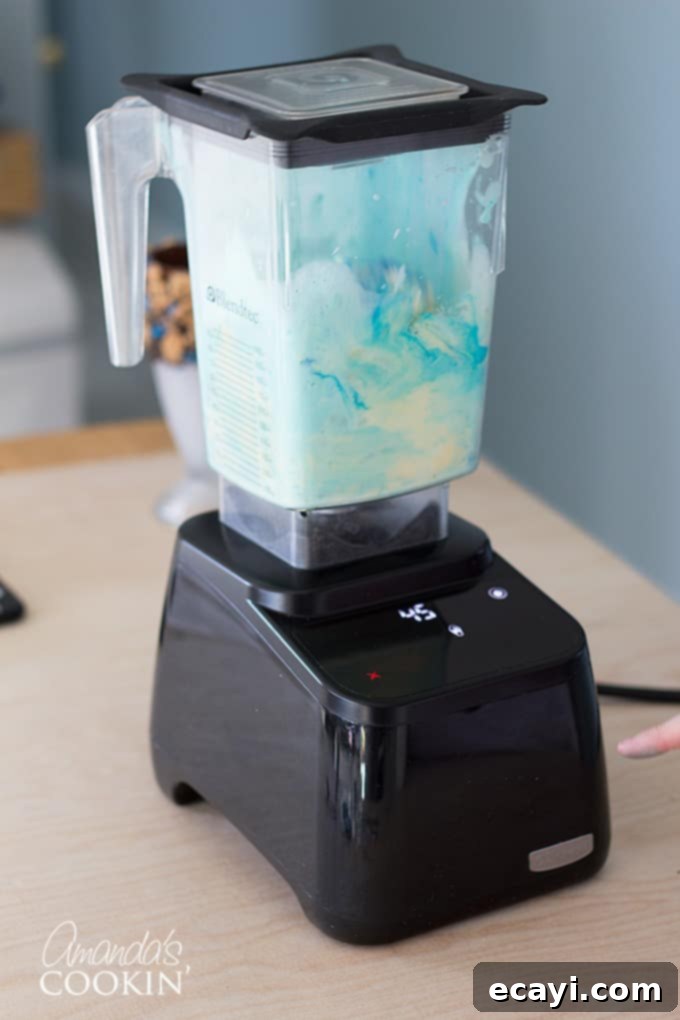
Next, and most importantly for our Cookie Monster theme, add your sky blue gel food coloring to the blender. It’s always best to start with a small amount, perhaps a few drops, and then blend. If the color isn’t as vibrant or deep a blue as you desire, simply add a little more food coloring and blend again until you achieve that perfect, recognizable Cookie Monster blue. Gel food coloring ensures an intense, rich color without diluting the milkshake.
Assembling Your Cookie Monster Masterpiece
Now for the grand finale – assembling your spectacular Cookie Monster Freak Shakes! Retrieve your chilled, decorated glasses from the freezer. The hardened frosting and cookie crumbles will provide a stable and appealing base for your milkshake.
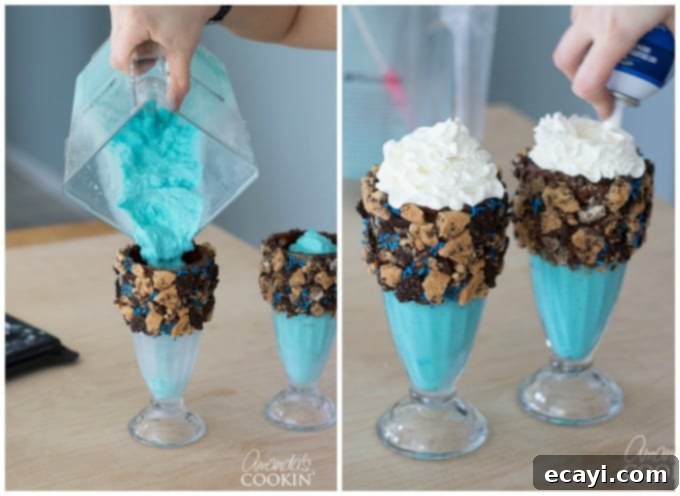
Carefully pour your freshly blended, brilliant blue milkshake mixture into the prepared glasses, leaving a bit of room at the top for toppings. Next, crown each milkshake with a generous swirl of Reddi Whip whipped topping. This fluffy cloud not only adds to the visual appeal but also provides a creamy contrast to the dense shake.
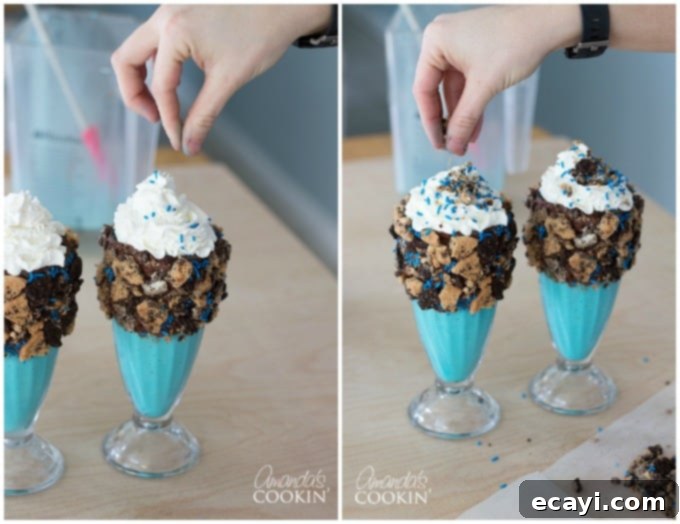
Now, sprinkle additional blue sprinkles over the whipped cream for an extra pop of color and festive flair. Then, take the leftover cookie crumbles that you set aside earlier and generously scatter them over the whipped cream and sprinkles. This adds more delicious cookie flavor and a delightful crunch to every sip.
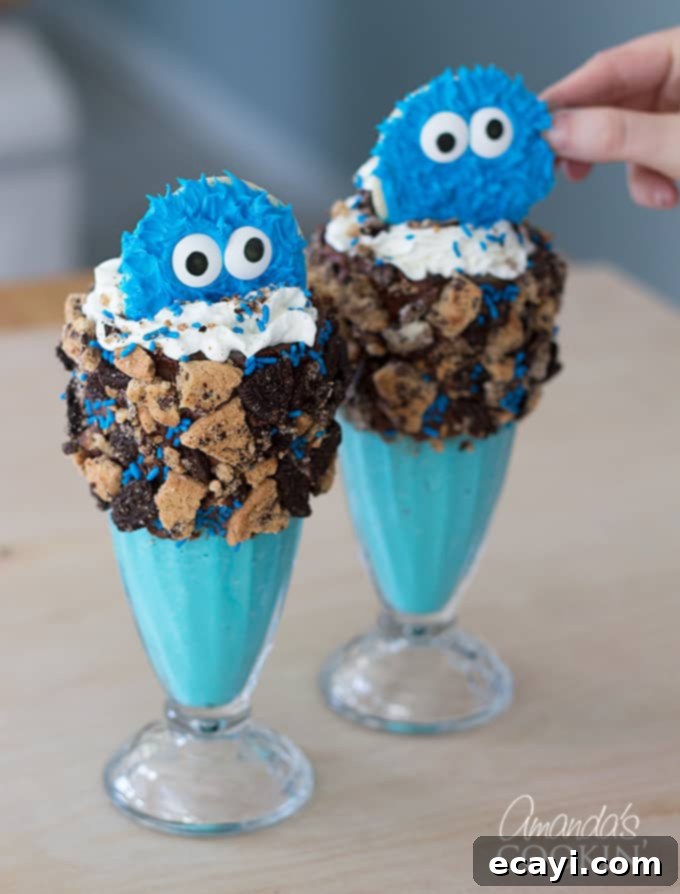
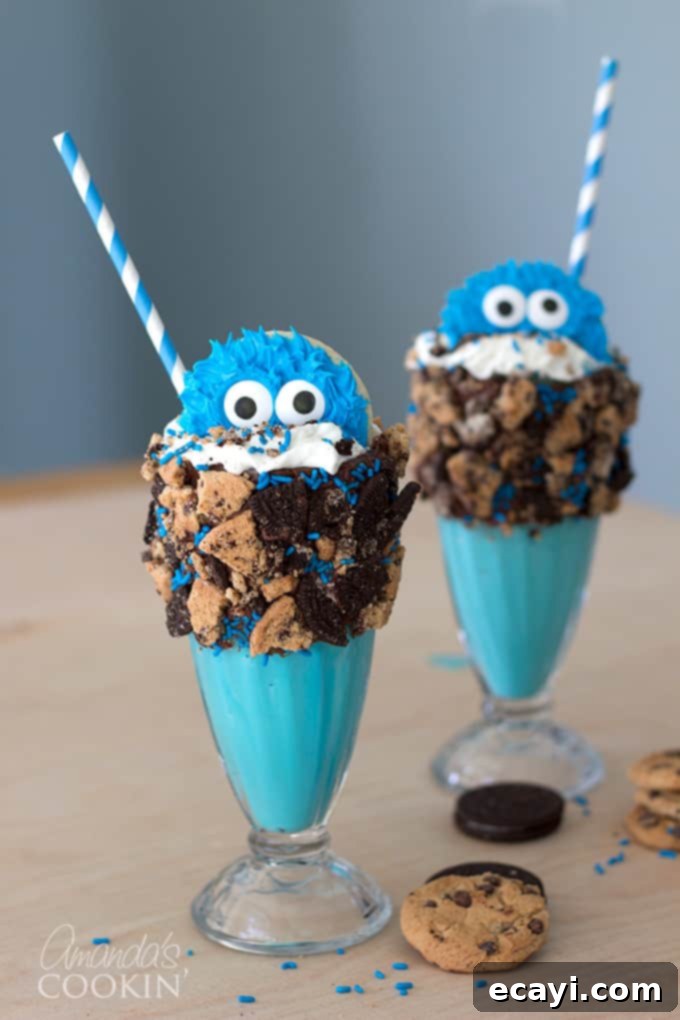
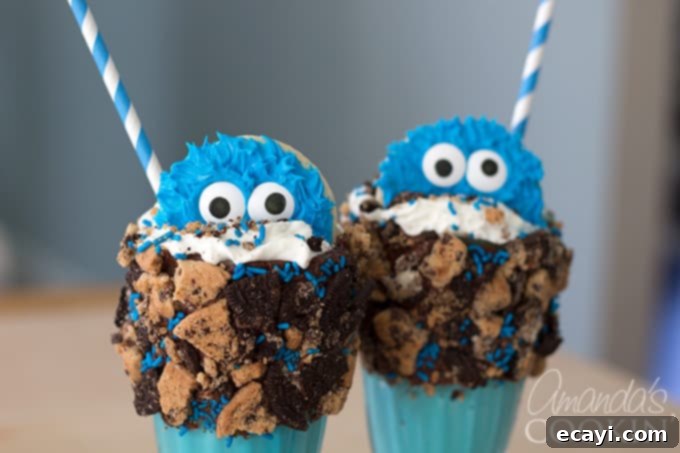
Finally, carefully place your adorable homemade (or store-bought) Cookie Monster cookies directly on top of the whipped cream, ideally in the center. Position them so their goofy eyes are front and center, ready to charm. To complete the look, don’t forget to add a cute striped paper straw – it’s the perfect finishing touch!
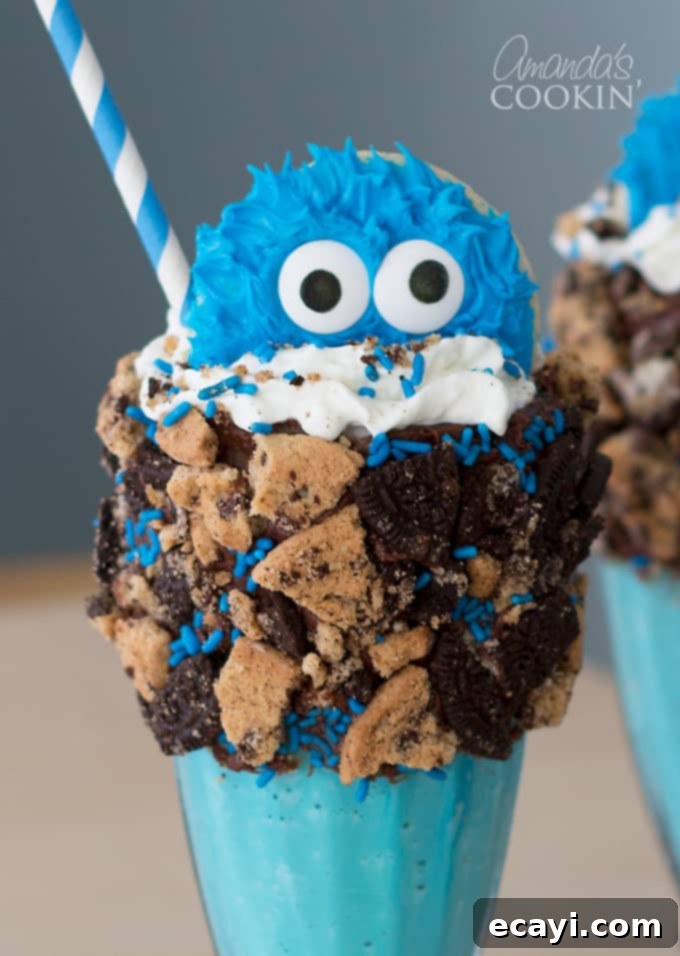
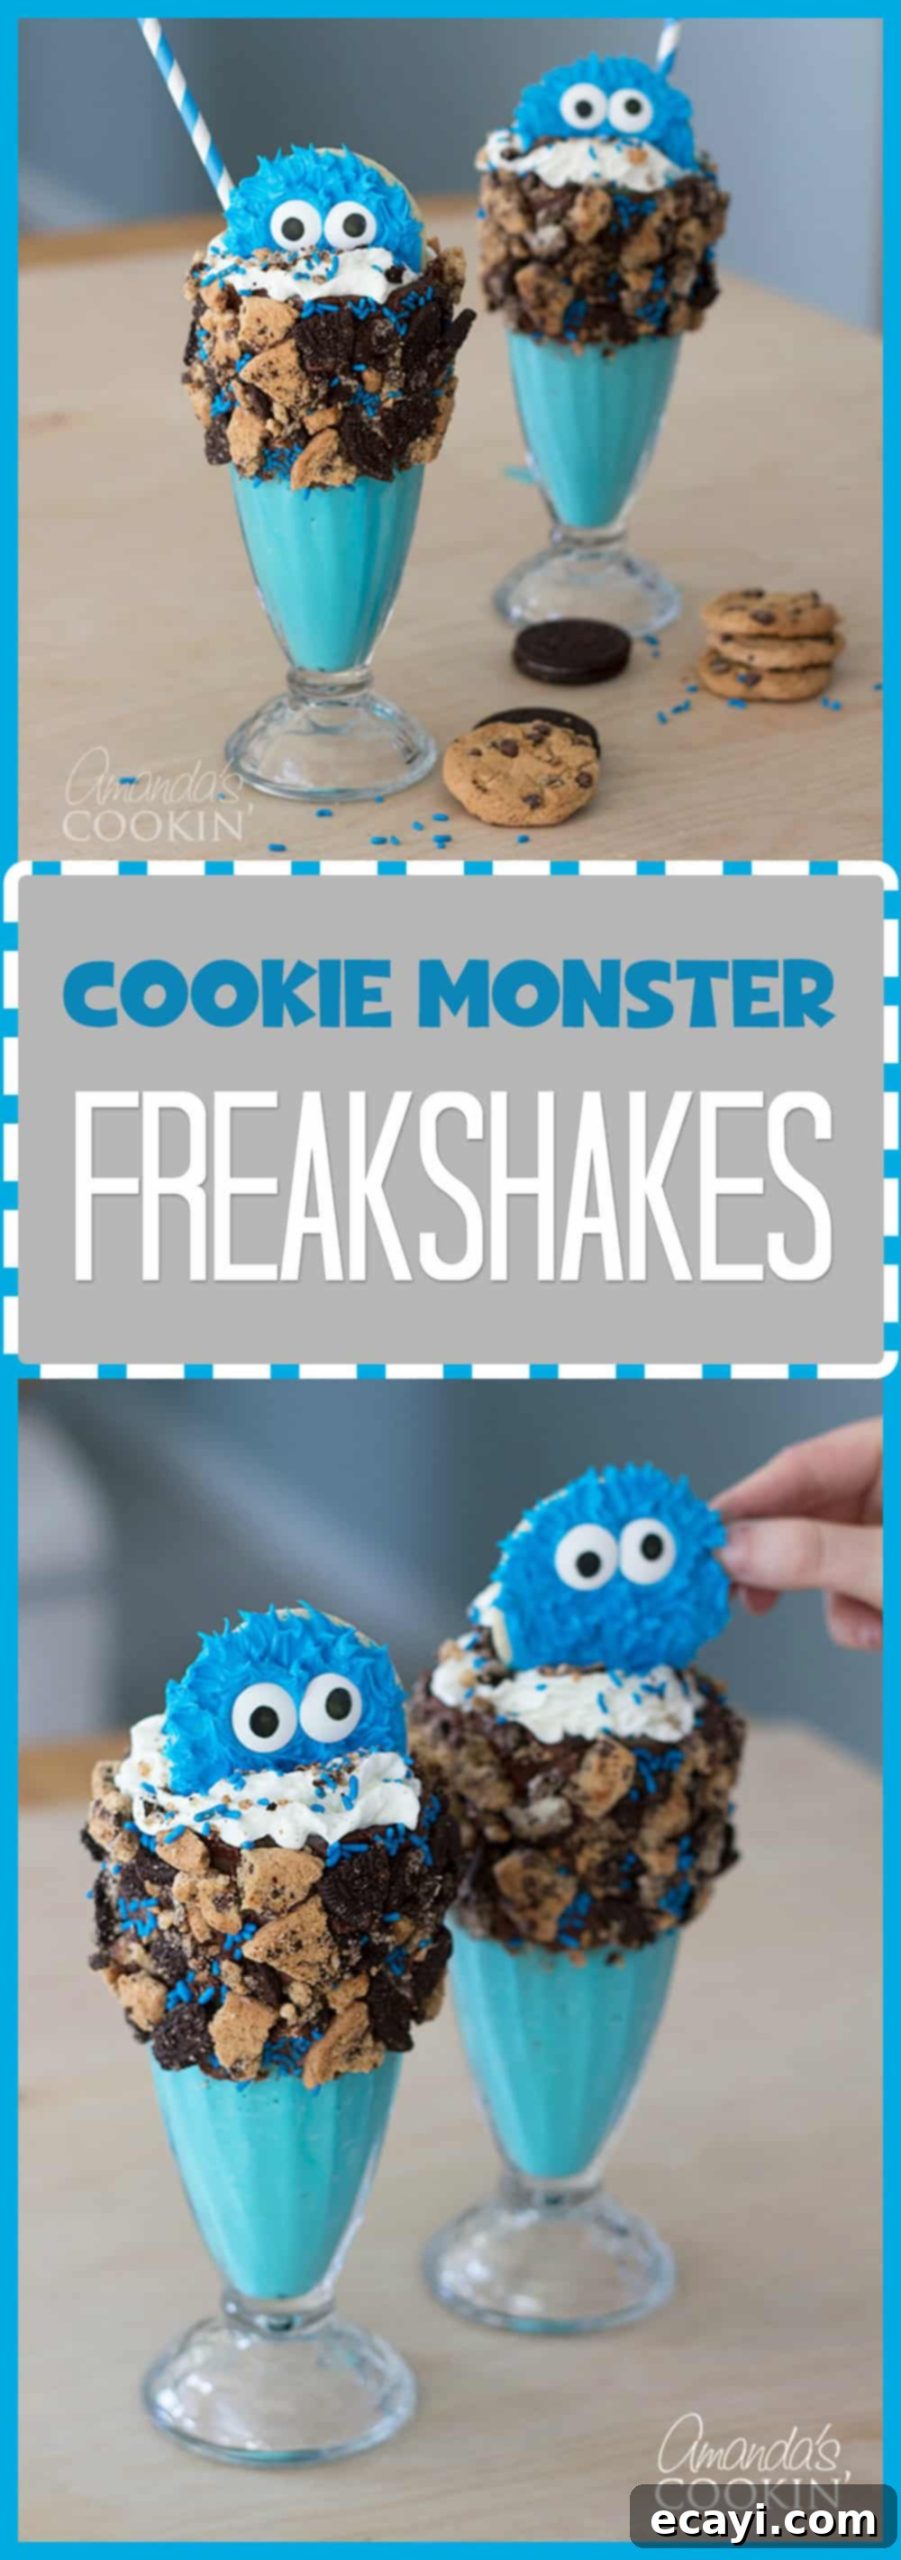
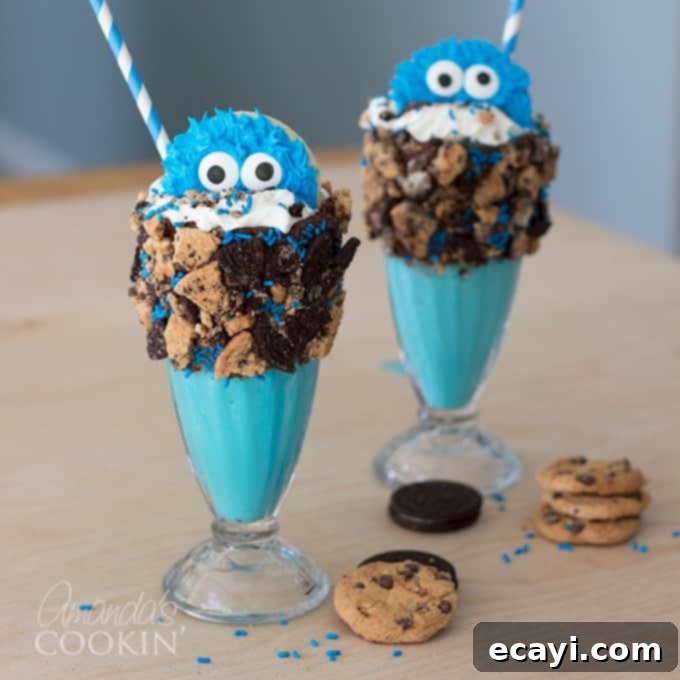
And there you have it – two absolutely super cute and irresistibly inviting Cookie Monster Freak Shakes, ready to be devoured!
Enjoy Your Cookie Monster Milkshakes!
I genuinely hope you have as much fun making these incredibly easy and utterly adorable Cookie Monster Freak Shakes as I did! The process is a blast, and the final outcome is undoubtedly worth every bit of effort. The smiles and excitement these shakes generate are truly priceless. I still remember my younger brother literally licking his milkshake glass clean – I think that was his absolute favorite part!
Essentially, this recipe creates a vibrant blue vanilla milkshake, but there’s room for customization. During my initial testing, I experimented with a cookies ‘n cream ice cream base instead of just plain vanilla. I blended in two of each type of cookie (Oreo and Chips Ahoy) along with the other milkshake ingredients. And oh my goodness, they were incredibly delicious! The only minor drawback with adding the cookies directly into the blender was that the milkshake didn’t achieve the pure, intense blue color I envisioned for that classic Cookie Monster look. So, for this specific recipe, we opted to omit the cookies from the milkshake blend to prioritize the striking aesthetic. However, if flavor is your ultimate goal and you don’t mind a slightly less uniform blue, absolutely feel free to add those cookies into the blender for an even more flavorful and textural milkshake! It’s a fantastic variation to try if you’re feeling adventurous.
If your love for Cookie Monster is as strong as ours, then you absolutely must try these equally charming and delicious Cookie Monster Ice Cream Sandwiches next! They are another fantastic way to celebrate this beloved character.
More Extreme Milkshake Inspiration
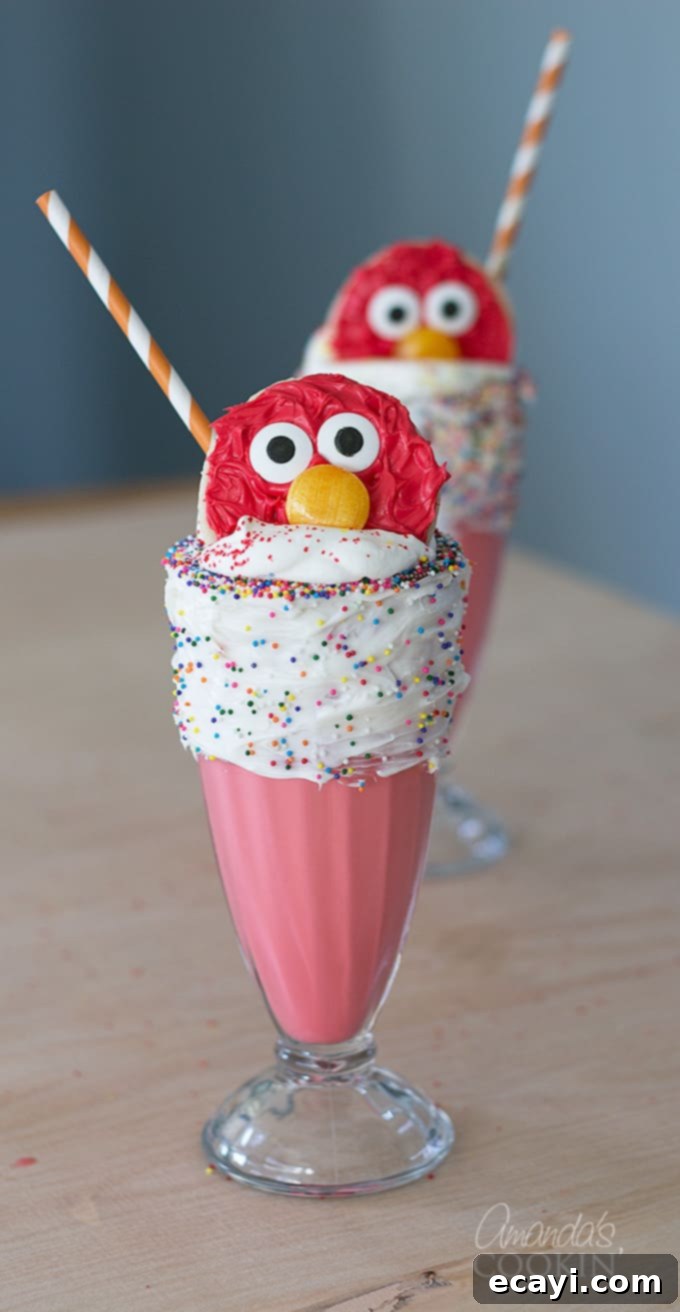
The fun doesn’t stop with Cookie Monster! Be sure to explore our delightful Elmo Freakshakes as well. These bright red, cheerful shakes are the perfect counterpart to the blue Cookie Monster version, making them ideal for a dynamic duo at any Sesame Street-themed party. And while you’re at it, don’t miss learning how to make the charming Cookie Monster and Elmo cookies that top these extreme milkshakes! They are incredibly easy to create and are truly the easiest character cookies you’ll ever make. For more over-the-top dessert ideas, you may also be interested in our general guide to absolutely delicious Freakshakes: Extreme Milkshakes or our magical Unicorn Freakshakes! Each recipe offers a unique and exciting way to turn a simple milkshake into an unforgettable dessert experience.
Cookie Monster Freak Shakes
IMPORTANT – There are often Frequently Asked Questions within the blog post that you may find helpful. Simply scroll back up to read them!
Print It
Pin It
Rate It
Save ItSaved!
Ingredients
- 5 scoops vanilla ice cream
- Reddi Whip whipped topping
- Blue sprinkles
- 6 Chips Ahoy cookies
- 6 Oreo cookies
- Blue gel food coloring I used sky blue- make sure you use the gel food coloring, the color is much more vibrant.
- Chocolate frosting
- ½ cup milk
- Parchment paper
- Ziploc bag
For the Cookie Monster Cookies
- 1 package of refrigerated Pillsbury sugar cookies
- Vanilla or white frosting
- Blue gel food coloring sky blue
- Edible candy eyeballs
Instructions
-
Grab 6 Chips Ahoy and 6 Oreo cookies and put them in a large Ziploc bag. Crush the cookies by hand, but be careful not to crunch them up too much; aim for distinct crumbles, otherwise you’ll be working with cookie dust.
-
After crushing, lay out a piece of parchment paper and pour your cookie crumbles onto it. Spread them out evenly to create a bed of crumbs.
-
Grab your milkshake glasses, chocolate frosting, and a butter knife or rubber spatula. Spread a generous, even layer of frosting around the top rim of the milkshake glasses. A thicker coat of frosting creates a better base for your cookie crumbles, so don’t hesitate to load it on!
-
Take your freshly frosted milkshake glass and lightly roll its rim in the cookie crumbles. Try not to press too hard, as this can smear the frosting. Only roll the glass once initially; then, you can fill in any empty spots by gently pressing more cookie crumbles by hand. Set aside any leftover crumbles for topping the finished milkshake.
-
Go through and press in your cookie crumbles to make sure they stay securely in place. Take your blue sprinkles and scatter them over any remaining open-frosted spots on the glass, gently pressing them down. Once the glasses are decorated, pop them into the freezer for the remainder of the time it takes to make the shakes, allowing the frosting and decorations to set and harden.
-
Add your 5 scoops of vanilla ice cream and 1/2 cup milk to a blender.
-
Then add your sky blue gel food coloring to the blender. It’s best to add a small amount at first, blend, and then add a little more if you desire a more vibrant color.
-
Pour your blue Cookie Monster milkshake mixture into your chilled, decorated glasses. Add a generous swirl of whipped cream to the top.
-
Top the whipped cream with your blue sprinkles and the leftover cookie crumbles.
-
Place your adorable Cookie Monster cookies on top of the milkshake (position them in the middle of the whipped cream). Don’t forget to add a fun striped straw for sipping!
Nutrition
The recipes on this blog are tested with a conventional gas oven and gas stovetop. It’s important to note that some ovens, especially as they age, can cook and bake inconsistently. Using an inexpensive oven thermometer can assure you that your oven is truly heating to the proper temperature. If you use a toaster oven or countertop oven, please keep in mind that they may not distribute heat the same as a conventional full sized oven and you may need to adjust your cooking/baking times. In the case of recipes made with a pressure cooker, air fryer, slow cooker, or other appliance, a link to the appliances we use is listed within each respective recipe. For baking recipes where measurements are given by weight, please note that results may not be the same if cups are used instead, and we can’t guarantee success with that method.
