The Ultimate Guide to Monster Cookies: Chewy, Peanut Butter, Oatmeal & M&M Delight
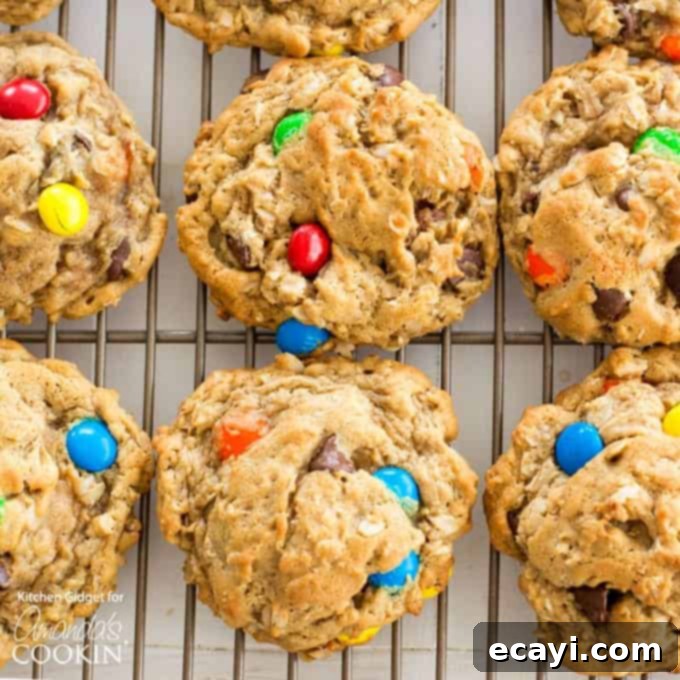
Welcome to the wonderful world of Monster Cookies! These aren’t just any ordinary cookies; they are a delightful explosion of flavors and textures, featuring the irresistible combination of soft and chewy peanut butter, hearty oatmeal, rich chocolate chips, and vibrant M&M’s. If you’re a fan of classic peanut butter cookies, then you are absolutely going to adore our Monster Cookies. They are incredibly easy to make, offer a huge burst of flavor, and are especially fun to bake with kids, making them a perfect activity for family time in the kitchen.
What Exactly Are Monster Cookies?
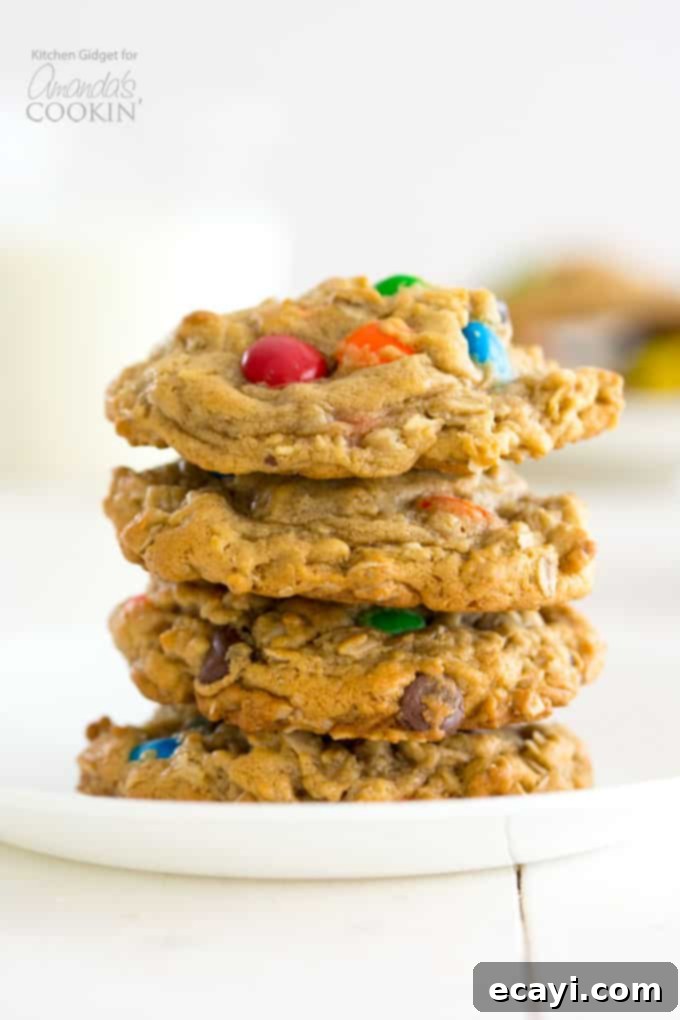
Imagine the best qualities of an oatmeal cookie and a peanut butter cookie harmoniously blended into one giant, irresistible treat. That’s precisely what Monster Cookies are! They are renowned for their impressive size, wonderfully soft and chewy texture, and the generous scattering of classic mix-ins like chocolate chips and colorful M&M’s. These cookies are designed to satisfy every sweet tooth, delighting both adults and children alike. All they truly need to be complete is a tall glass of cold milk.
The name “Monster Cookies” itself is a nod to their grand scale and the “monster” variety of delicious ingredients packed into each bite. Some say they’re called monsters because they are so big and full of different tasty components that the name felt fitting. Others suggest it’s because you need a “monster appetite” to truly devour these substantial delights!
(By the way, if you were actually searching for Cookie Monster cookies, we have those too – a different kind of fun, but equally delicious!)
What Makes a Monster Cookie “Monster-Sized”?
The beauty of Monster Cookies lies in their generous blend of staple ingredients. A traditional Monster Cookie recipe typically calls for creamy peanut butter, wholesome old-fashioned rolled oats, vibrant M&M’s, and rich chocolate chips. However, the true “monster” aspect comes from the flexibility and endless possibilities for customization. You can easily add or subtract mix-ins to suit your preferences or what you have on hand. For instance, some creative bakers include raisins, miniature marshmallows, shredded coconut, or even various types of nuts to enhance the flavor profile and texture. Years ago, I even made “Chockablock Cookies” from a beloved cookbook, which were quite similar but incorporated molasses and coconut for a unique twist.
Can I Substitute Peanut Butter in Monster Cookies?
Absolutely! For those with peanut allergies or simply looking to explore different flavors, there are numerous excellent replacements for peanut butter. Any nut butter, such as almond butter or cashew butter, will work wonderfully. Sunbutter, made from sunflower seeds, is another fantastic option, especially for nut-free households, providing a similar rich and creamy consistency that blends seamlessly into the cookie dough.
Choosing Your Chocolate Chips
While semi-sweet chocolate chips are the traditional choice for Monster Cookies, don’t feel limited! The beauty of these cookies is their adaptability. Feel free to use any flavored chip that brings you joy. The market offers a wide array of choices, including decadent dark chocolate chips, creamy milk chocolate chips, sweet white chocolate chips, butterscotch chips for a caramel-like note, or even refreshing mint chips for a holiday twist. Experimentation is highly encouraged to find your perfect combination!
The Right Oats for the Perfect Texture
For Monster Cookies, old-fashioned oats (also known as rolled oats) are essential. They are key to achieving that wonderfully chewy texture that defines these cookies. It’s important to differentiate them from other oat varieties: steel-cut oats, which resemble small rice grains, require much longer cooking times and would result in a tough, unappealing texture in cookies. On the other end, instant oats cook very quickly and become mushy, making them ideal for a rapid breakfast but completely unsuitable for baking cookies where structure and chewiness are desired.
M&M’s and Beyond: Colorful Candy Options
The classic Monster Cookie recipe always features traditional, colorful M&M’s, which add a fantastic crunch and burst of sweetness. However, you can get incredibly creative with your candy choices! We’ve seen these cookies made with peanut M&M’s, peanut butter M&M’s, miniature M&M’s, and even crispy M&M’s. Imagine the festive fun of using holiday-themed M&M’s for Easter, Halloween, or Christmas cookies – the possibilities are endless for making your treats extra special. If you’re lucky enough to visit an M&M’s store, you can even purchase bags of single colors to create custom color palettes!
Beyond M&M’s, other candy-coated chocolates work beautifully. Reese’s Pieces offer a delightful peanut butter flavor, while Sixlets provide a slightly different texture and color. For a European flair, Smarties (the chocolate-filled kind, not to be confused with the little pastel-colored discs found in the U.S.) are an excellent substitute that will add a unique touch to your Monster Cookies.
Make Ahead & Storage Tips: Can I Freeze the Dough?
Yes, absolutely! Freezing Monster Cookie dough is a brilliant way to prepare for future cravings or unexpected guests. It’s incredibly convenient and ensures you always have fresh-baked cookies ready in minutes. Here’s how to do it:
- Prepare the Dough: Mix your cookie dough according to the recipe instructions below.
- Form and Flash Freeze: Line a cookie sheet with parchment paper. Scoop cookie dough balls onto the sheet, leaving some space between each. Place the sheet in the freezer for about 2 hours, or until the dough balls are firm. This “flash freezing” prevents them from sticking together.
- Store: Once firm, transfer the frozen dough balls from the cookie sheet into a large, freezer-safe gallon bag.
- Label: Don’t forget to mark the freezer bag with the baking temperature and time. You can also slip a small piece of paper with the instructions inside the bag.
- Bake from Frozen: To bake, simply remove the desired number of dough balls from the freezer and place them on a lined baking sheet. You can let them thaw for about ten minutes at room temperature, then bake as directed. Alternatively, place them directly into a preheated oven from frozen and add an extra 3-4 minutes to the specified baking time.
Frozen cookie dough can be stored for up to 3 months, making it a perfect solution for fresh cookies anytime!
Can I Transform Monster Cookies into Cookie Bars?
You certainly can! Monster Cookie bars are a fantastic alternative, especially if you’re serving a crowd or prefer a less hands-on approach to portioning. This particular recipe is quite generous and will actually yield enough dough to fill two 13×9-inch pans. If you only want one pan of bars, simply halve all the ingredient measurements. Maintain the oven temperature at 350°F (175°C), but adjust the baking time to approximately 25-27 minutes. To check for doneness, insert a toothpick into the center of the bars after about 23 minutes; it should come out with moist crumbs attached, not wet batter.
Mom’s Easy Monster Cookies: A Cherished Family Recipe
When I first decided to perfect and photograph the ultimate Monster Cookies, I realized I didn’t have my own copy of the recipe readily available. So, I did what any good child would do: I called my mom! It’s funny how some of the best recipes are passed down through generations. Back in my college days, I meticulously copied countless family recipes to take a piece of home with me, but this one somehow slipped through the cracks. My mom, unfortunately, couldn’t find her copy either, but she remembered it came from my aunt. After a quick call, success! I finally had the treasured recipe for these truly exceptional Monster Cookies.
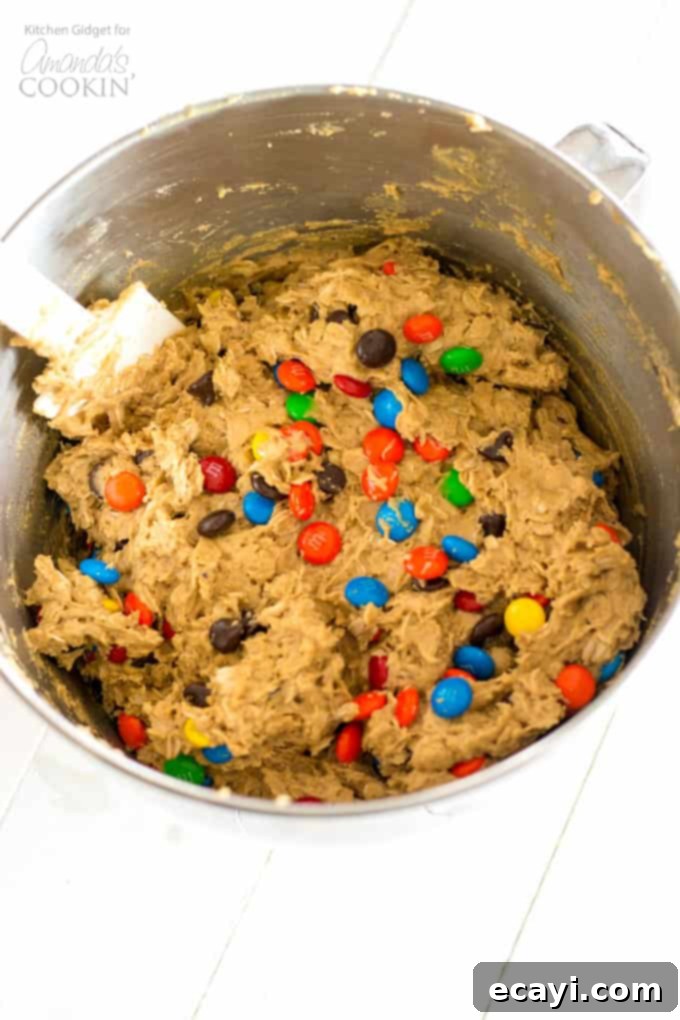
My aunt often makes these Monster Cookies with her grandkids, and she shared a wonderful tip: it’s a fantastic recipe for kids to get hands-on and mix with their hands. I can only imagine how much they love the sensory experience of getting to combine all those colorful, textural ingredients!
Essential Tips for Making Perfect Monster Cookies
While my aunt advocates for hands-on mixing, I confess a love for my kitchen gadgets, especially when baking cookies! Two of my all-time favorites proved invaluable for this recipe: my trusty KitchenAid Stand Mixer (or any powerful stand mixer) and an adjustable measuring cup. The stand mixer makes creaming butter and sugar a breeze, ensuring a light and fluffy base. The adjustable measuring cup is a true game-changer for sticky ingredients like peanut butter, shortening, or honey. Its genius design allows the bottom to push up, ejecting the ingredient cleanly without any waste or messy scraping. It’s incredibly versatile, working for dry, solid, liquid, and sticky ingredients alike – a highly recommended invention for any baker!
A Deeper Look at the Ingredients: What You Need to Know
- Unsalted Butter (softened): “Softened” butter is crucial for proper creaming. It means the butter should be pliable enough that you can press your finger into it and leave a slight indentation. If your finger sinks deep, it’s too soft and could lead to greasy cookies. Take your butter out of the fridge about 10-20 minutes before you start. While unsalted is preferred for better control over sodium, salted butter can also be used without significantly affecting the final flavor in this recipe.
- Packed Brown Sugar: When measuring brown sugar, always pack it firmly into the measuring cup to ensure you have the correct amount, then level off the top. This technique helps achieve the ideal moisture and chewiness.
- White Granulated Sugar: Standard white granulated sugar is recommended for this recipe. For a slightly different texture and deeper flavor, you can substitute it with an equal amount of brown sugar. If you prefer using a sugar substitute, make sure to check its specific packaging for proper measurement equivalents, as they can vary greatly.
- Eggs (room temperature): For optimal blending and a smoother cookie batter, aim for room temperature eggs. Take them out of the fridge approximately 20 minutes before you begin mixing. Room temperature eggs emulsify better with fats, resulting in a more uniform dough.
- Creamy Peanut Butter: As discussed, creamy peanut butter is a cornerstone of this recipe. Feel free to substitute with other nut butters like almond butter or cashew butter, or even sunflower seed butter, if preferred. Ensure it’s a smooth variety for consistent texture.
- Corn Syrup: A small amount of corn syrup contributes to the cookie’s chewiness and helps prevent crystallization. If you prefer to avoid it, agave nectar or honey can be used as a direct substitute. The quantity is minimal, so it won’t drastically alter the flavor.
- Pure Vanilla Extract: Pure vanilla extract offers the best flavor. However, imitation vanilla extract can be used as a suitable alternative if pure vanilla is unavailable.
- All-Purpose Flour: Either bleached or unbleached all-purpose flour will work effectively. The key to accurate measurement is to spoon the flour into your measuring cup and then level off the top with a straight edge. Avoid packing the flour or scooping directly from the bag, as this can compress it and lead to using too much flour, which can result in dry, dense cookies. Precise measurement is vital for successful baking.
- Baking Soda: This leavening agent helps the cookies rise and spread, contributing to their signature soft and chewy texture.
- Old-Fashioned Oats: These are non-negotiable for their distinctive chewy texture and wholesome contribution to Monster Cookies. Only use old-fashioned (rolled) oats, as other varieties will not yield the desired consistency.
- M&M’s: Our recipe uses regular M&M’s, but feel free to experiment with any variety you enjoy, from peanut to crispy, or swap them out for Reese’s Pieces for an extra peanut butter punch!
- Semisweet Chocolate Chips: While semisweet chocolate chips are a classic choice, don’t hesitate to use your favorite type or flavor of chocolate chip. Milk chocolate, dark chocolate, or even white chocolate chips can all be fantastic additions. Just ensure you keep the measurements consistent.
Recommended Kitchen Tools for Baking Success:
- Cookie Sheets: Insulated baking sheets are highly recommended as they promote more even baking and prevent burnt bottoms, especially compared to darker coated pans. They’re also an affordable investment.
- Silicone Baking Mats: If you’re looking for an eco-friendly and reusable alternative to parchment paper, silicone baking mats are an excellent investment that will last for years and provide a non-stick surface.
- Adjustable Measuring Cup: As mentioned, this innovative gadget simplifies measuring sticky ingredients like peanut butter or honey, ensuring precise amounts and easy cleanup.
- Large Cookie Scoop: A large cookie scoop (around 3 tablespoons) is perfect for creating uniformly sized Monster Cookies, ensuring even baking. While it’s different from an ice cream scoop, one can be used in a pinch for similar results.
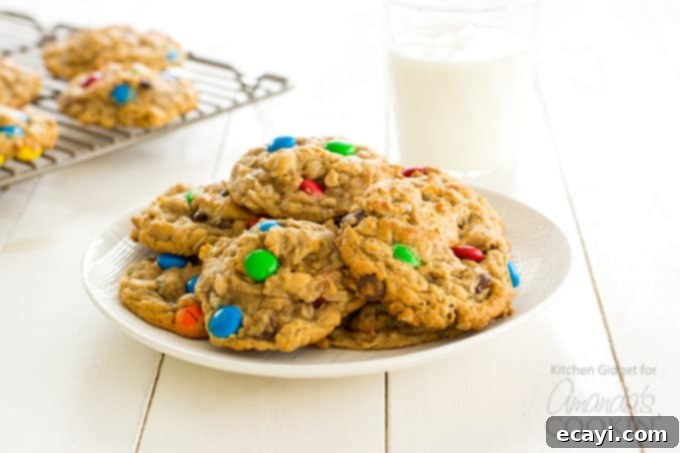
For truly “monster-sized” cookies, I prefer to use about 3 tablespoons of dough per cookie, which typically yields around 3 dozen delicious treats. If you prefer a more “regular” cookie size, you can reduce the amount to 1.5 to 2 tablespoons per cookie, which will, of course, increase your total yield. Remember that larger cookies might require a minute or two more baking time. Always keep an eye on them!
Looking for more cookie inspiration? Be sure to explore some of our other favorite cookie recipes on the blog:
- Italian Anisette Cookies: These popular Italian desserts are delicately flavored with anise for a distinct licorice taste.
- Peanut Butter Chocolate Chunk Bars: A must-try recipe for anyone who adores the classic combination of peanut butter and chocolate!
- Grandma’s All-Occasion Sugar Cookies: You simply can’t go wrong with a perfectly baked, classic sugar cookie.
- Pretzel Chocolate Chip Cookies: Indulge in the irresistible salty-sweet combination of these incredibly satisfying cookies.
- Sweet Potato Oat Cookies: A delightfully moist and chocolatey cookie, secretly packed with wholesome sweet potato goodness.
- Thumbprint Cookies: Especially popular during the holidays, these make for the perfect cookie-exchange treat!
Monster Cookies
Rating: 4.86 from 14 votes
Please remember, additional helpful tips and Frequently Asked Questions are often found within the main blog post. Scroll up to read them!
Print It | Rate It
Ingredients
- ½ cup butter softened
- 1 cup brown sugar packed
- 1 cup granulated sugar
- 3 large eggs room temperature
- 1 ½ cups peanut butter
- 1 ½ teaspoons corn syrup
- 1 ½ teaspoons vanilla extract
- 1 cup all purpose white flour
- 2 teaspoons baking soda
- 3 ½ cups old fashioned oats
- 208 grams M&M candies (approximately 1 cup)
- ½ cup semi sweet chocolate chips
Before You Begin
For truly “monster-sized” cookies, use about 3 tablespoons of dough per cookie. This will yield approximately 3 dozen cookies. If you prefer smaller, “regular-sized” cookies, reduce the dough amount to 1.5-2 tablespoons, and you will get more cookies from the batch.
Instructions
-
Preheat your oven to 350°F (175°C). Line cookie sheets with silicone baking mats or parchment paper, and set them aside.
-
In a large mixing bowl, using an electric mixer, cream together the softened butter, packed brown sugar, and granulated sugar until the mixture is light and fluffy.
-
Add the eggs one at a time, beating well after each addition until fully incorporated into the mixture.
-
Beat in the peanut butter, corn syrup, and vanilla extract until thoroughly combined. In a separate bowl, whisk together the flour, baking soda, and oats. Gradually add the dry ingredients to the wet ingredients, mixing until just combined. Finally, fold in the M&M’s and chocolate chips until evenly distributed throughout the dough. Avoid overmixing.
-
If the cookie dough feels too sticky to handle easily, refrigerate it for at least 30 minutes. Drop 3-tablespoon portions of dough onto the prepared cookie sheets, ensuring cookies are spaced at least 2 inches apart. For a more vibrant appearance, gently press a few extra M&M’s onto the tops of each cookie, if desired. Bake at 350°F (175°C) for 9-13 minutes.
-
A shorter baking time will result in softer, chewier cookies. The cookies may appear slightly under-baked in the center; this is normal for a chewy cookie. Allow them to cool on the cookie sheet for 5-10 minutes before transferring. If your dough was chilled or you prefer crispier cookies, use the longer baking time. After cooling on the sheet, transfer them to a wire rack to cool completely.
Nutrition
Calories: 268 cal |
Carbohydrates: 32g |
Protein: 6g |
Fat: 13g |
Saturated Fat: 5g |
Cholesterol: 27mg |
Sodium: 174mg |
Potassium: 156mg |
Fiber: 2g |
Sugar: 20g |
Vitamin A: 135 IU |
Vitamin C: 0.1mg |
Calcium: 31mg |
Iron: 1.2mg
Tried this Recipe? Pin it for Later!
Follow on Pinterest @AmandasCookin or tag #AmandasCookin!
The recipes on this blog are tested with a conventional gas oven and gas stovetop. It’s important to note that some ovens, especially as they age, can cook and bake inconsistently. Using an inexpensive oven thermometer can assure you that your oven is truly heating to the proper temperature. If you use a toaster oven or countertop oven, please keep in mind that they may not distribute heat the same as a conventional full-sized oven and you may need to adjust your cooking/baking times. For baking recipes where measurements are given by weight, please note that results may not be the same if cups are used instead, and we can’t guarantee success with that method.
This post was originally published on this blog on Jan 17, 2018.
