The Ultimate 7 Layer Taco Dip: Your Go-To Crowd-Pleasing Appetizer
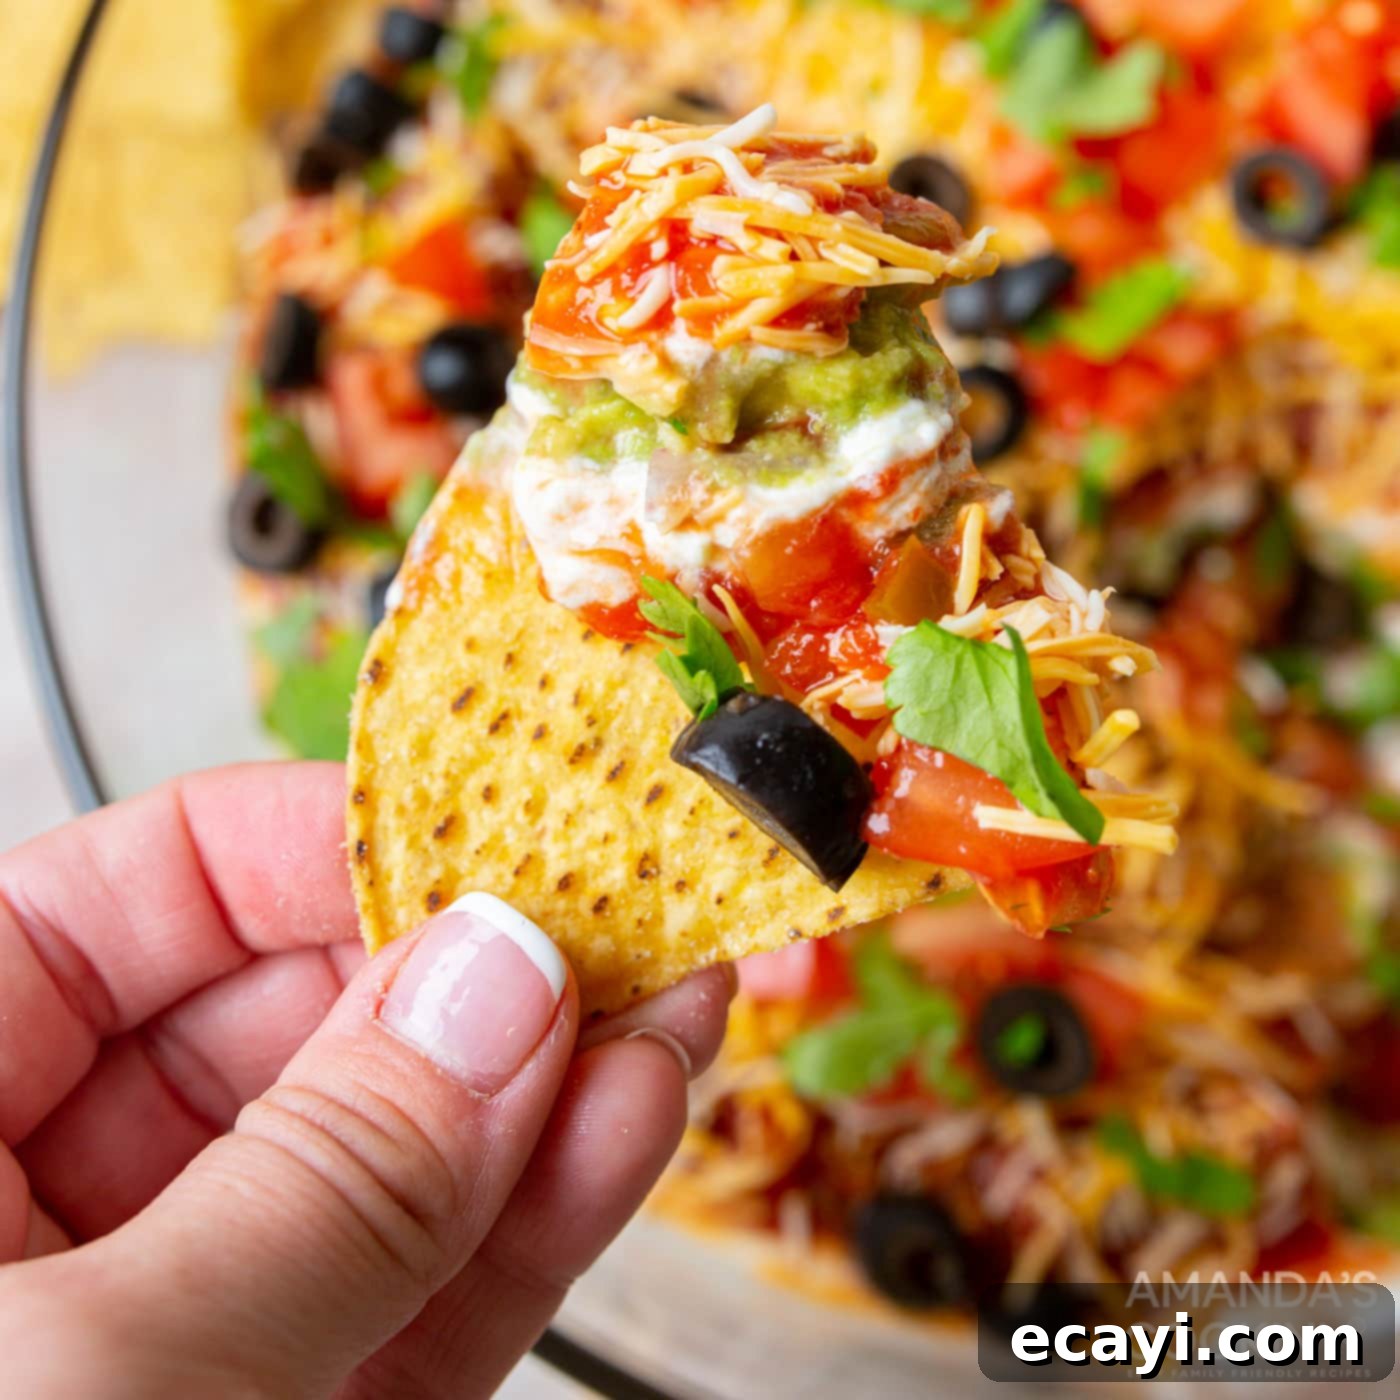
There’s a reason why some dishes become legendary at parties, and the 7 Layer Taco Dip is undoubtedly one of them. This vibrant, flavorful, and incredibly satisfying appetizer is the undisputed champion of potlucks, game day gatherings, backyard barbecues, and any occasion where friends and family come together to enjoy good food and good company. Loaded with a medley of taco-inspired fixings, each spoonful offers a delightful combination of textures and tastes that will have everyone coming back for more. Forget fussy finger foods; this dip is a hearty, wholesome, and universally loved classic that promises to disappear fast from the serving table. Its ease of preparation combined with its impressive presentation makes it the perfect choice for hosts looking to serve something both delicious and visually appealing without spending hours in the kitchen.
Why This 7 Layer Dip Recipe Always Wins Over the Crowd
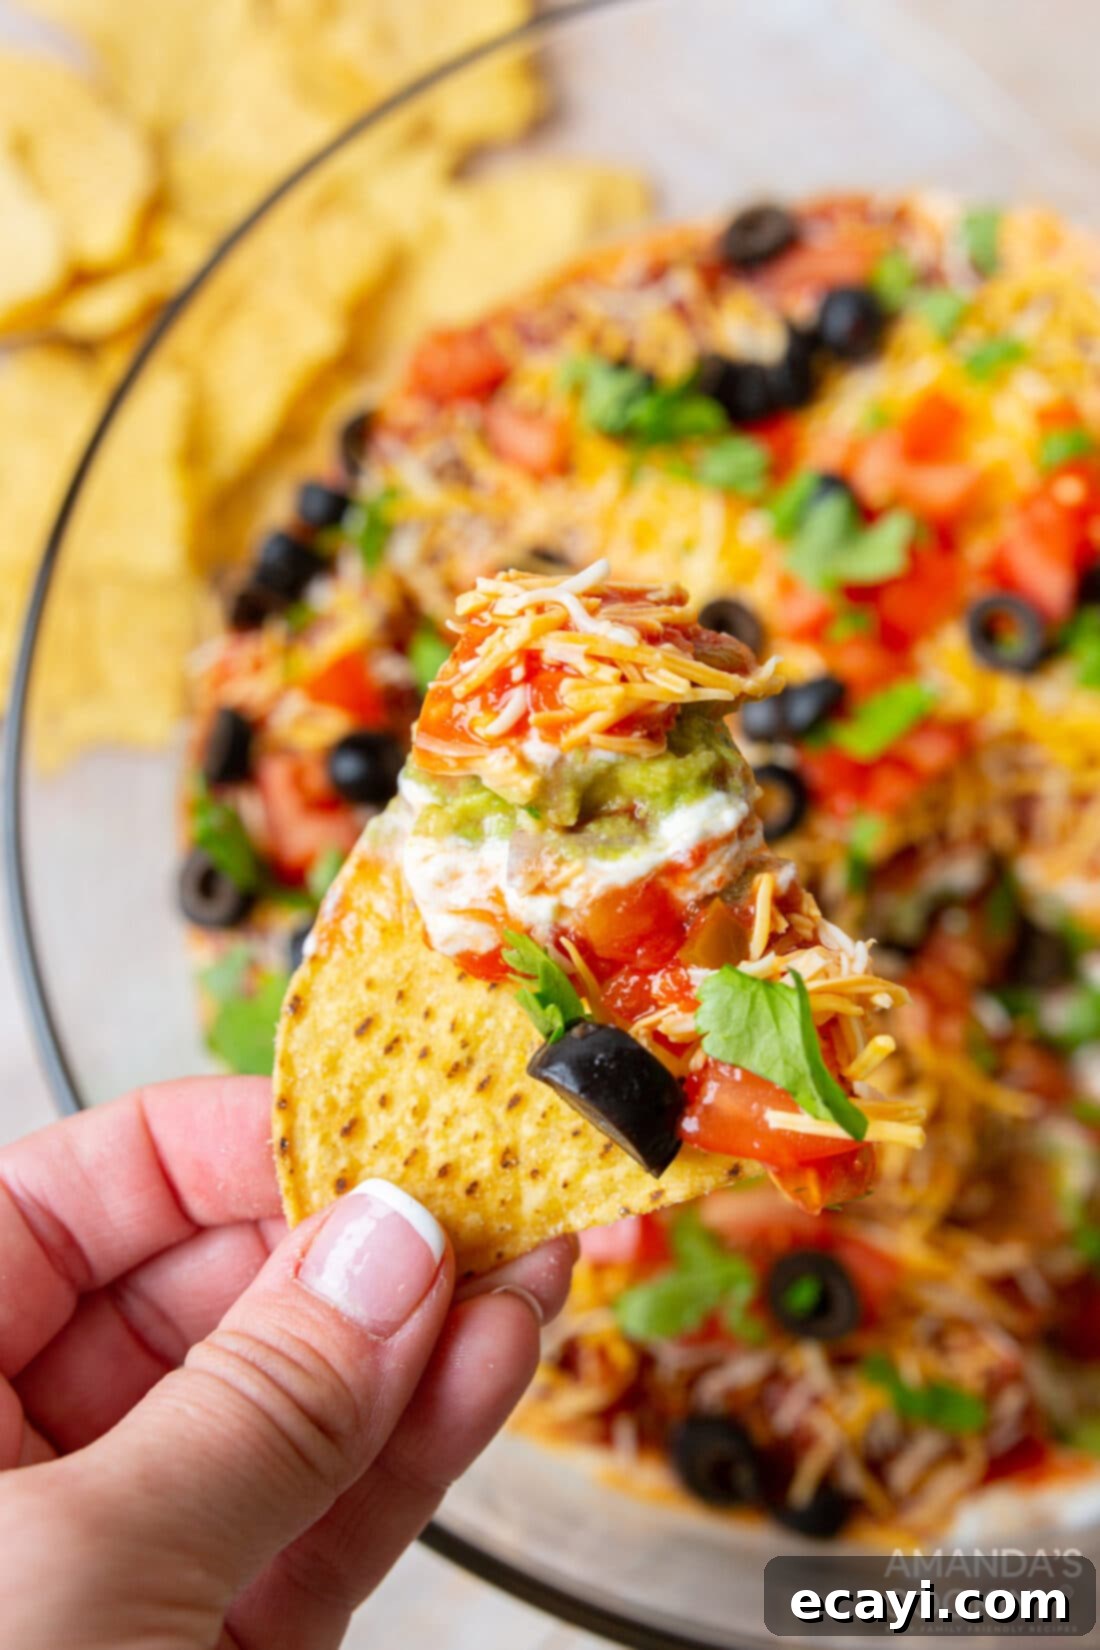
The magic of this easy 7 layer dip recipe lies in its simplicity and the brilliant combination of its distinct layers. It’s not just a dip; it’s an experience in every scoop! Each ingredient plays a crucial role in creating a harmonious blend of creamy, savory, tangy, and fresh flavors that perfectly complement one another. Imagine digging your chip through the rich, seasoned refried beans, hitting the cool, zesty guacamole, then the smooth sour cream, vibrant salsa, savory shredded Mexican cheese, crisp tomatoes, and briny olives, all finished with a sprinkle of fresh cilantro. This layered approach ensures that with every bite, you get a little bit of everything, making it an incredibly satisfying and addictive appetizer. It’s truly a celebration of classic Tex-Mex flavors packed into one irresistible dish, proving that you really can’t go wrong with a well-made taco dip.
Beyond its incredible taste, this recipe is a win for hosts because of its make-ahead potential and scalability. You can prepare most components in advance, reducing stress on the day of your event. Plus, it’s easily adaptable to feed any size crowd, from a small family gathering to a large fiesta. The vibrant colors also make for a beautiful presentation, adding a festive touch to any spread. It’s a dish that looks as good as it tastes, making it an instant centerpiece for your appetizer table and encouraging guests to gather around and enjoy. The contrasting textures, from the smoothness of the beans and guacamole to the crunch of fresh vegetables and tortilla chips, provide an engaging eating experience that keeps guests coming back for more.
Essential Ingredients for Your Perfect 7 Layer Taco Dip
Crafting the perfect homemade 7 layer dip starts with selecting high-quality ingredients. While the full list with precise measurements is available in the printable recipe card at the end of this post, let’s explore the key components that make this dip so extraordinary. You’ll find that many of these are pantry staples, making this a convenient option for impromptu gatherings. From the robust base to the fresh, vibrant toppings, each ingredient contributes to the overall deliciousness and visual appeal of this fantastic party food. Knowing what each layer brings to the table will help you understand the magic behind this beloved appetizer.
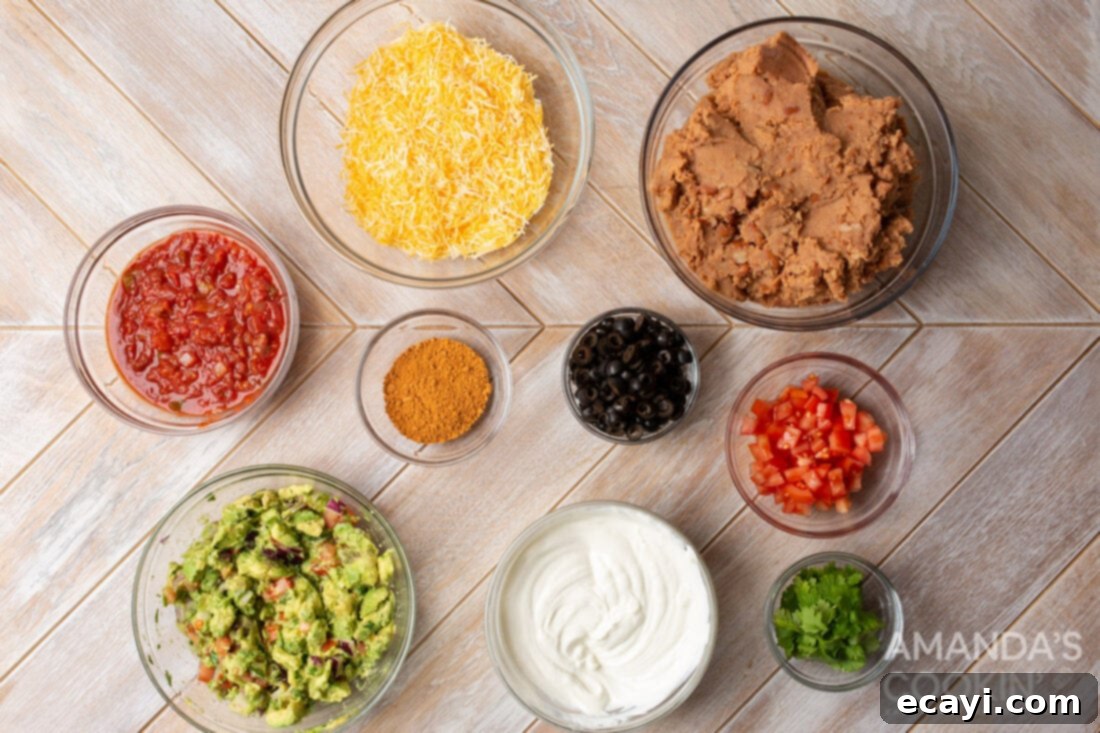
Detailed Ingredient Information & Smart Substitution Suggestions
Let’s dive deeper into each of the seven layers, along with some tips and tricks for choosing the best ingredients and making smart substitutions to suit your taste or dietary needs. The beauty of this Mexican layered dip is its flexibility, allowing you to customize it to perfection. Each layer contributes its own unique flavor and texture, building a symphony of tastes that makes this dip an unforgettable crowd-pleaser.
The Robust Foundation: Taco Seasoned Refried Beans
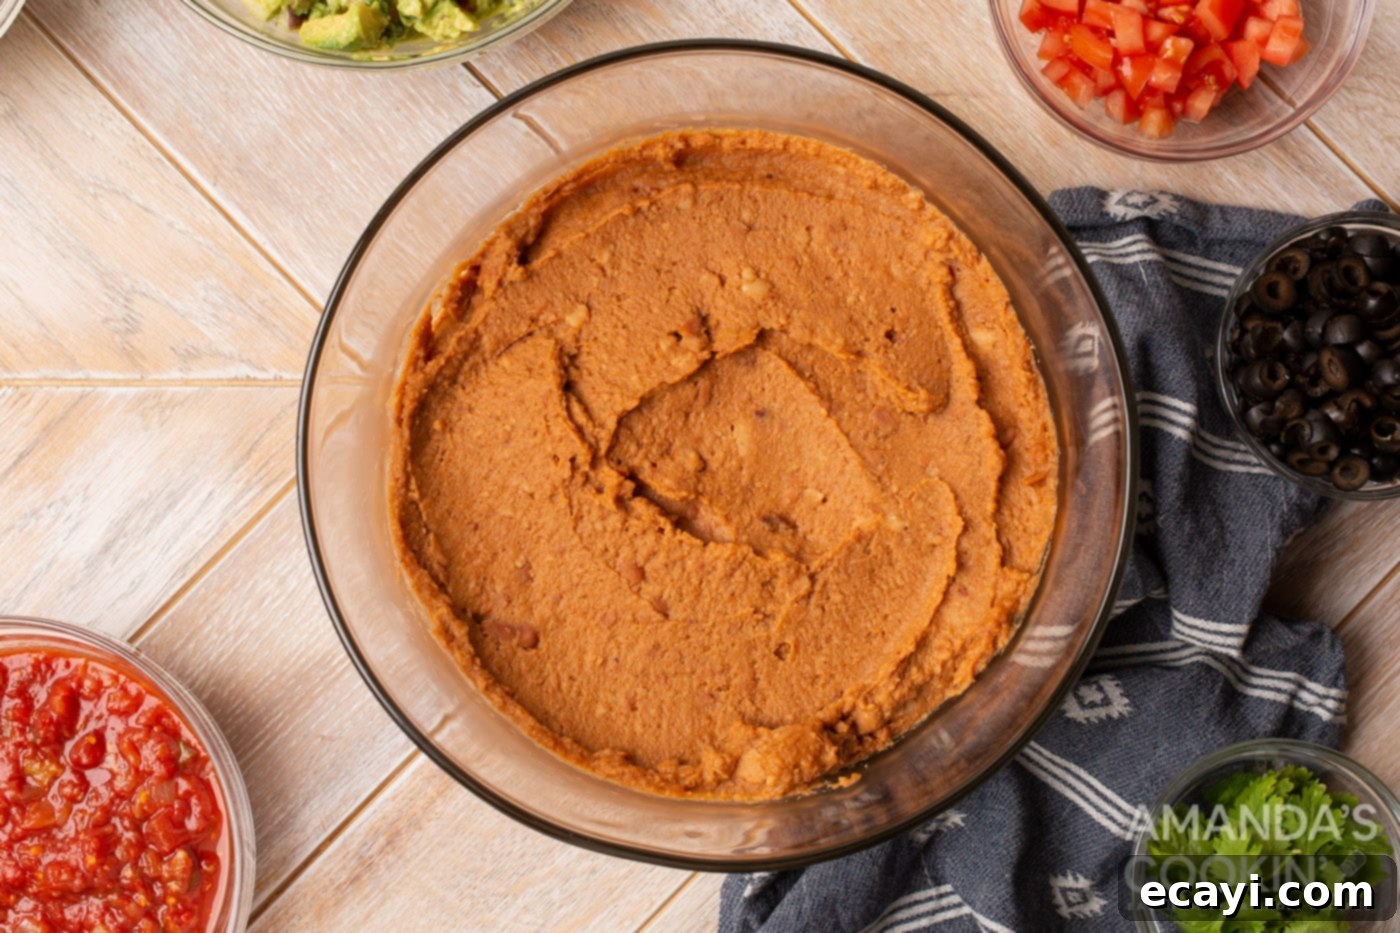
The very first layer, and the structural base of our incredible dip, is a generous spread of refried beans. To infuse them with authentic taco flavor, we recommend placing them in a medium pot on the stovetop over medium-low heat to warm slightly. This gentle heat makes them much easier to mix with the taco seasoning, ensuring an even distribution of spice and a smoother consistency for spreading. You don’t need to “cook” the beans, just soften them enough to become spreadable and thoroughly seasoned. For convenience, canned refried beans work wonderfully, whether pinto or black beans, providing a hearty and satisfying foundation. If you prefer a smoother texture, you can mash them a bit further with a fork or potato masher. For a healthier twist, consider using low-fat refried beans. Alternatively, for a different texture, you could use whole black beans (rinsed and mashed) seasoned with taco seasoning.
Creamy & Zesty Layers: Guacamole & Sour Cream
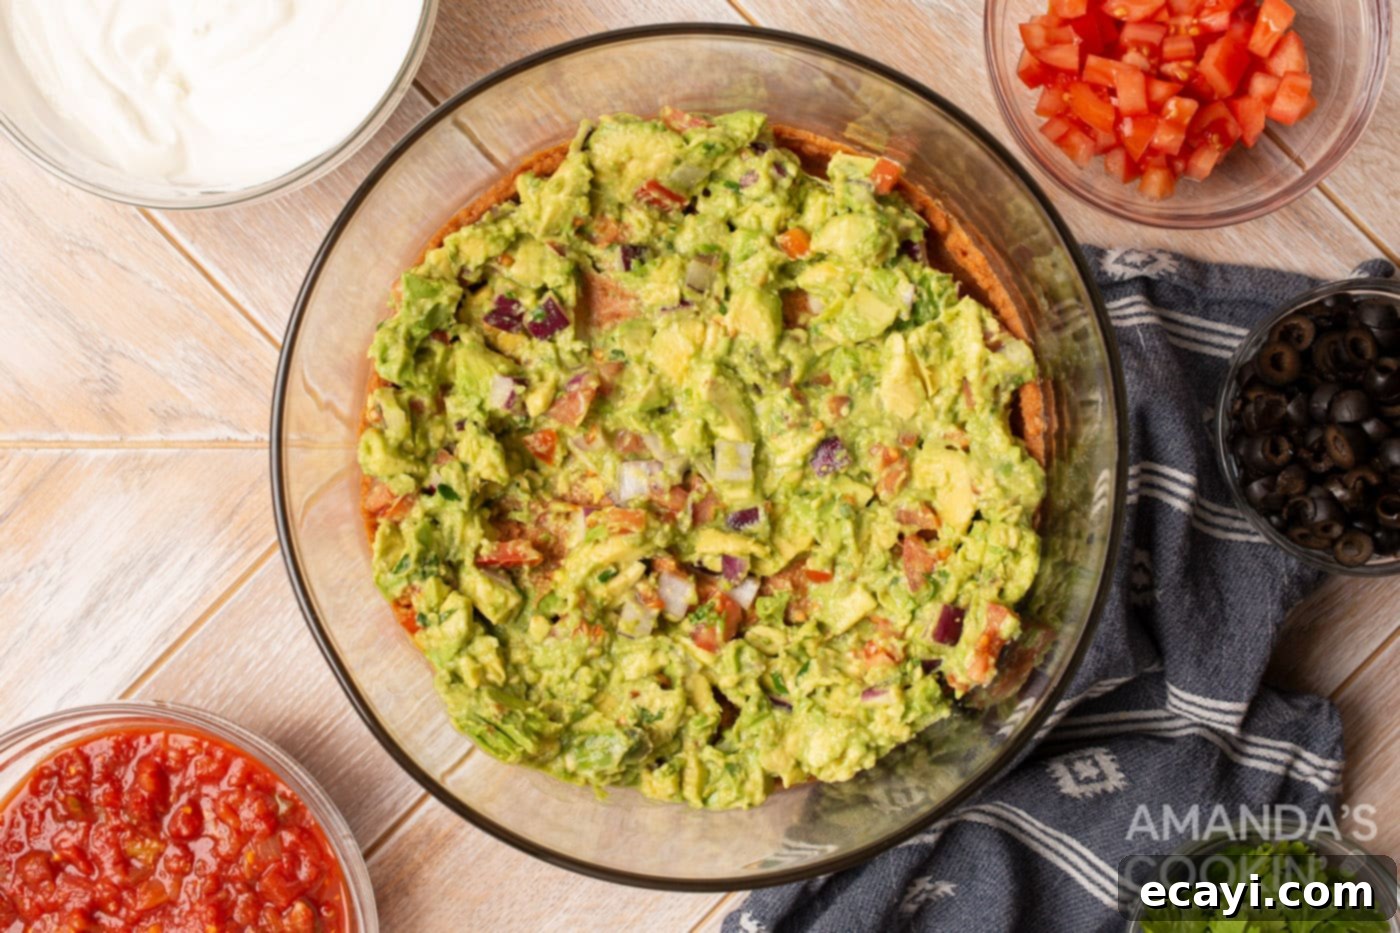
The next two layers bring the essential creaminess and a delightful tang to the dip. We highly recommend making fresh guacamole for this recipe. The vibrant, fresh taste of homemade guacamole, bursting with ripe avocado, zesty lime juice, finely chopped red onion, and fresh cilantro, is truly unmatched and elevates the entire dish. When choosing avocados, look for ones that yield slightly to gentle pressure. If time is short, a good quality store-bought guacamole can certainly be used, but fresh is always best. To prevent your guacamole from browning, try spreading it as the second layer directly over the refried beans and ensuring it’s covered by the next layer quickly. A squeeze of extra lime juice mixed into the guacamole also helps.
For the sour cream layer, plain full-fat sour cream provides the richest taste and creamiest texture, creating a wonderful contrast to the savory beans and fresh guacamole. However, light sour cream or even plain Greek yogurt can be used as healthier alternatives; Greek yogurt offers a tangier profile which many enjoy. As an alternative to seasoning the beans, you can mix the taco seasoning directly into the sour cream layer instead. This is a common and delicious variation I have used many times in the past, and it works just as well to distribute that beloved taco flavor throughout the dip. You could also add a dash of hot sauce, a pinch of garlic powder, or a hint of cumin to the sour cream for an extra kick and depth of flavor.
Flavorful & Fresh: Salsa, Mexican Cheese, Tomatoes & Olives
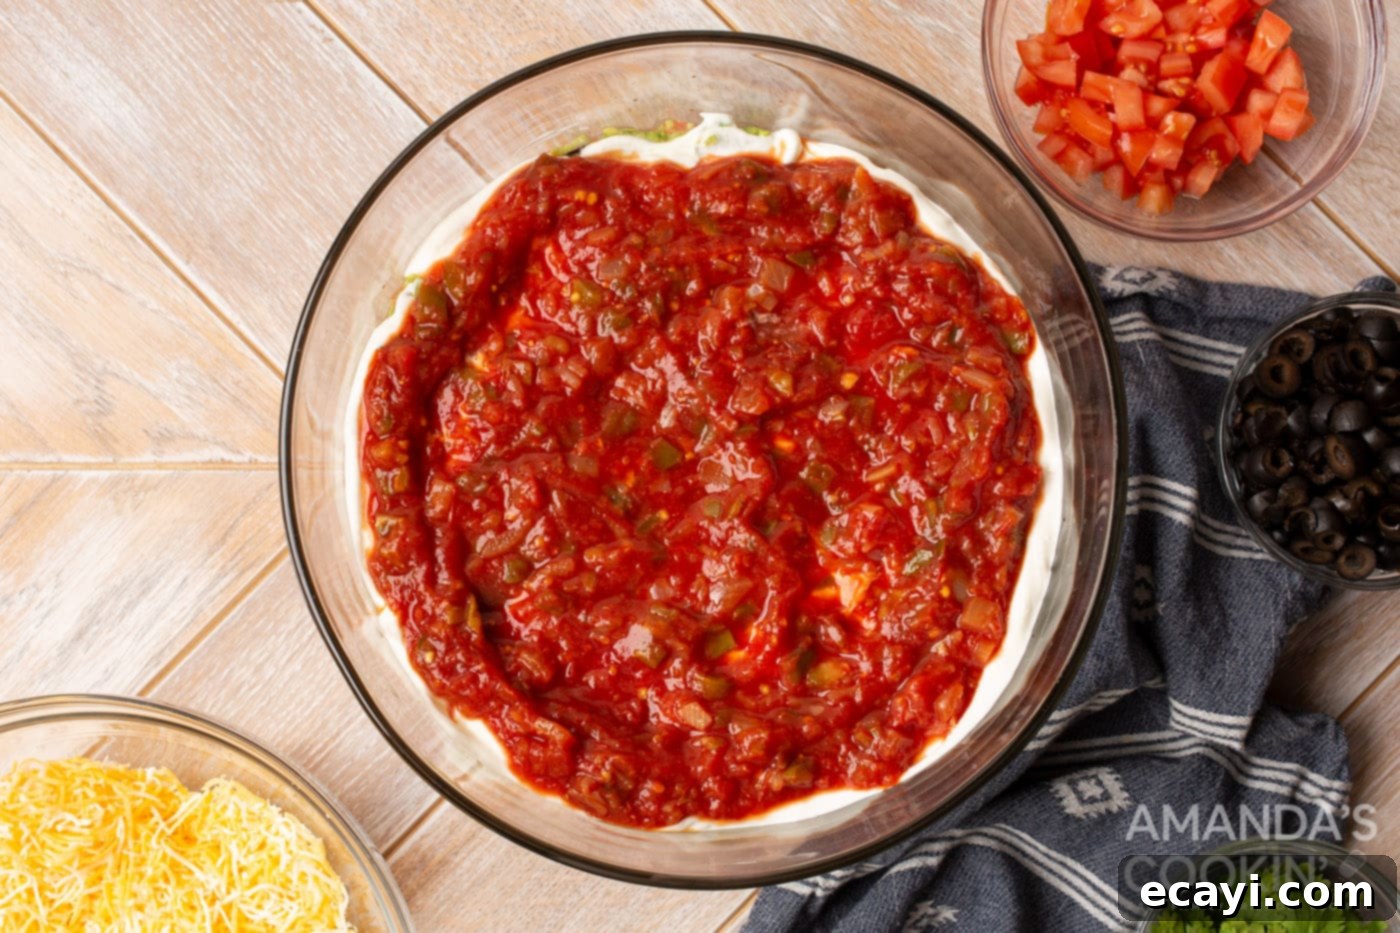
The final layers add vibrant color, refreshing texture, and a burst of savory goodness that completes the 7 Layer Taco Dip experience. A good quality salsa is key here. You can choose your favorite type – mild, medium, or hot, chunky or smooth – to control the spice level and texture. Different flavor profiles, such as corn salsa, black bean salsa, or roasted tomato salsa, can add unique dimensions to your dip. Pico de gallo (fresh chopped salsa) is an excellent substitute for an even fresher flavor and brighter taste.
For the cheese, a generous layer of a Mexican blend of shredded cheese is ideal, offering a mix of Monterey Jack, cheddar, and other complementary cheeses that melt beautifully in your mouth. Freshly shredding your own cheese often melts better and tastes richer than pre-shredded varieties (which can contain anti-caking agents), but either will work to deliver that cheesy goodness. Diced fresh tomatoes add a refreshing, juicy element and a crucial pop of red color. Roma tomatoes or cherry tomatoes (halved or quartered) are great choices; ensure they are well-drained after dicing to prevent excess moisture from making your dip watery. For the briny counterpoint, sliced black olives are a classic addition to any taco dip recipe, providing a savory depth. Ensure they are well-drained to prevent unwanted liquid. If you’re not a fan of olives, feel free to omit them or substitute with another ingredient like corn kernels or finely diced pickled jalapeños for a spicy kick.
The Bright Finish: Fresh Cilantro (or Alternatives)
Finally, a generous topping of fresh chopped cilantro adds a bright, herbaceous finish that ties all the flavors together beautifully and provides a stunning green garnish. For those who find cilantro soapy-tasting (due to a genetic predisposition), finely shredded iceberg or romaine lettuce for a crisp crunch, or thinly sliced green onions are fantastic alternatives that still provide a fresh, contrasting element and visual appeal. Remember, there are many potential additions you can incorporate, such as seasoned ground beef or black beans, so feel free to mix it up a bit and suit this dip to your specific tastes and preferences, making it truly unique!
How to Make Your Best 7 Layer Taco Dip
These step by step photos and instructions are here to help you visualize how to make this recipe. You can Jump to Recipe to get the printable version of this recipe, complete with measurements and instructions at the bottom.
Making this iconic layered dip is surprisingly straightforward, mostly involving assembling pre-prepped ingredients. The key is to create distinct, even layers for both visual appeal and optimal flavor distribution. Precision in layering ensures that each bite delivers the full spectrum of flavors and textures. Follow these simple steps for a truly show-stopping appetizer:
-
Prepare the Refried Bean Base: In a medium pot on your stovetop, set to medium-low heat, combine the canned refried beans with the taco seasoning mix. Stir constantly until the seasoning is fully incorporated and the beans are slightly warmed and easy to spread. This warming step is crucial for achieving a smooth, flavorful base that’s easy to work with. Once thoroughly mixed and seasoned, pour the refried bean mixture into the bottom of your chosen serving dish – a 3-5 quart glass container or a standard 9×13 casserole dish works perfectly, allowing ample space for all layers. Spread the bean mixture evenly across the bottom, ensuring a consistent layer, then allow it to cool completely. Cooling prevents the heat from the beans from prematurely warming or melting the cooler, creamy layers above it, ensuring each layer maintains its integrity and visual separation.

-
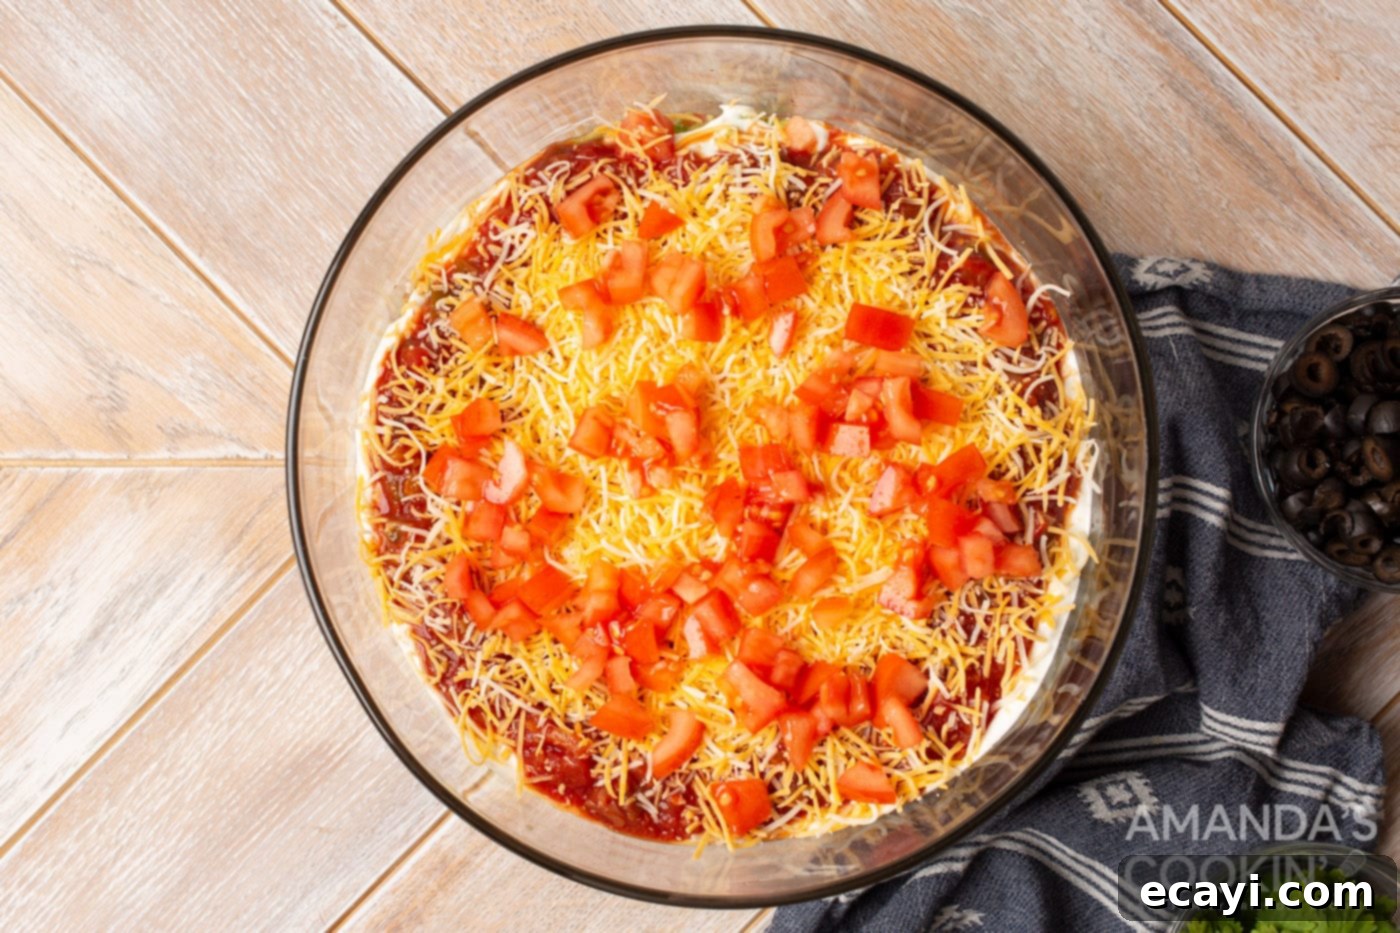
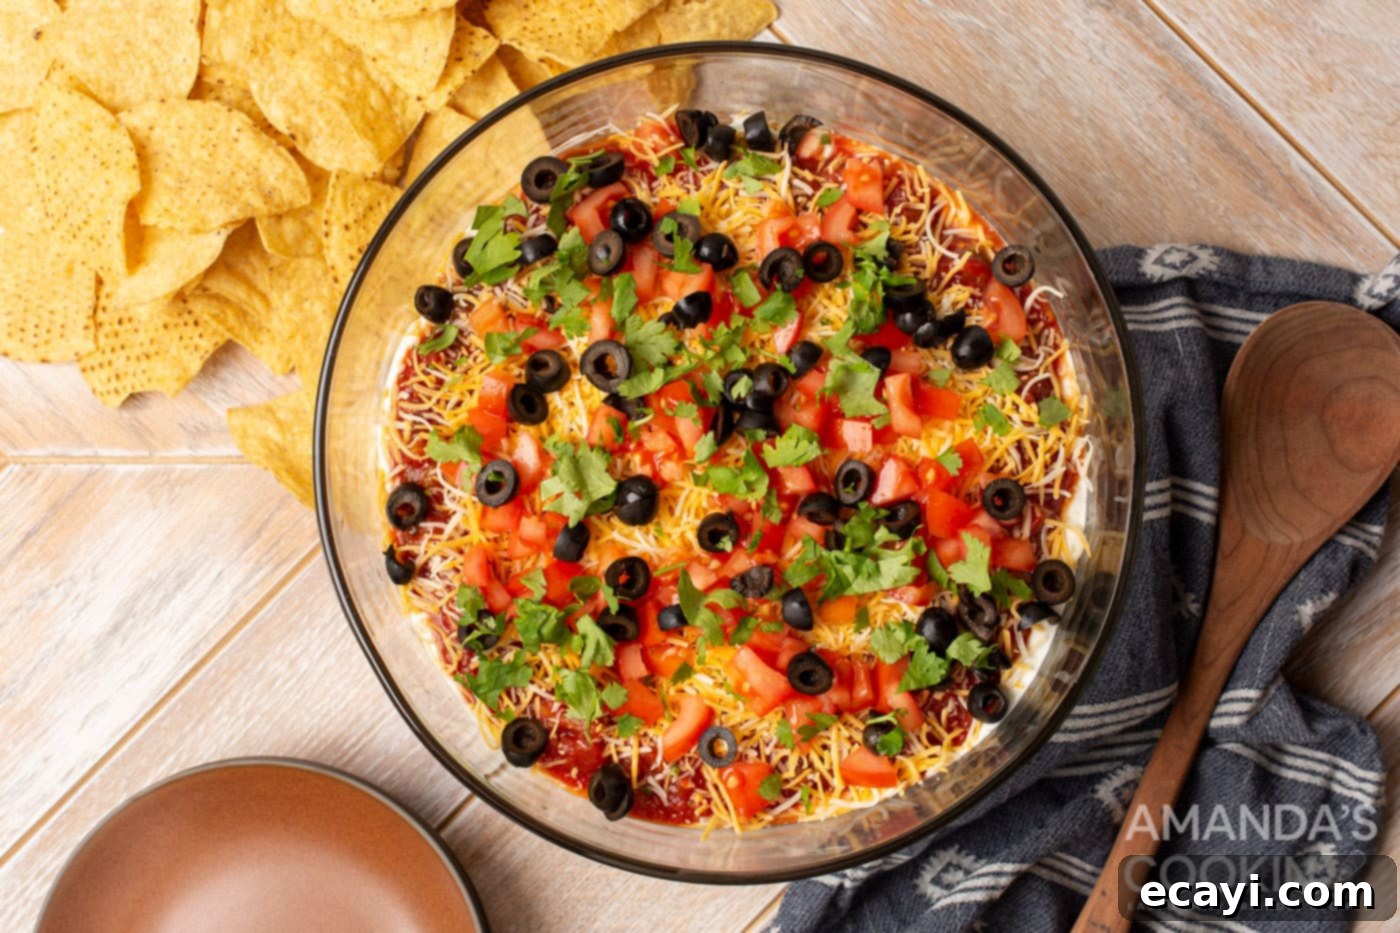
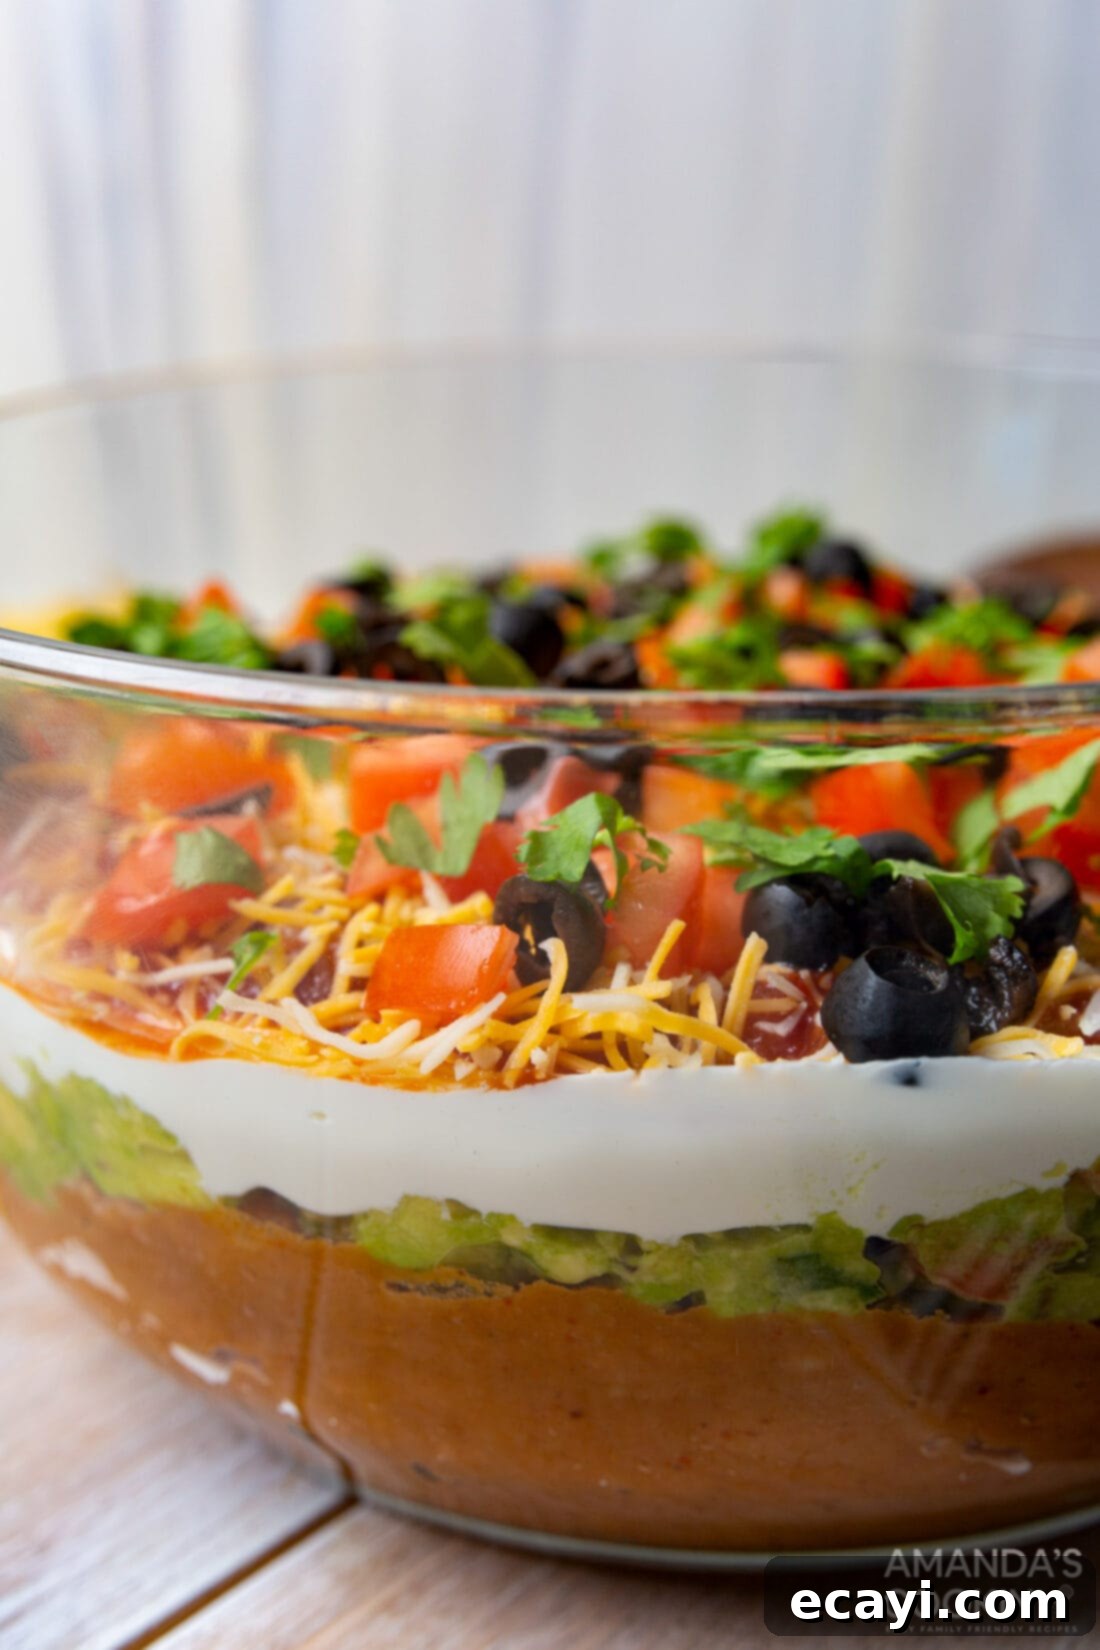
Assemble the Remaining Layers: Once the bean layer has completely cooled, it’s time to meticulously build the remaining layers. Work carefully and gently to create distinct and visually appealing strata, using a spoon or offset spatula to spread each ingredient evenly to the edges of the dish. Follow this specific order for the best results and a harmonious flavor profile: first, spread the creamy, zesty guacamole evenly over the refried beans. Next, add the smooth sour cream, making sure to spread it gently to avoid mixing with the guacamole below. Then, layer the vibrant, well-drained salsa, followed by the shredded Mexican cheese. Finally, scatter the crisp diced tomatoes and briny sliced olives evenly over the cheese. Finish with a generous sprinkling of fresh chopped cilantro or, if you prefer, finely shredded lettuce for an added crunch and a beautiful pop of green color. The careful layering and visual impact of these distinct layers are part of what makes this 7 layer taco dip so appealing and appetizing!


-
Chill for Optimal Flavor and Firmness: After carefully layering all the ingredients, cover the dish tightly with plastic wrap. This is a crucial step for both flavor development and structural integrity. Refrigerate the assembled 7 layer dip for at least 30 minutes, or ideally, several hours up to overnight. Chilling allows all the wonderful flavors to meld beautifully, creating a more cohesive and delicious taste experience. More importantly, it helps the dip firm up significantly, making it much easier to scoop with chips without it turning into a messy pile. This firm consistency is key for a visually appealing and easy-to-eat party appetizer. The longer it chills, the better it holds its shape and flavor.

-
Serve and Savor: When you’re ready to serve, simply uncover your perfectly chilled dip and place it prominently on your appetizer table. Arrange a generous supply of sturdy tortilla chips around the dish – extra-thick or “scoops” style chips work best to handle the hearty layers. For an extra touch of freshness and visual appeal, you can garnish with a few extra cilantro sprigs or a lime wedge before serving. Then, step back and watch your guests delight in this ultimate party appetizer! Be prepared for it to disappear quickly, as this dip is always a major hit.
Frequently Asked Questions & Expert Tips for 7 Layer Dip Success
To ensure your 7 layer taco dip is nothing short of spectacular and to address any common concerns, here are answers to frequently asked questions and some expert tips to elevate your creation and make your party prep a breeze.
The beauty of a layered taco dip is its incredible versatility! You can easily customize it with additional layers or toppings to suit your preferences, dietary needs, and impress your guests. Some popular and delicious additions include: shredded iceberg or romaine lettuce for a refreshing crunch and added bulk; finely chopped white or red onion for a sharper bite; thinly sliced green onions for a milder onion flavor and vibrant green garnish; sliced jalapeños (fresh or pickled) for a spicy kick; corn kernels (fresh, frozen, or canned and drained) for sweetness and texture; or black beans (rinsed, drained, and perhaps seasoned) for extra protein and fiber. For meat lovers, browned and seasoned ground beef or turkey (drained of excess fat) makes an excellent savory layer. You could also experiment with different types of cheese (like Cotija or Pepper Jack), a drizzle of hot sauce, or a sprinkle of chili powder or smoked paprika for an extra flavor boost. Don’t be afraid to make this dip your own unique masterpiece!
This delicious dip is an excellent make-ahead appetizer and will last for 3-4 days when kept in an air-tight container or tightly covered with plastic wrap in the refrigerator. You can comfortably prepare it a day in advance or several hours before your event, which helps reduce last-minute stress. A key concern with making it ahead is the guacamole layer, which tends to brown when exposed to air. However, in this layered dip, the guacamole is typically the second layer (above the beans and below the sour cream), which helps shield it from oxidation, allowing it to stay fresh longer than if it were an exposed top layer. Even if a slight discoloration occurs, it’s still completely safe and delicious to eat as long as it has been stored properly in the fridge. For best results, assemble all layers except the very top delicate garnishes (like fresh cilantro or shredded lettuce) if making more than 12 hours ahead. Add those fresh elements just before serving for optimal appearance and crispness.
For a dip with so many delicious layers and varying textures, you absolutely need sturdy dippers! Classic corn tortilla chips are, of course, the quintessential go-to choice. Look for thick, robust corn tortilla chips that can handle the weight and texture of all seven layers without breaking mid-scoop. Scoops-style tortilla chips are particularly excellent as they are specifically designed to pick up a generous amount of dip with ease. Beyond chips, consider offering a vibrant variety of fresh vegetable sticks for a healthier and refreshing option: carrot sticks, celery sticks, colorful bell pepper strips (red, yellow, or orange), crisp cucumber slices, or even jicama sticks add a wonderful crunch. Mini bell peppers, sliced in half lengthwise, also make fantastic edible scoops. The key is to provide options that can withstand the hearty and multi-layered nature of this incredible dip, ensuring every guest can enjoy a satisfying scoop.
Several layers in this dip, particularly the salsa and diced tomatoes, contain natural moisture that can potentially make your dip watery over time if not managed. To minimize this, ensure you drain your salsa thoroughly before adding it, especially if it’s a very juicy variety. For diced fresh tomatoes, you can gently squeeze them in a paper towel or blot them after dicing to remove excess liquid before layering. Additionally, ensure your olives are well-drained. Another effective tip is to use a slotted spoon or paper towel to gently press down on the salsa layer just before adding the cheese, absorbing any surface moisture. Chilling the dip for an adequate amount of time (at least 30 minutes, ideally longer) also helps the layers meld and set, preventing them from releasing too much liquid. If you anticipate serving the dip over several hours, it’s a good practice to add the most watery components, like salsa and tomatoes, closer to serving time or just before the final chill.
Absolutely! This 7 layer taco dip is surprisingly adaptable for healthier or specific dietary needs without sacrificing its amazing flavor. You can opt for low-fat or fat-free refried beans, light or fat-free sour cream, or substitute sour cream entirely with plain Greek yogurt for a protein boost and a pleasant tangier taste. Choose a low-sodium or no-sugar-added salsa. Instead of a full layer of shredded Mexican cheese, you could use a smaller amount of a stronger-flavored cheese, or even omit it and add more fresh vegetables like extra shredded lettuce, corn, or black beans. Increase the amount of fresh toppings overall. For a vegetarian version, simply ensure all ingredients are meat-free. For a vegan version, use vegan refried beans (check labels), make a cashew-based sour cream or use a store-bought vegan sour cream, substitute guacamole with a creamy avocado dip, and use dairy-free shredded cheese. Serve with a mix of sturdy tortilla chips and a generous platter of fresh vegetable dippers like bell pepper strips, cucumber slices, and carrot sticks for added crunch and nutrition.
If you’re bringing your delicious 7 layer dip to a potluck or party, careful transportation is key to maintaining its integrity and freshness. Choose a sturdy, lidded serving dish or a casserole dish with a tight-fitting lid. Alternatively, if your dish doesn’t have a lid, cover it securely with multiple layers of plastic wrap, pressing it directly onto the top layer to minimize air exposure, and then add a layer of aluminum foil for extra protection against spills and jostling. To maintain freshness and firmness, especially on hot days or for longer distances, keep the dip chilled in a cooler with ice packs. Once you arrive at your destination, try to get it into the refrigerator as soon as possible until you’re ready to serve. If you plan to add delicate garnishes like fresh cilantro or shredded lettuce, it’s often best to pack these separately in small containers and add them just before serving for optimal freshness, crispness, and appealing presentation.
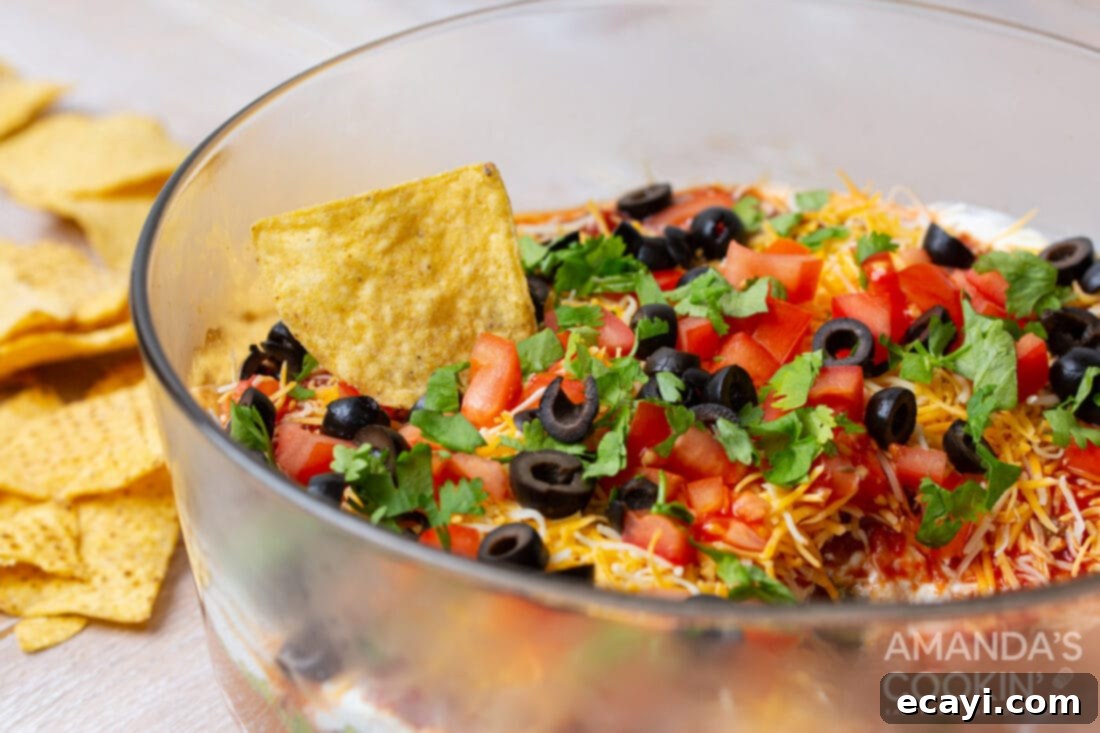
Creative Serving Suggestions for Your 7 Layer Dip
The 7 layer dip is the quintessential party appetizer, guaranteed to be a hit at any gathering, from casual get-togethers to festive celebrations. While it’s perfectly delicious served simply with sturdy tortilla chips, there are many ways to elevate its presentation and extend its appeal, making it an even more memorable dish. Serve this incredible dip at a slightly cool room temperature or chilled, depending on your preference and the ambient temperature of your event. If serving outdoors on a hot day, keeping it chilled in a serving bowl nested in ice is advisable. For maximum enjoyment, aim for slightly cool, allowing the complex flavors to truly shine without being overly cold.
This versatile dip is perfect for a wide array of occasions: bring it to football parties, Super Bowl gatherings, casual potlucks, exciting game nights, festive birthday celebrations, holiday parties, or really any time you need a delicious and hassle-free appetizer that you know everyone will thoroughly enjoy. Its vibrant colors and multiple textures make it a visually appealing centerpiece for any food spread. Consider serving it in a clear glass dish to showcase its beautiful, distinct layers – this presentation always garners “oohs and aahs” from guests. Beyond traditional tortilla chips, offer an assortment of dippers such as pita chips, savory crackers, or a vibrant selection of fresh vegetable sticks like crisp cucumber slices, crunchy carrot and celery sticks, and colorful bell pepper strips for a lighter, healthier option. You can even set up a mini “dip bar” with extra toppings on the side, allowing guests to customize their scoops with extra cilantro, fresh or pickled jalapeños, a dash of hot sauce, or a sprinkle of additional cheese. With a dip this popular, there are rarely any leftovers!
More Irresistible Party Dip Recipes You’ll Love
If you’re a fan of delicious, easy-to-make, and crowd-pleasing dips, then you’re in for a treat! Dips are often the heart of any good party spread, offering a variety of flavors and textures that cater to every guest and encourage mingling. After mastering the sensational 7 layer taco dip, you might be looking for more fantastic options to round out your appetizer menu or simply expand your repertoire of party favorites. Here are some other amazing party dip recipes that are sure to be just as popular and devoured just as quickly:
- Hearty & Flavorful Bean Dip
- Warm & Creamy Hot Spinach Dip
- Savory Beer Cheese Dip
- Smoky & Cheesy Queso Dip
- Spicy Buffalo Chicken Dip
- Philly Cheesesteak Dip
- Decadent Million Dollar Dip
- Elegant Smoked Salmon Dip
I love to bake and cook and share my kitchen experience with all of you! Remembering to come back each day can be tough, that’s why I offer a convenient newsletter every time a new recipe posts. Simply subscribe and start receiving your free daily recipes!

7 Layer Taco Dip
IMPORTANT – There are often Frequently Asked Questions within the blog post that you may find helpful. Simply scroll back up to read them!
Print It
Pin It
Rate It
Save ItSaved!
Ingredients
- 31 oz refried beans canned
- 1 oz taco seasoning mix
- 3 cups guacamole
- 24 oz sour cream
- 16 oz salsa
- 1 cup shredded Mexican cheese
- 1 tomato diced
- 2.25 oz sliced olives drained
- ¼ cup cilantro chopped, or shredded lettuce
Things You’ll Need
-
13×9 baking dish
Before You Begin
- To season the refried beans, place them in a pot on the stovetop to warm up a bit then mix in the taco seasoning. This can be done quickly, and you do not have to actually cook the beans. The heat simply allows you to mix the beans easier. If you’d prefer, you can mix the taco seasoning straight into the sour cream layer instead, I have done this many times in the past.
Instructions
-
In a medium pot on the stovetop over medium-low heat, mix refried beans and taco seasoning mix. Pour into the bottom of a 3-5 quart glass container or 9×13 casserole dish. Allow to cool.
-
Create layers in order of ingredients: guacamole, sour cream, salsa, shredded cheese, tomatoes, olives and cilantro/shredded lettuce.
-
Refrigerate covered for at least 30 minutes up to overnight to help firm. Serve with chips!
Nutrition
The recipes on this blog are tested with a conventional gas oven and gas stovetop. It’s important to note that some ovens, especially as they age, can cook and bake inconsistently. Using an inexpensive oven thermometer can assure you that your oven is truly heating to the proper temperature. If you use a toaster oven or countertop oven, please keep in mind that they may not distribute heat the same as a conventional full sized oven and you may need to adjust your cooking/baking times. In the case of recipes made with a pressure cooker, air fryer, slow cooker, or other appliance, a link to the appliances we use is listed within each respective recipe. For baking recipes where measurements are given by weight, please note that results may not be the same if cups are used instead, and we can’t guarantee success with that method.
