The Best Melting Potatoes Recipe: Crispy Outside, Creamy Inside Perfection
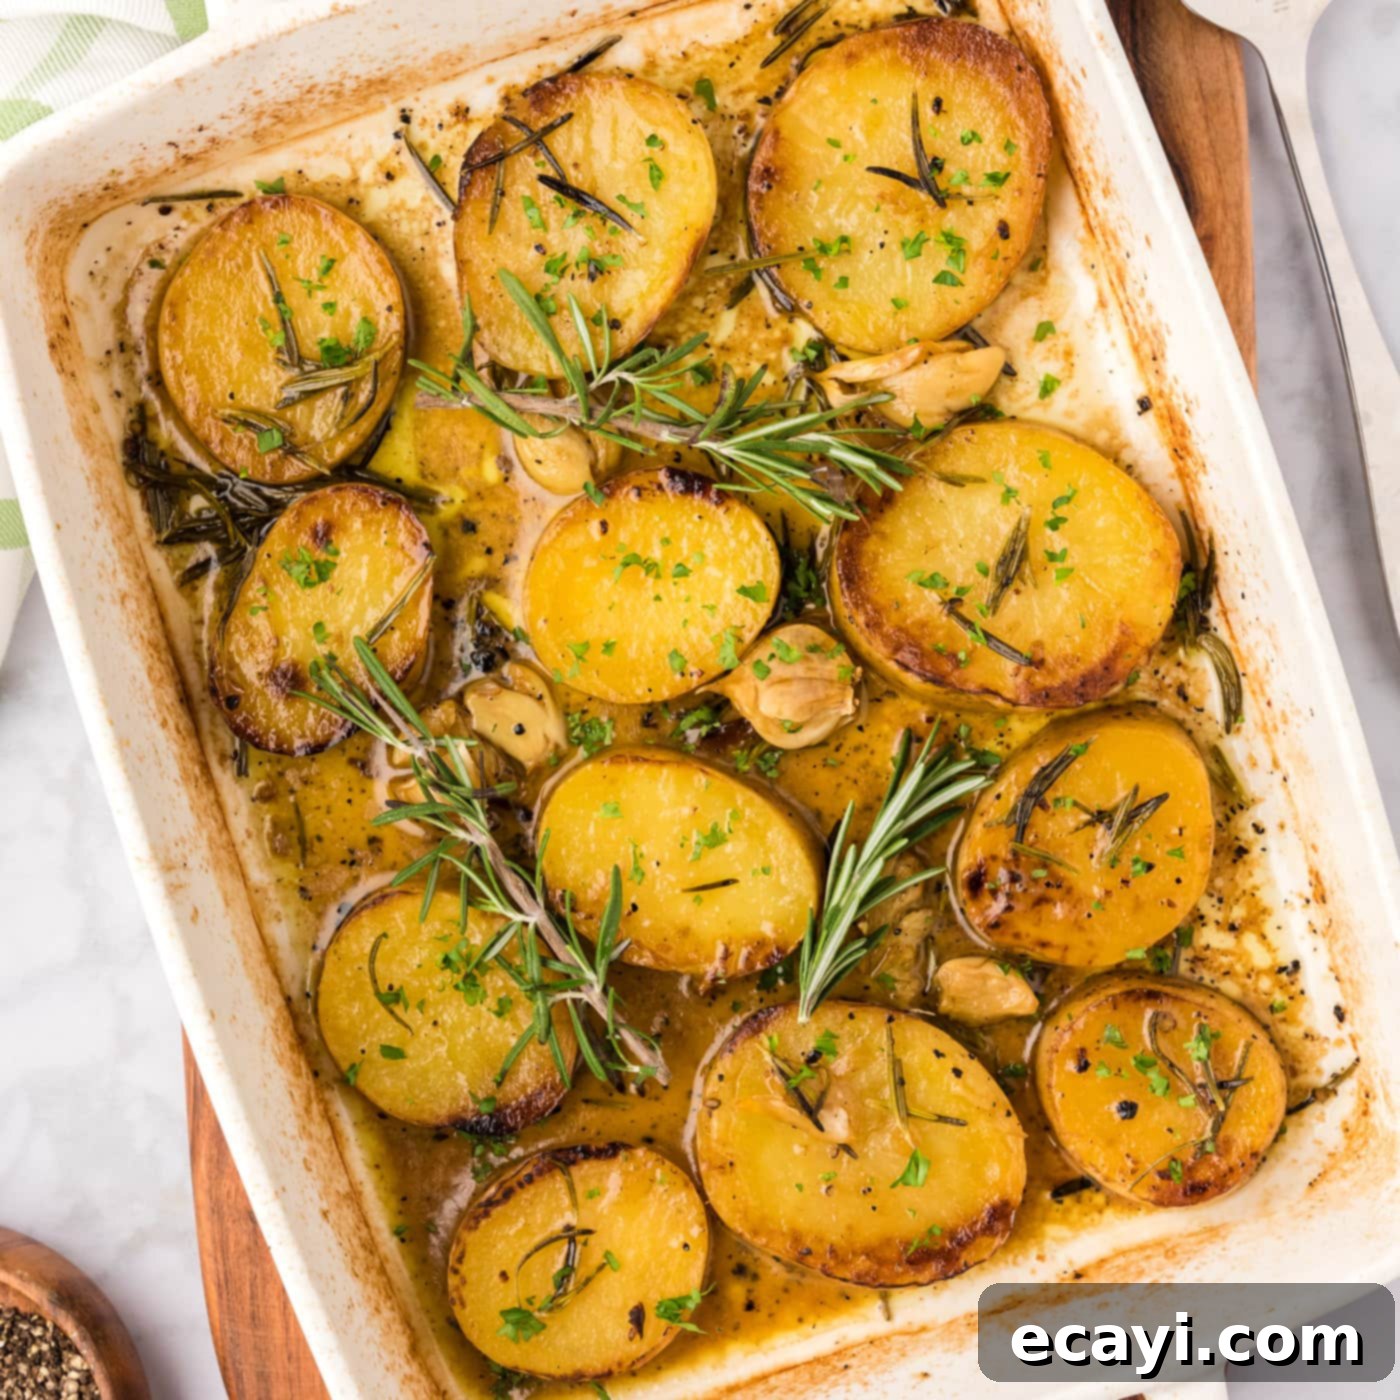
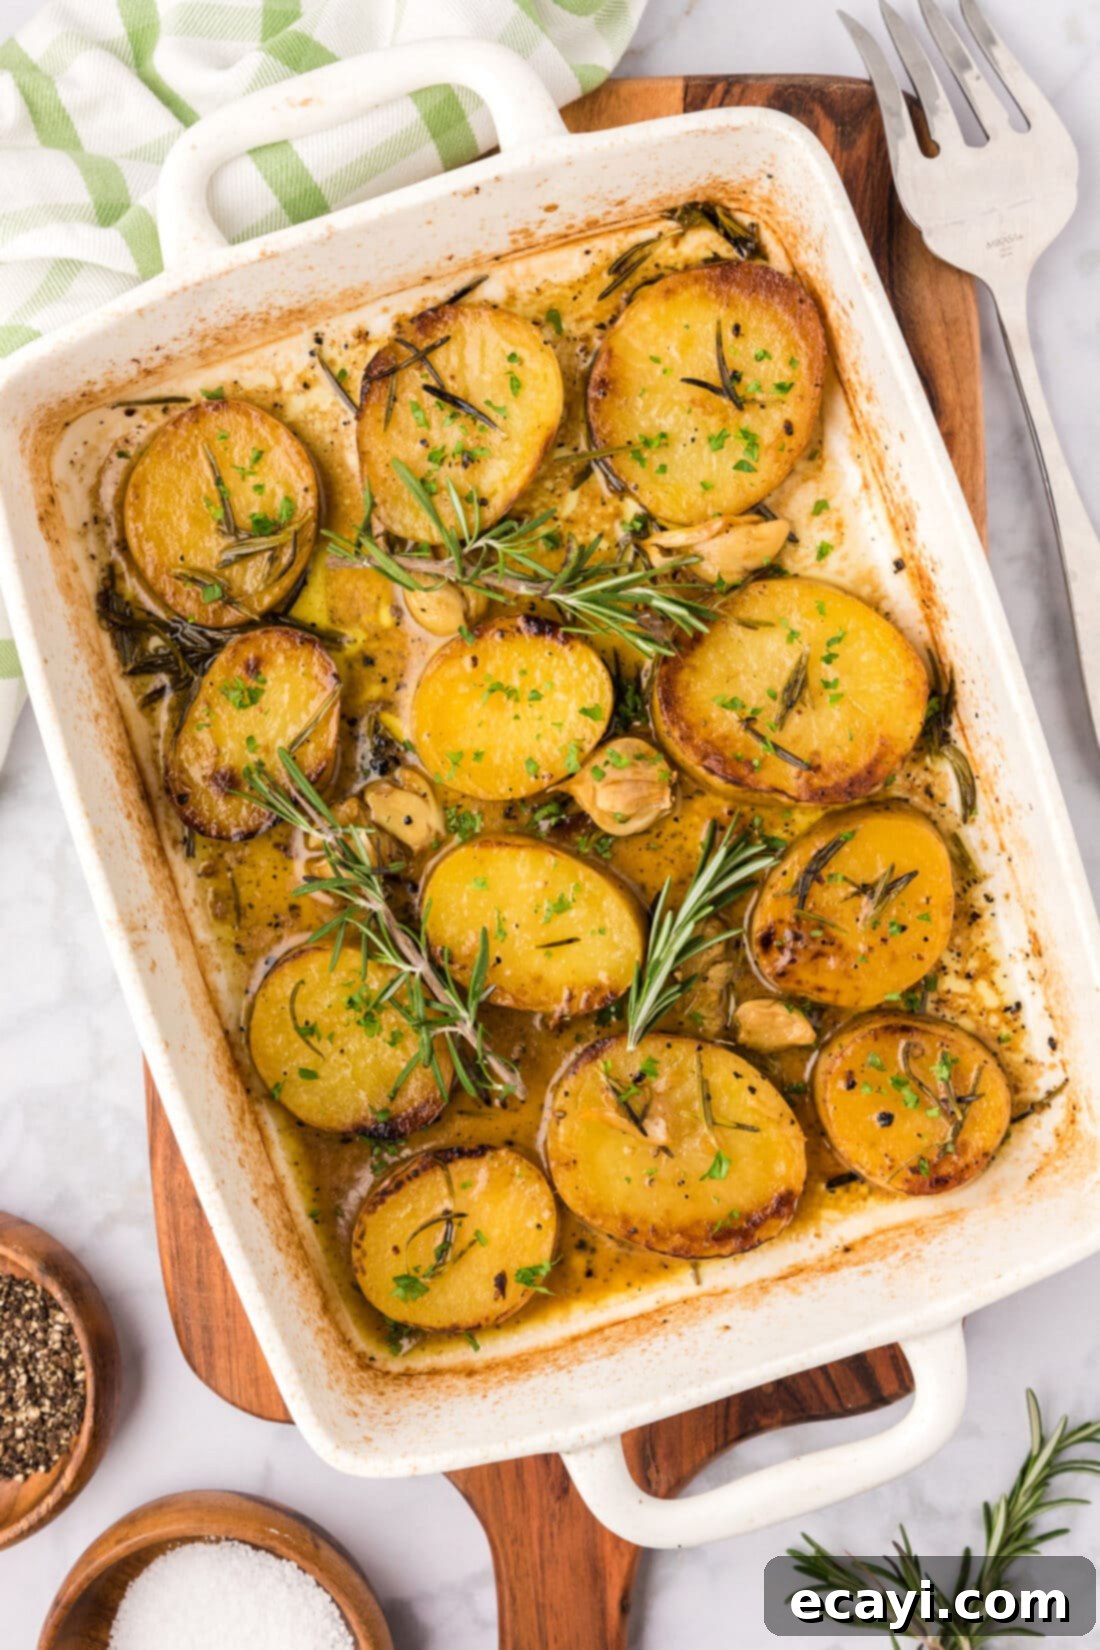
Prepare to be enchanted by this truly remarkable melting potatoes recipe, where simple sliced potatoes are transformed into a culinary masterpiece. Each thick-cut potato round is lovingly enveloped in a rich symphony of aromatic herbs, luxurious butter, pungent garlic, and savory chicken broth. The result is an extraordinary side dish that boasts an unbelievably creamy, tender texture on the inside, beautifully contrasted by a delightfully crisp, golden-brown crust on the outside. This isn’t just another potato dish; it’s an experience that lives up to its name, quite literally melting in your mouth with every exquisite bite.
Why This Melting Potatoes Recipe Will Be Your New Favorite
There’s a reason these potatoes are called “melting potatoes” and not simply roasted potatoes – they truly live up to their delectable name, practically dissolving in your mouth with an unmatched tenderness. The magic of this recipe lies in its ingenious cooking method, which delivers a perfect balance of textures and deeply infused flavors.
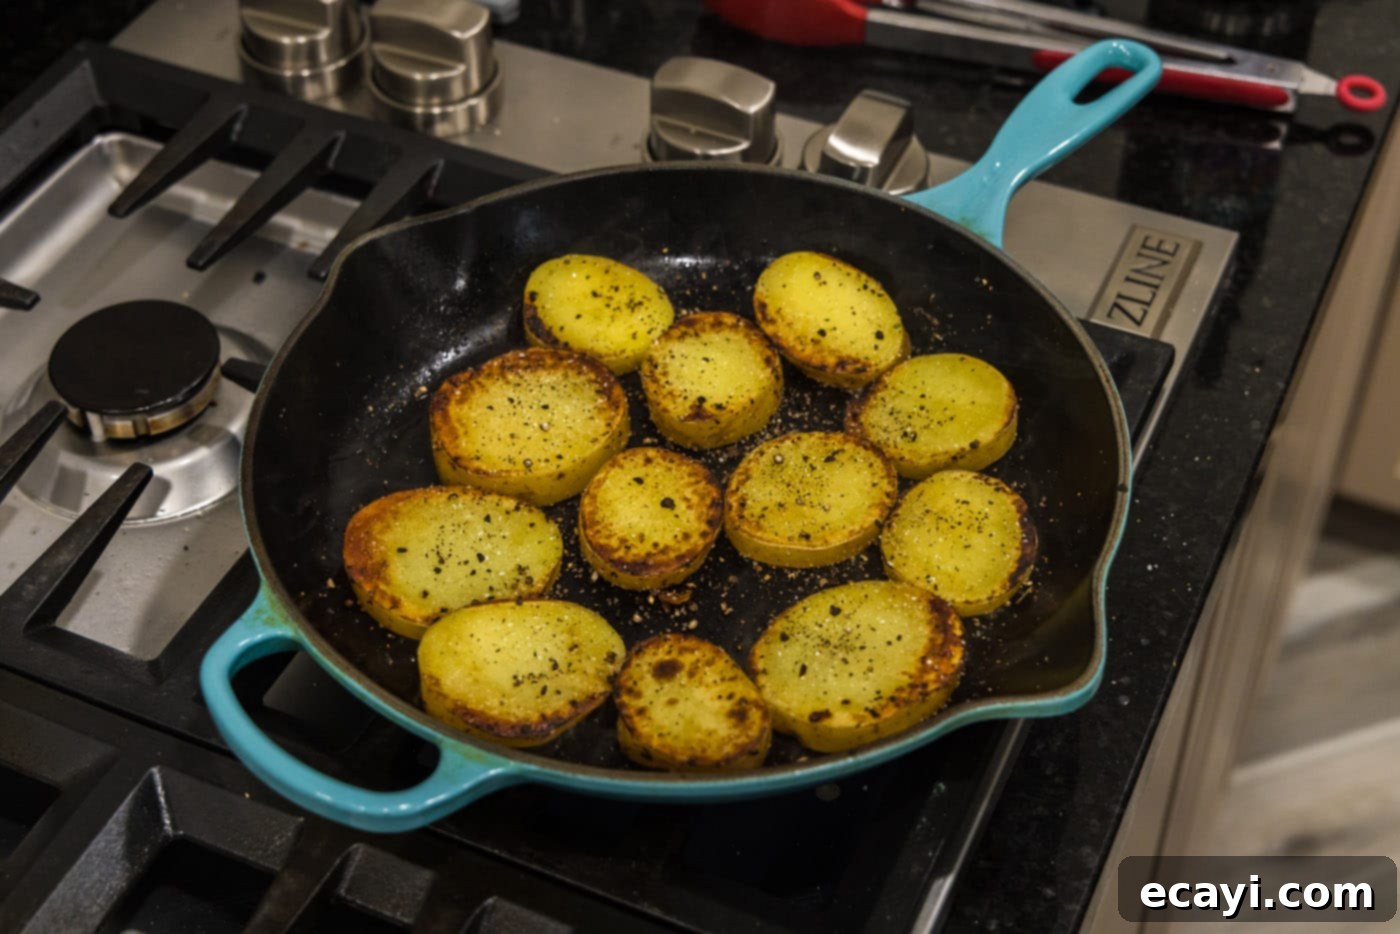
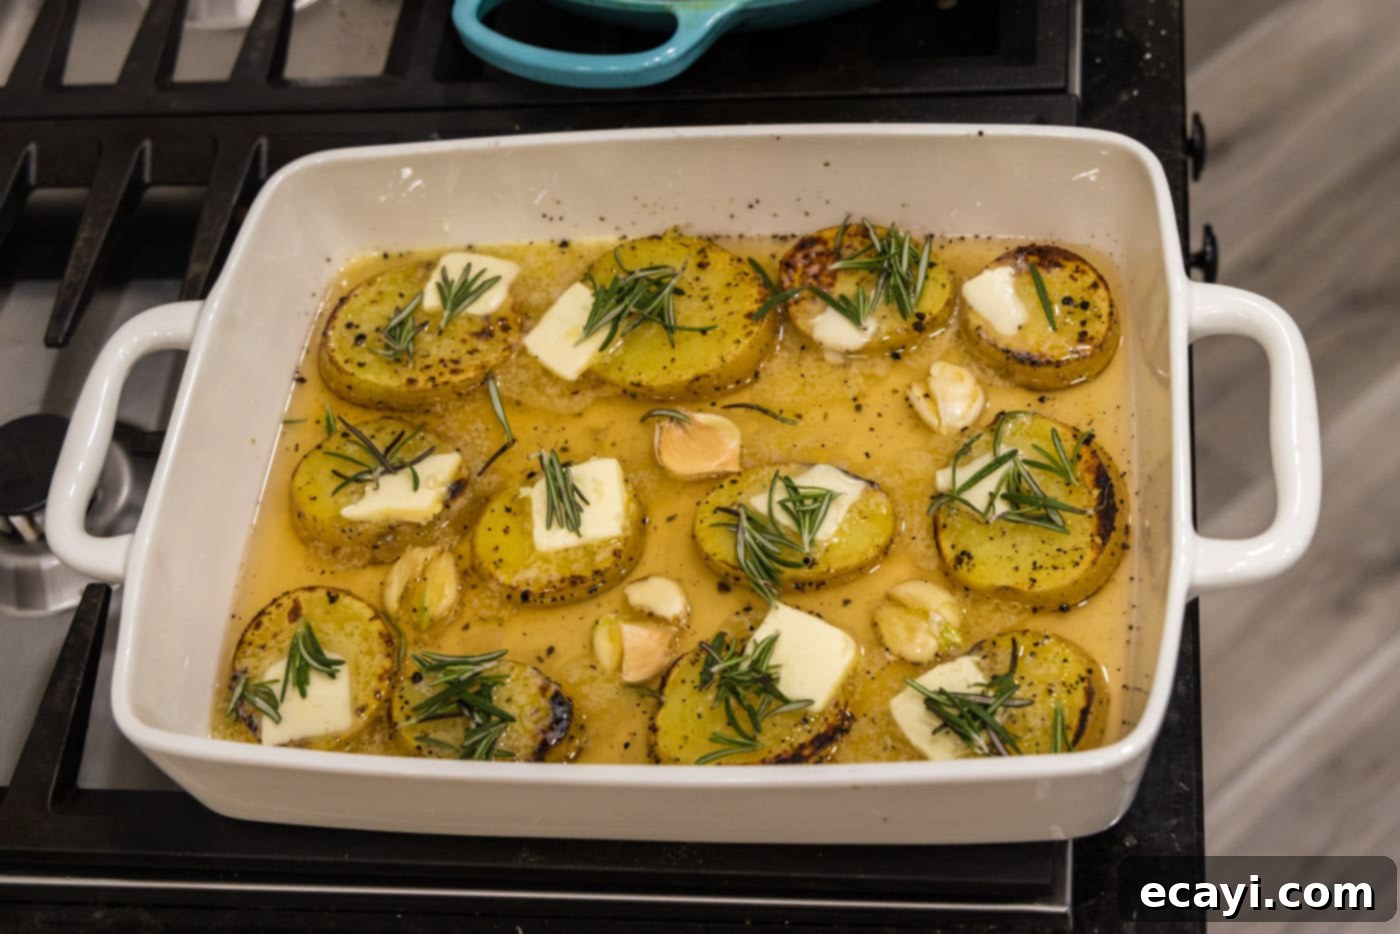
We begin by searing thick-cut potato rounds in a hot skillet. This crucial first step gives these potatoes a significant head start, creating that irresistible crispy, golden-brown exterior that is so desirable. This initial sear isn’t just for color; it locks in moisture and develops a beautiful depth of flavor. Once seared to perfection, these golden rounds are then transferred to a baking dish, where they embark on their “melting” journey. They are roasted in a rich, flavorful bath consisting of savory chicken broth, fragrant whole garlic cloves, fresh sprigs of rosemary, and generous pats of unsalted butter.
This is where the true transformation unfolds. As the potatoes slowly roast, they diligently soak up the chicken broth and the surrounding ingredients. This infusion process saturates them with incredible flavor, transforming their starchy interior into an ultra-tender, creamy consistency. The butter and the high roasting temperature work in harmony to caramelize the sugars on the potato’s surface, enhancing that crispy crust while ensuring the core remains exquisitely soft. The result is a potato dish that is wonderfully creamy, caramelized to perfection, and so tender it literally melts in your mouth – a far cry from standard roasted potatoes. It’s a culinary technique that ensures every single bite is bursting with flavor and delightful texture.
Essential Ingredients for Perfect Melting Potatoes
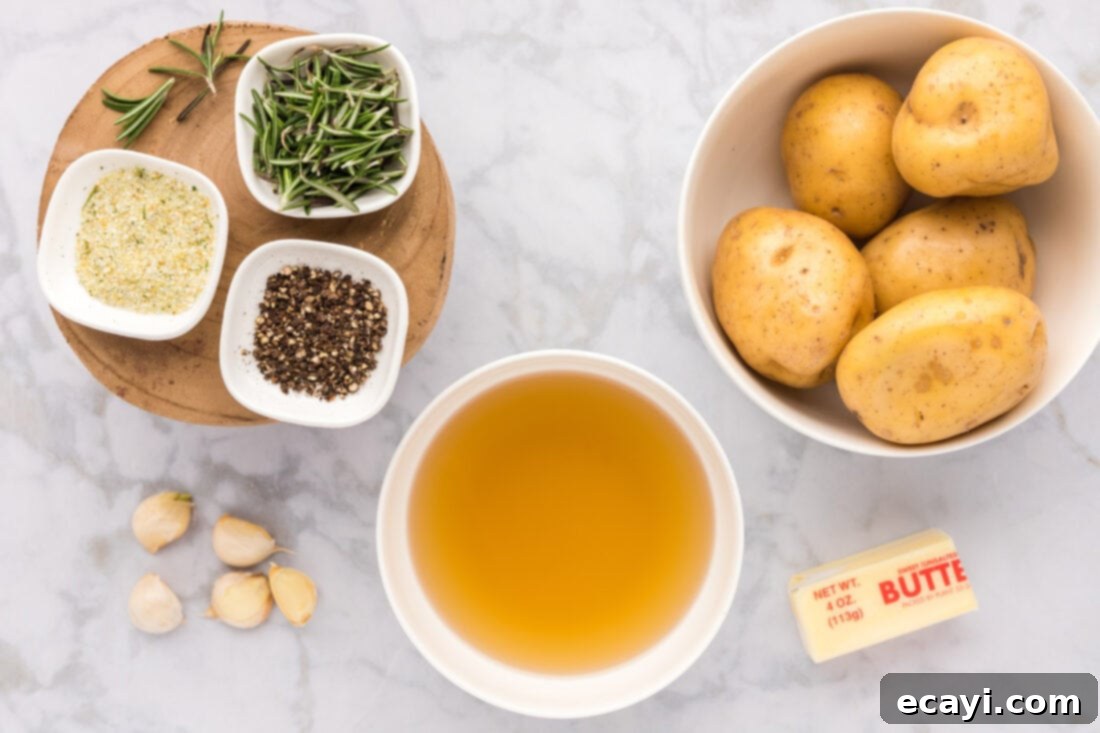
Crafting these extraordinary melting potatoes requires a selection of fresh, high-quality ingredients that work together to create their signature flavor and texture. While the list is simple, each component plays a vital role. For precise measurements, detailed instructions, and a printable version of this delicious recipe, please refer to the complete recipe card located at the very end of this post.
Ingredient Spotlight & Smart Swaps
Understanding your ingredients and knowing when to make smart substitutions can elevate your cooking and adapt recipes to your preferences or what you have on hand. Here’s a closer look at the key components for our melting potatoes:
- POTATOES: For this recipe, Yukon Gold potatoes are highly recommended due to their wonderfully creamy texture and thin skin, which crisps up beautifully. Their buttery flavor perfectly complements the other ingredients. However, if Yukon Golds aren’t available, you have excellent alternatives. Red potatoes also work exceptionally well, offering a slightly waxier texture but still achieving that desirable creamy interior. Even Russet potatoes can be used, though they might require a bit more attention to prevent them from becoming too mushy. If using Russets, ensure they are sliced uniformly and roasted carefully.
- HERBS: Fresh rosemary sprigs bring a robust, earthy, and slightly piney aroma that is quintessential to this dish. The rosemary infuses the broth and potatoes with a fragrant, comforting flavor. Should you wish to experiment or prefer a different herb, fresh thyme is an excellent substitute, offering a more subtle, lemony, and herbaceous note. Other fresh herbs like sage or a blend of Italian herbs could also be explored, depending on your palate and the meal you’re pairing them with.
- BROTH: Chicken broth provides the foundational savory liquid that the potatoes absorb, contributing immense depth of flavor. For a vegetarian or vegan version, a high-quality vegetable broth can be substituted without compromising the “melting” effect. Ensure your broth is low-sodium if you are sensitive to salt, as you will be adding garlic salt separately.
- GARLIC: We use whole, slightly crushed garlic cloves which mellow and sweeten as they roast, imparting a gentle, aromatic garlic essence without being overpowering. The crushing helps release their natural oils and flavors more effectively.
- BUTTER: Unsalted butter is preferred, allowing you to control the overall saltiness of the dish. It contributes to the rich flavor, aids in searing, and helps create that crispy, caramelized exterior. If using salted butter, simply reduce the amount of garlic salt added later.
- SEASONINGS: A simple combination of garlic salt and cracked black pepper is all you need. The garlic salt provides both saltiness and an extra layer of garlic flavor, while black pepper adds a subtle spice. Adjust these to your personal taste.
Mastering the Art of Melting Potatoes: Step-by-Step Guide
These step-by-step photos and detailed instructions are provided to help you visualize each stage of the recipe, ensuring your melting potatoes turn out perfectly. For a concise, printable version of this recipe, complete with exact measurements and instructions, simply Jump to Recipe at the bottom of the post.
- Prepare Your Oven: Begin by preheating your oven to 425°F (220°C). This high temperature is crucial for achieving that crispy exterior and promoting the “melting” effect.
- Wash and Dry Potatoes: Thoroughly rinse the 3 pounds of Yukon Gold potatoes under cold water to remove any dirt. Then, pat them completely dry with a clean kitchen towel or paper towels. It’s important for the potatoes to be dry for proper searing. Do not peel the potatoes; their skin adds texture, flavor, and nutrients, and crisps up beautifully during cooking.
- Trim and Slice: Carefully cut off both ends of each potato. While you can discard these ends, they are perfectly edible and can be saved for another dish, such as a quick roast or a soup base. Next, slice the potatoes into thick, uniform pieces, approximately 3/4-inch thick. Consistency in thickness is key here, as it ensures even cooking and uniform texture across all potato slices.
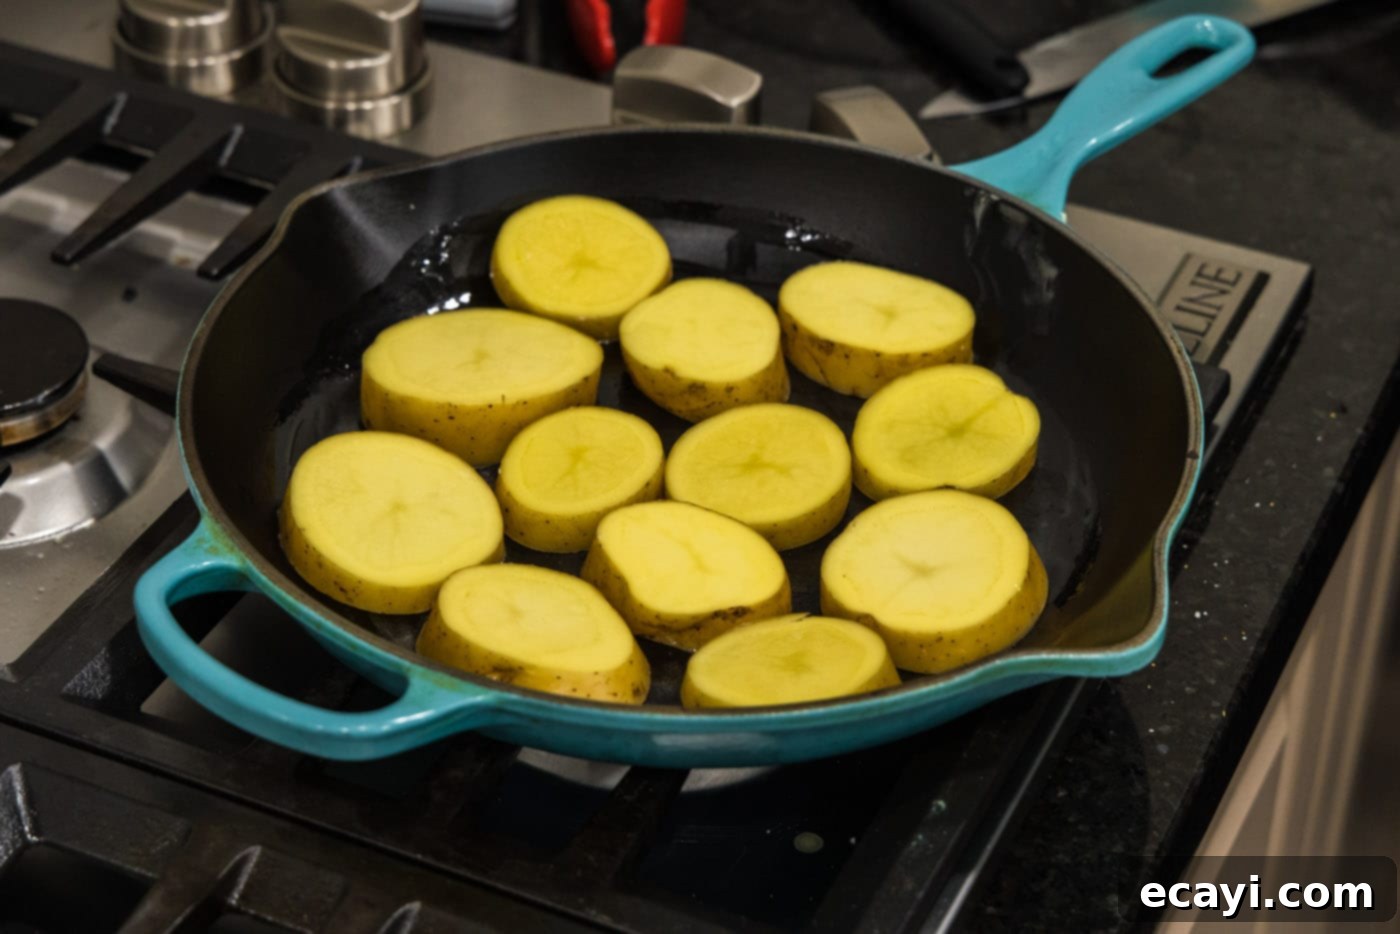
- Melt Butter in Skillet: In a large, heavy-bottomed skillet (cast iron works wonderfully for this), melt 1 1/2 tablespoons of unsalted butter over medium-high heat. Once melted, use a basting brush to evenly spread the melted butter all over the bottom surface of the skillet, ensuring comprehensive coverage for searing.
- First Sear: Carefully place the sliced potatoes into the hot skillet, arranging them in a single layer if possible. You may need to work in batches, depending on the size of your skillet, to avoid overcrowding. Overcrowding can steam the potatoes instead of searing them, preventing that desired crisp crust.
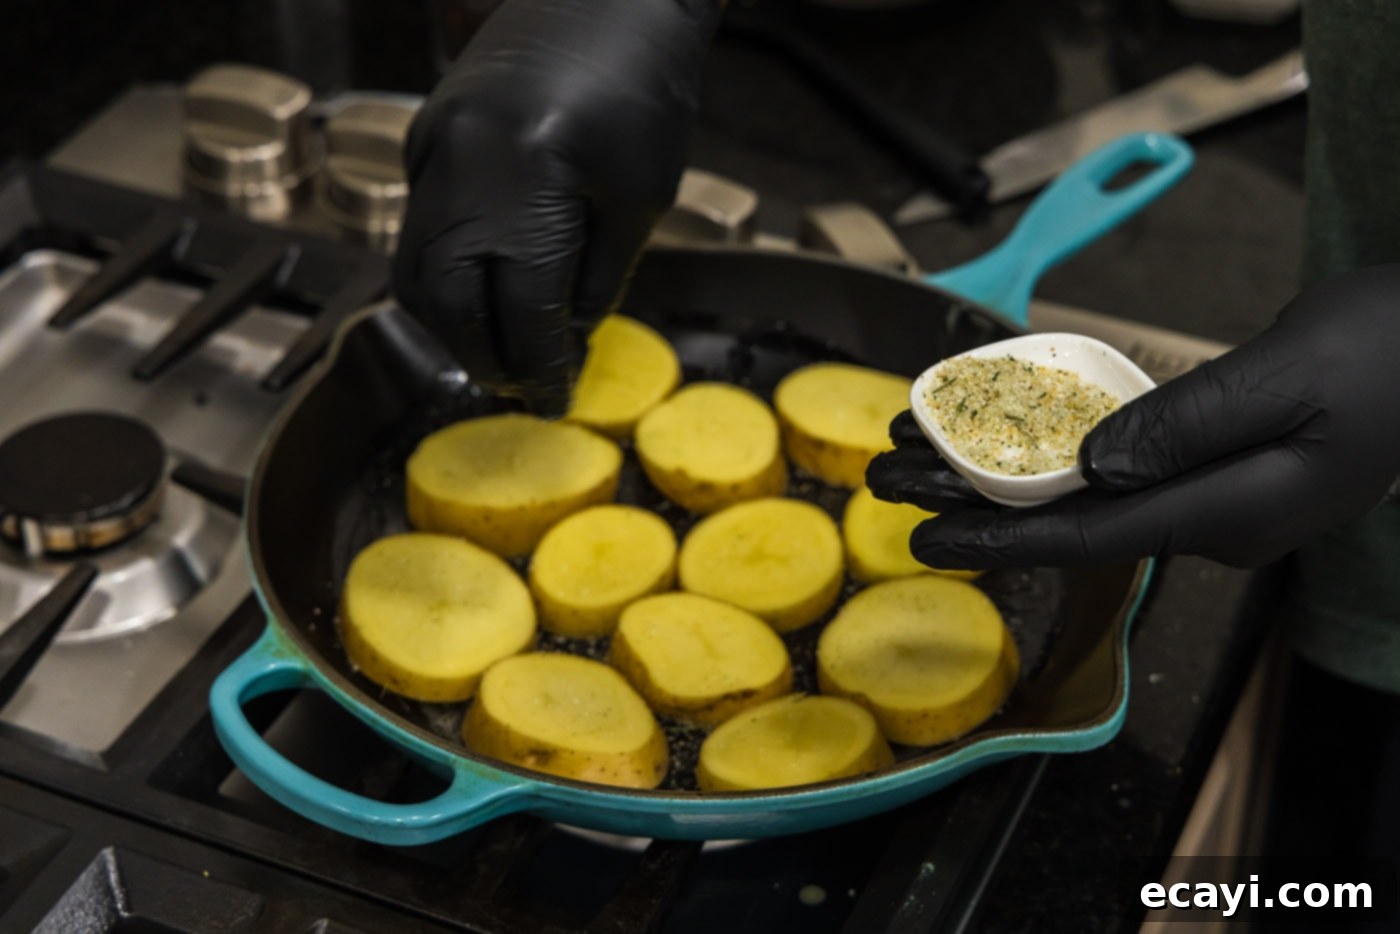
- Season and Cook First Side: Once the potatoes are in the skillet, generously season the exposed side with garlic salt and freshly cracked black pepper to taste. Allow them to cook undisturbed for 5-7 minutes, or until a beautiful, deep golden-brown crust forms on the bottom. Resist the urge to move them too soon!


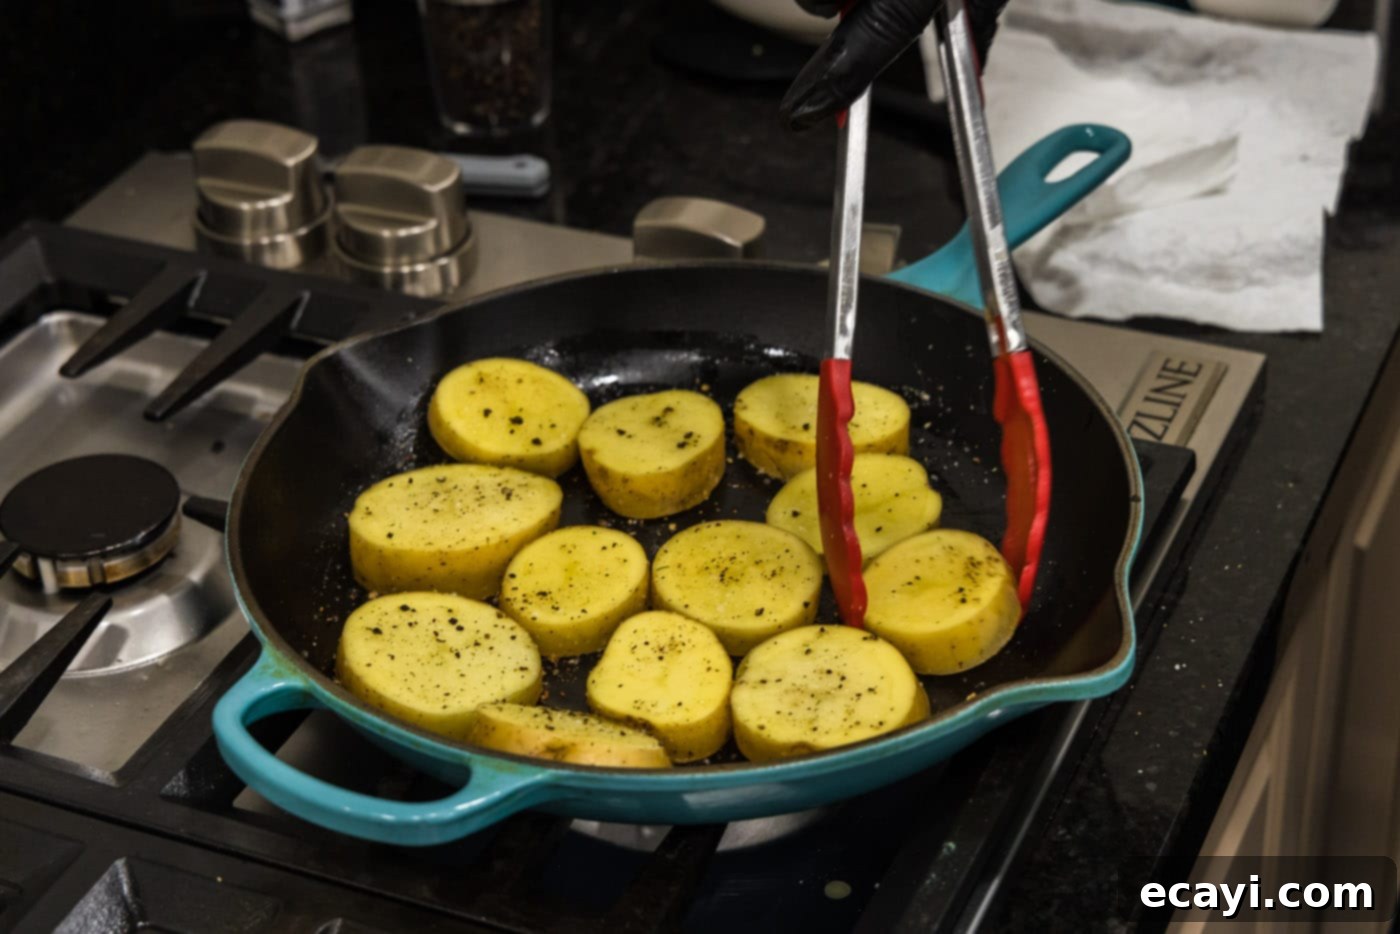
- Flip and Season Second Side: Using tongs, carefully turn each potato slice over to expose the browned side. Season the newly exposed side with additional garlic salt and cracked black pepper. Continue cooking for another 5-7 minutes, until the second side also develops a beautiful golden-brown crust. You might not need to use all of your seasonings; adjust based on preference.


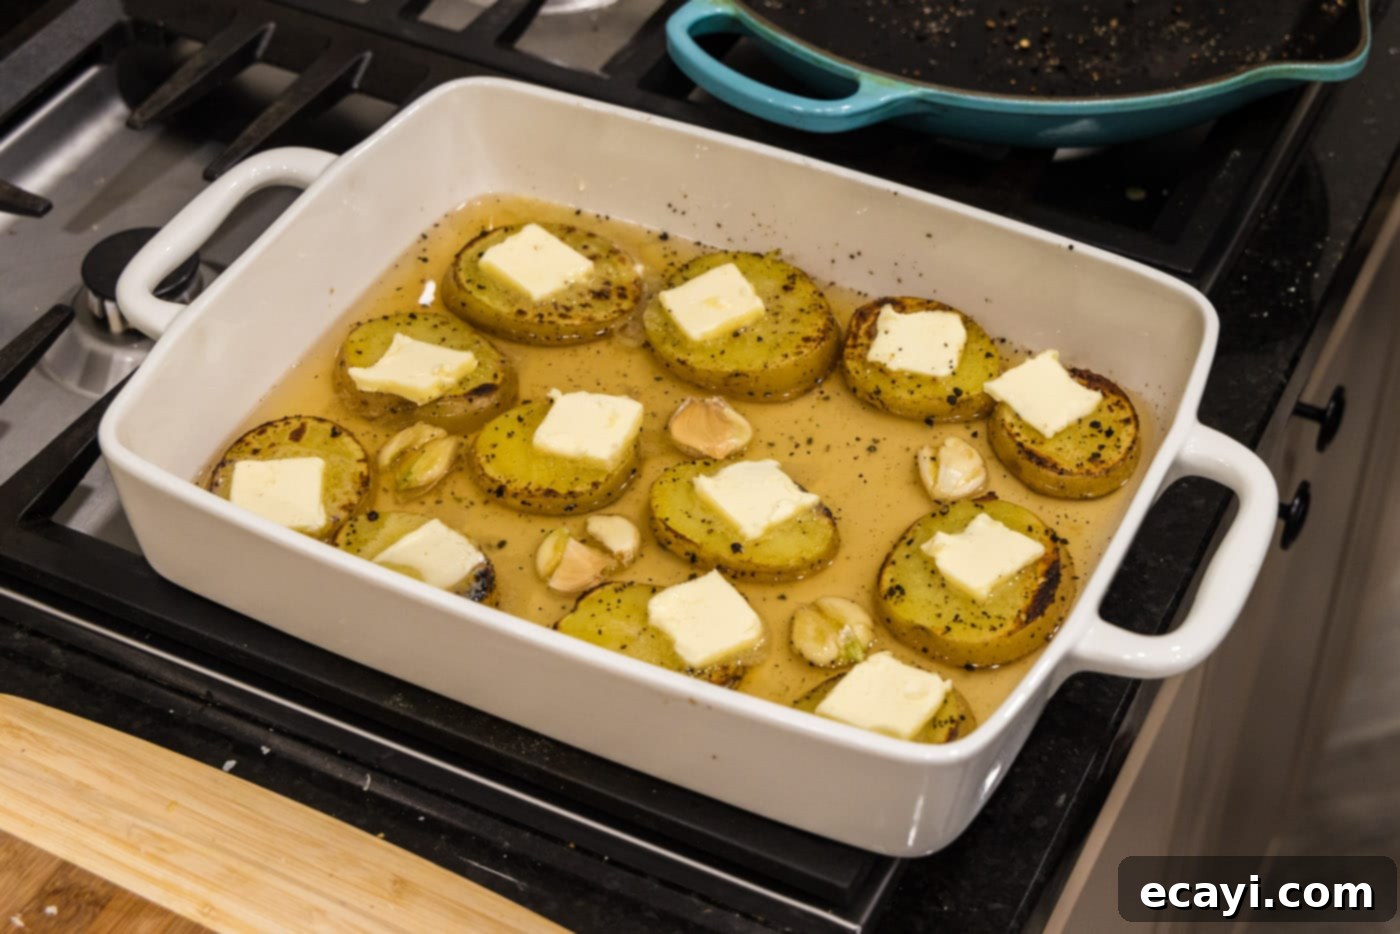
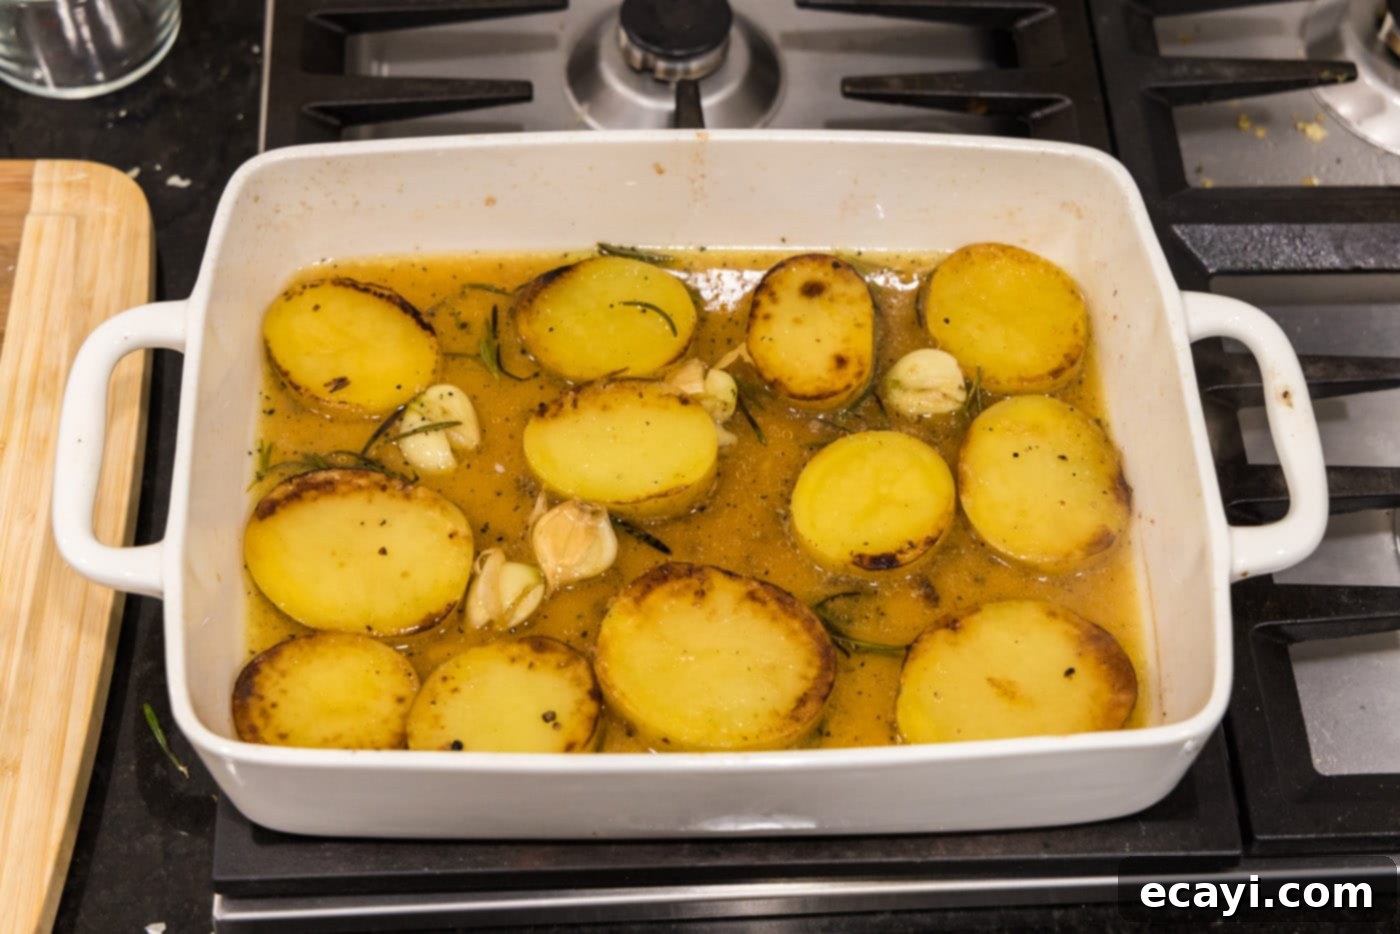
- Prepare for Roasting: While the potatoes are searing (or after searing the first batch), pour 1 1/2 cups of chicken broth into a 13×9 baking dish. Once all potatoes are beautifully browned, carefully transfer them from the skillet into the chicken broth in the baking dish, arranging them in a single layer if possible.
- Add Aromatics: Take the 5 whole garlic cloves and slightly crush them. A simple method is to place the flat side of a chef’s knife onto a clove and give it a firm whack with the heel of your hand. This releases their flavor without mincing them. Distribute these crushed garlic cloves among the potatoes in the broth.
- Butter & Rosemary Topping: Slice the remaining 2 1/2 tablespoons of butter into small squares, ensuring you have one small pat for each potato slice. Place these butter pats directly on top of each potato. Then, place a small bunch of fresh rosemary leaves on top of each butter pat. This allows the butter and rosemary to melt and infuse the potatoes and broth during roasting.


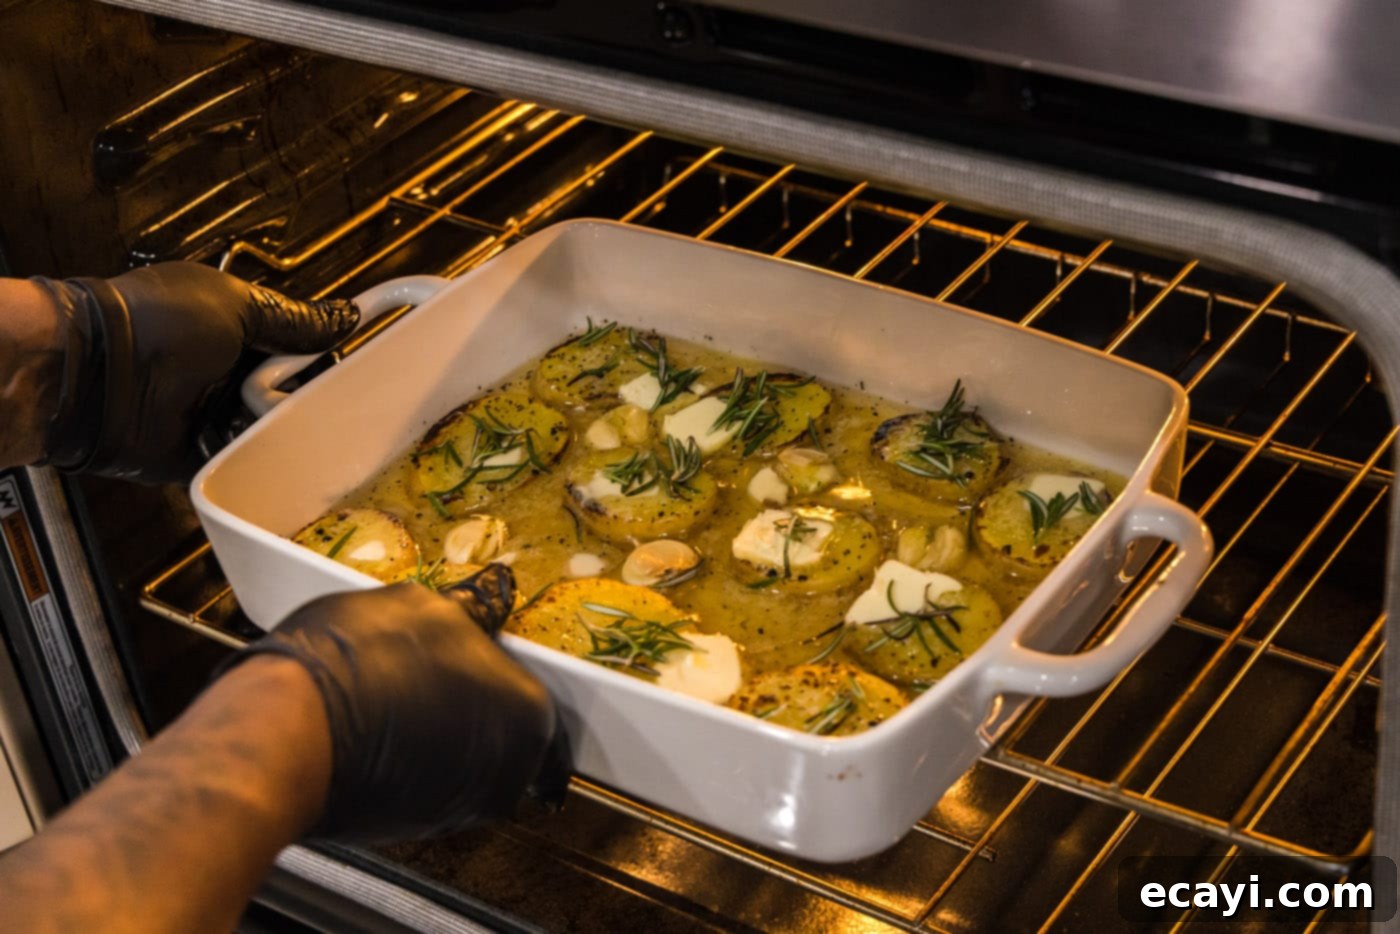
- Bake to Perfection: Transfer the baking dish to your preheated 425°F (220°C) oven. Bake for an initial 10-15 minutes. After this time, carefully remove the dish, gently turn the potatoes over using tongs (this helps them absorb liquid and brown evenly), and return them to the oven for an additional 10-15 minutes, or until the potatoes are fork-tender and the liquid has largely been absorbed, leaving a rich, caramelized glaze.


- Serve Immediately: Once baked, remove the melting potatoes from the oven. The potatoes will be incredibly hot and tender. Let them rest for a minute or two before serving directly from the baking dish or transferring them to a platter. Enjoy the irresistible combination of crispy edges and a melt-in-your-mouth interior!
Frequently Asked Questions & Expert Tips for Success
Storing leftover melting potatoes is simple and ensures you can enjoy them again. Place any cooled leftovers in an airtight container and store them in the refrigerator for up to 4-5 days. For reheating, spread the potatoes in a single layer on a baking sheet and warm them in a 350°F (175°C) oven until they are thoroughly heated through and the edges begin to crisp up again. This method helps maintain their texture better than microwave reheating.
While some potato recipes call for peeling, we strongly prefer not to remove the skin from the potatoes for this recipe, especially when using Yukon Gold or red potatoes. The skin adds a wonderful rustic texture, contributes to the crispy exterior, and provides additional nutrients and flavor. However, the choice is entirely up to your personal preference. If you prefer your potatoes completely smooth, you may peel them, but be aware that the overall texture might be slightly different. For maximum flavor and texture contrast, leaving the skin on is recommended.
You can do some prep work in advance. Slicing the potatoes can be done a few hours ahead; store them in cold water to prevent browning. The searing step, however, is best done right before roasting for optimal crispness. If you fully cook them ahead, the crispiness will diminish upon reheating, but they will still be delicious and tender.
A 13×9-inch (33×23 cm) baking dish is ideal for this quantity of potatoes, allowing them to spread out in a relatively single layer and get good contact with the broth and heat. You can use glass, ceramic, or metal. Ensure it’s oven-safe for the specified temperature.
For extra crispiness, ensure your potatoes are thoroughly dry before searing. Don’t overcrowd the skillet during the initial sear – cook in batches if necessary. Also, a heavy-bottomed skillet (like cast iron) provides excellent heat retention for a superior crust. During the final baking stage, ensure enough liquid has evaporated and the oven temperature is maintained. You can even broil for the last minute or two (watching carefully!) if you want an intensely golden, crisp top.
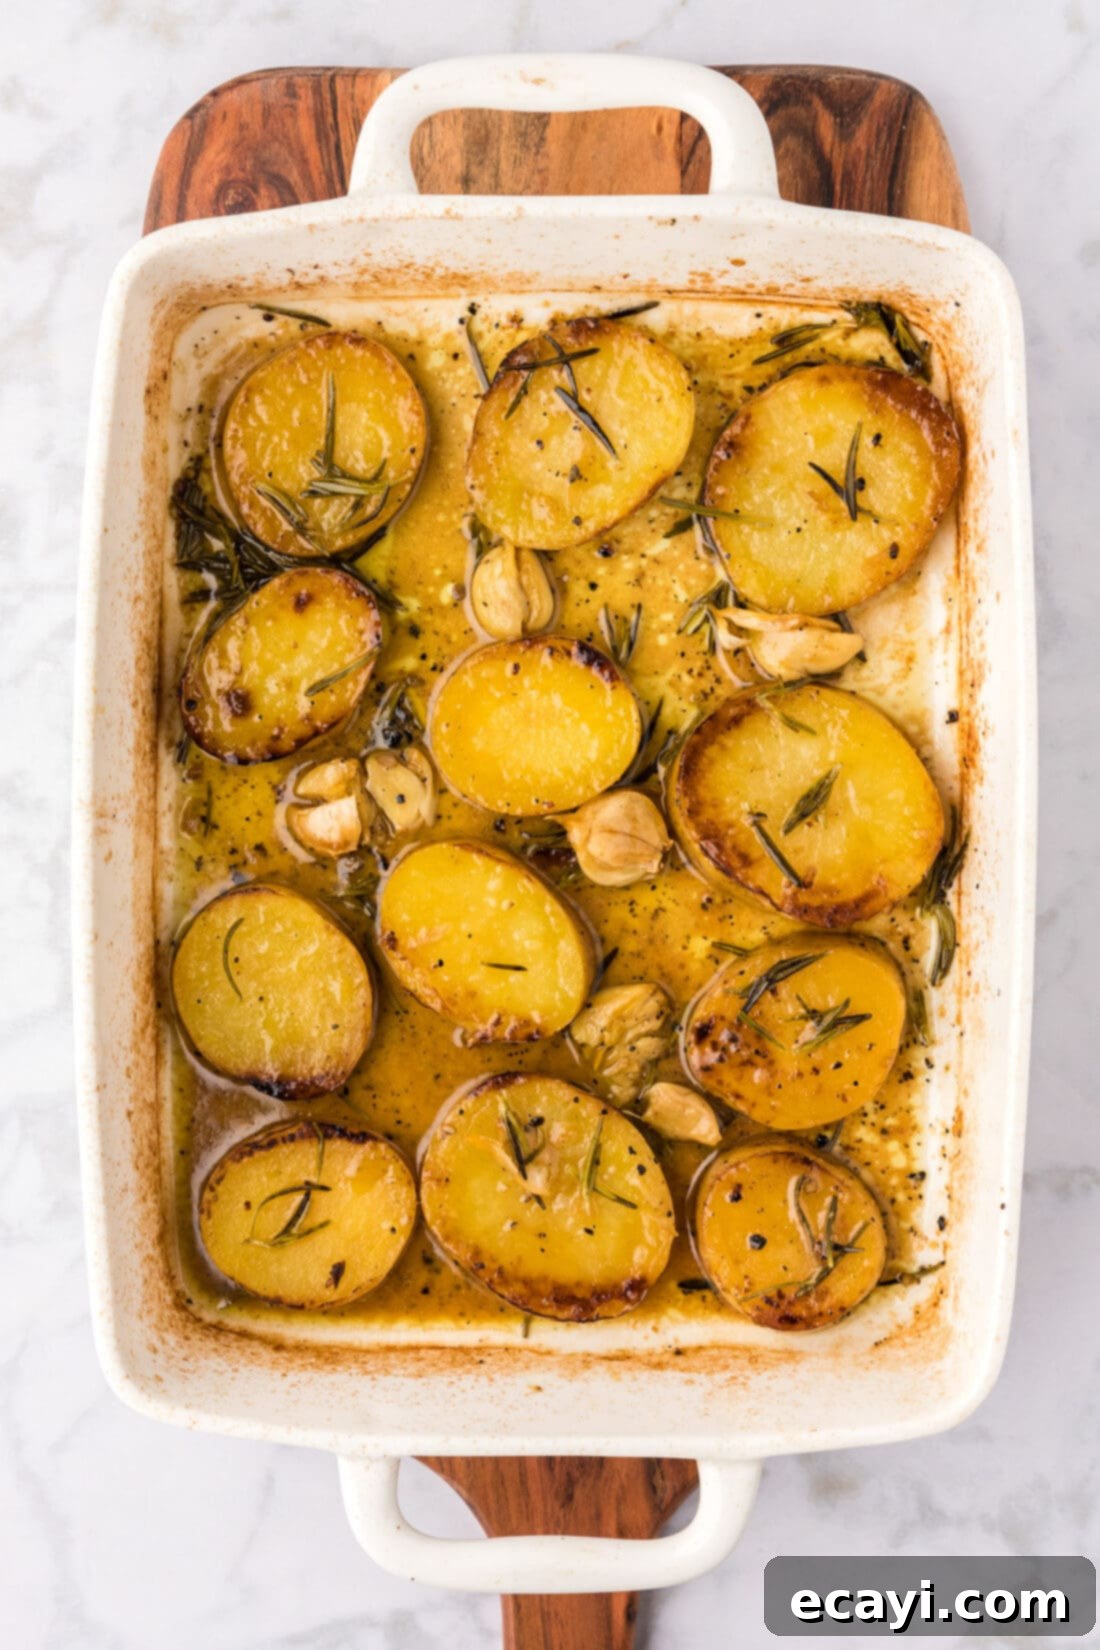
Versatile Serving Suggestions for Melting Potatoes
Melting potatoes are incredibly versatile, making them a fantastic and sophisticated side dish for almost any meal, from casual weeknight dinners to elegant gatherings and festive holiday feasts. Their rich flavor and delightful texture complement a wide array of main courses, enhancing the overall dining experience. Their ability to pair well with various proteins and cuisines makes them a go-to choice for any occasion.
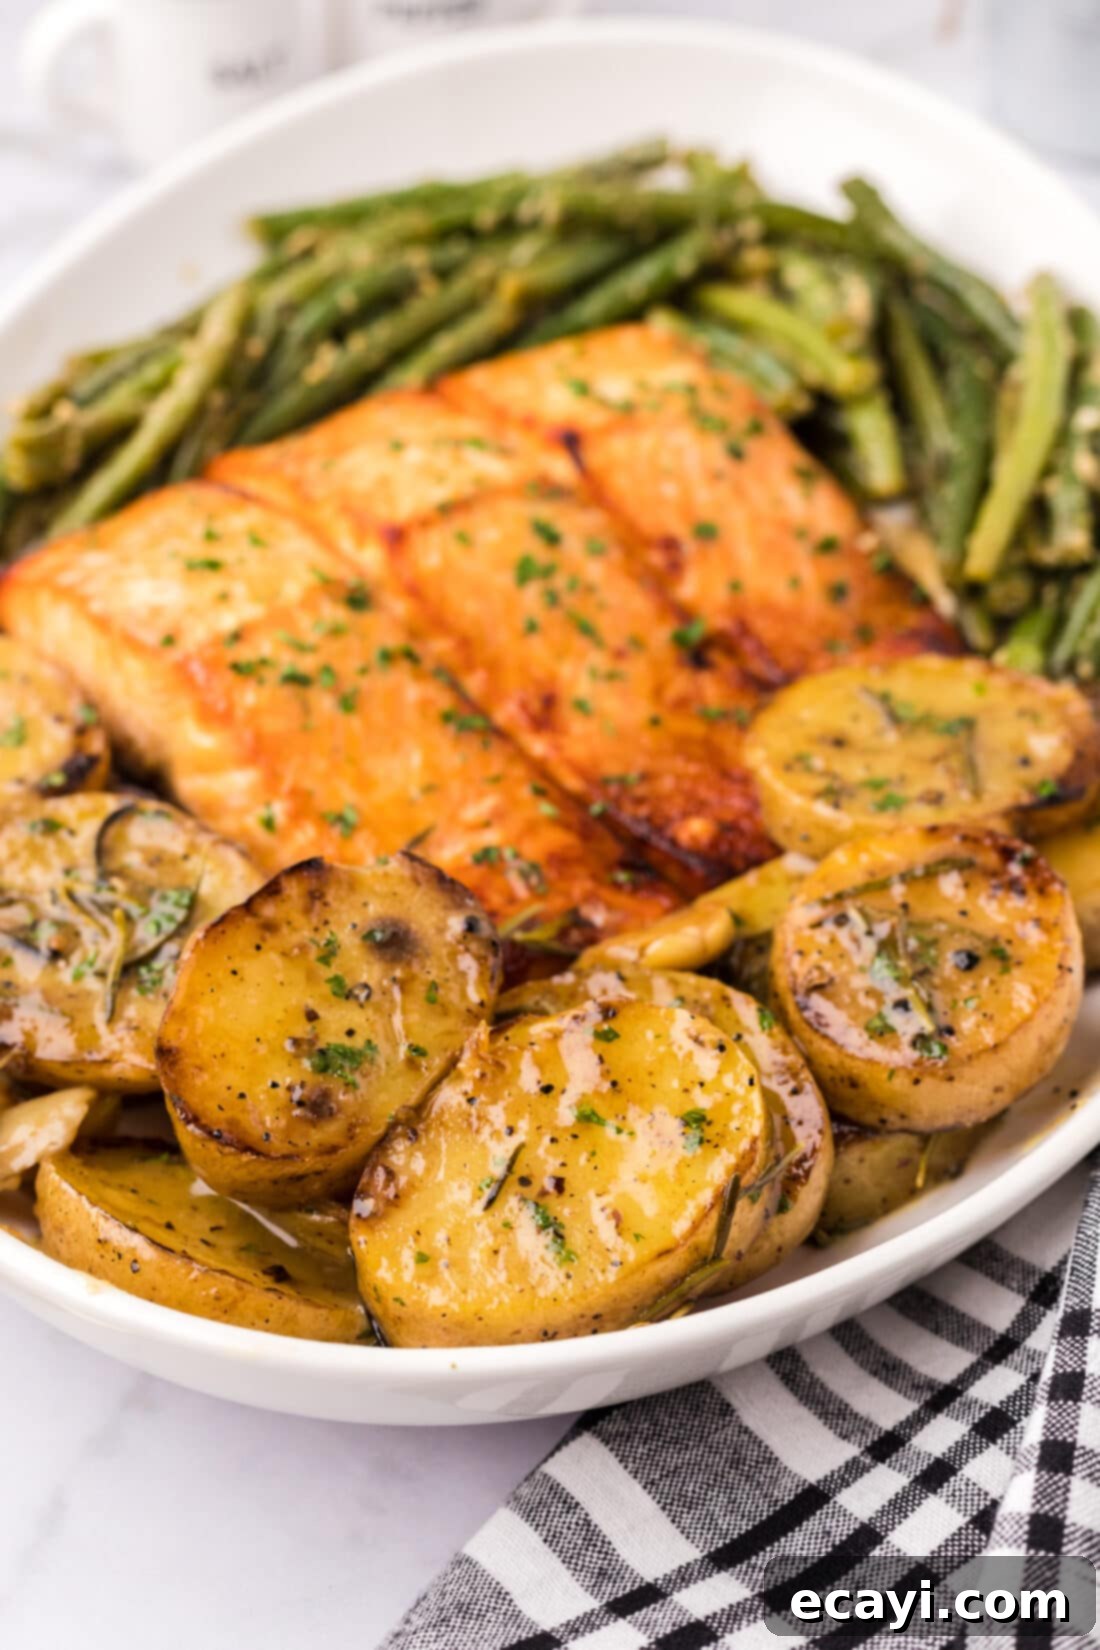
We absolutely adore serving these flavorful potatoes alongside classic protein dishes. Imagine them next to succulent roasted salmon, where the delicate fish meets the robust, buttery potatoes. They are also a phenomenal accompaniment to a perfectly cooked reverse-sear ribeye steak, providing a hearty and satisfying counterpoint to the rich beef. For poultry lovers, they shine beautifully when served with elegant chicken francese, soaking up the sauce and adding a comforting element.
But the possibilities don’t end there! These adaptable potatoes pair wonderfully with just about any protein you can think of: beef, chicken, pork, and seafood all find a fantastic partner in melting potatoes. Their savory depth makes them ideal for hearty roasts, grilled meats, or even lighter fish preparations. You can also get creative and serve them as a gourmet appetizer, perhaps with a creamy herb dip on the side for dipping. The truth is, these versatile melting potatoes truly have no culinary limits – they’re sure to become a beloved staple in your kitchen!
Explore More Delicious Potato Recipes
If you’ve fallen in love with the humble potato, as we have, then you’re in for a treat! There’s a world of incredible potato dishes waiting to be discovered, each offering unique flavors and textures. From classic comfort food to innovative new preparations, potatoes are the ultimate versatile ingredient. If you enjoyed the melting potatoes, be sure to explore these other fantastic potato recipes that are sure to please:
- Creamy Au Gratin Potatoes: Layers of thinly sliced potatoes baked in a rich, cheesy cream sauce until tender and bubbly.
- Crispy Parmesan Potatoes: Roasted potatoes tossed with savory Parmesan cheese, creating an irresistible crunchy crust.
- Decadent Twice Baked Potatoes: Fluffy mashed potato filling, mixed with cheese, bacon, and chives, then stuffed back into their skins and baked until golden.
- Classic Garlic Roasted Potatoes: Simple, flavorful roasted potato chunks infused with garlic and herbs – a timeless side.
- Bacon Three Cheese Potatoes: A comforting casserole featuring potatoes baked with a trio of cheeses and crispy bacon.
I absolutely love to bake and cook, and sharing my kitchen experiences and delicious recipes with all of you brings me immense joy! Remembering to come back to the blog each day for new culinary inspiration can sometimes be tough amidst a busy schedule, which is why I’m thrilled to offer a convenient newsletter. Every time a fresh new recipe posts, it can be delivered directly to your inbox. Simply subscribe today and start receiving your free daily recipes, making it easier than ever to discover your next favorite meal!
Melting Potatoes
IMPORTANT – There are often Frequently Asked Questions within the blog post that you may find helpful. Simply scroll back up to read them!
Print It
Pin It
Rate It
Save ItSaved!
Ingredients
- 3 pounds Yukon gold potatoes
- 1 ½ cups chicken broth
- 2 Tablespoons fresh rosemary separated into small leaf bundles
- cracked black pepper to taste
- garlic salt to taste
- 5 cloves garlic whole
- 4 Tablespoons unsalted butter separated
Things You’ll Need
-
Large heavy bottomed skillet
-
13×9 baking dish
Before You Begin
- For the best creamy texture, we highly recommend Yukon Gold potatoes. However, if they are not available, red potatoes or even Russet potatoes can be used as alternatives. Red potatoes offer a slightly firmer finish, while Russets will be very fluffy.
- Feel free to customize the herb profile! If you prefer a different aromatic, you can easily replace the fresh rosemary with fresh thyme or any other robust fresh herb that you enjoy. A combination could also be delightful.
- Whether to peel the potatoes or not is a matter of personal preference. We love leaving the skin on for this recipe as it contributes to the overall texture, adding a rustic charm and a bit more crispness, but feel free to peel them if you prefer a smoother finish.
- To store any leftover melting potatoes, place them in an airtight container and keep them refrigerated. They will stay fresh and delicious for 4-5 days. When ready to enjoy again, simply reheat them on a baking sheet in a 350°F (175°C) oven until they are warmed through and their edges are slightly crisp once more.
- Expert Tip for Searing: Do not overcrowd your skillet during the initial searing stage. If necessary, cook the potato slices in two separate batches to ensure each piece gets adequate contact with the hot surface and develops a beautiful, crispy, golden-brown crust. Overcrowding can lead to steaming rather than searing.
Instructions
-
Preheat oven to 425 F (220°C). Rinse the potatoes thoroughly under cold water and pat them completely dry. Ensure they are very dry for optimal searing. Do not peel the potatoes.
-
Cut the ends off of each potato. These ends can be used in another dish or discarded.
-
Slice all potatoes into thick, uniform pieces, approximately 3/4-inch (2 cm) thick. Consistency is key for even cooking.
-
Melt 1 1/2 tablespoons of the unsalted butter in a large, heavy-bottomed skillet over medium-high heat. Use a basting brush to spread the melted butter evenly across the entire bottom of the skillet.
-
Carefully place the sliced potatoes into the hot skillet in a single layer, ensuring not to overcrowd the pan. Work in batches if necessary.
-
Generously season the exposed side of the potatoes with garlic salt and freshly cracked black pepper to taste.
-
Cook the potatoes for 5-7 minutes without disturbing them, until they develop a beautiful, crisp, golden-brown crust on the bottom.
-
Using tongs, turn the potatoes over and season the browned side with additional garlic salt and cracked black pepper.
-
Pour 1 1/2 cups of chicken broth into a 13×9-inch baking dish. Carefully transfer the browned potatoes from the skillet into the chicken broth in the baking dish.
-
Slightly crush the 5 whole garlic cloves to release their aroma (using the flat side of a chef’s knife works well). Place these crushed garlic cloves among the potatoes in the broth.
-
Slice the remaining 2 1/2 tablespoons of butter into enough small squares so that you have one pat for each potato slice. Place these butter pats on top of each potato.
-
Place a small bunch of fresh rosemary leaves on top of each butter pat, allowing their flavor to infuse during baking.
-
Bake in the preheated oven for 10-15 minutes. Then, carefully turn the potatoes over using tongs and bake for an additional 10-15 minutes, or until the potatoes are fork-tender and the liquid has largely reduced and created a rich glaze. Serve hot and enjoy!
Nutrition
The recipes on this blog are tested with a conventional gas oven and gas stovetop. It’s important to note that some ovens, especially as they age, can cook and bake inconsistently. Using an inexpensive oven thermometer can assure you that your oven is truly heating to the proper temperature. If you use a toaster oven or countertop oven, please keep in mind that they may not distribute heat the same as a conventional full sized oven and you may need to adjust your cooking/baking times. In the case of recipes made with a pressure cooker, air fryer, slow cooker, or other appliance, a link to the appliances we use is listed within each respective recipe. For baking recipes where measurements are given by weight, please note that results may not be the same if cups are used instead, and we can’t guarantee success with that method.
