Easy Homemade Pop Tarts: Flaky, Jam-Filled Pastries with a Sweet Glaze
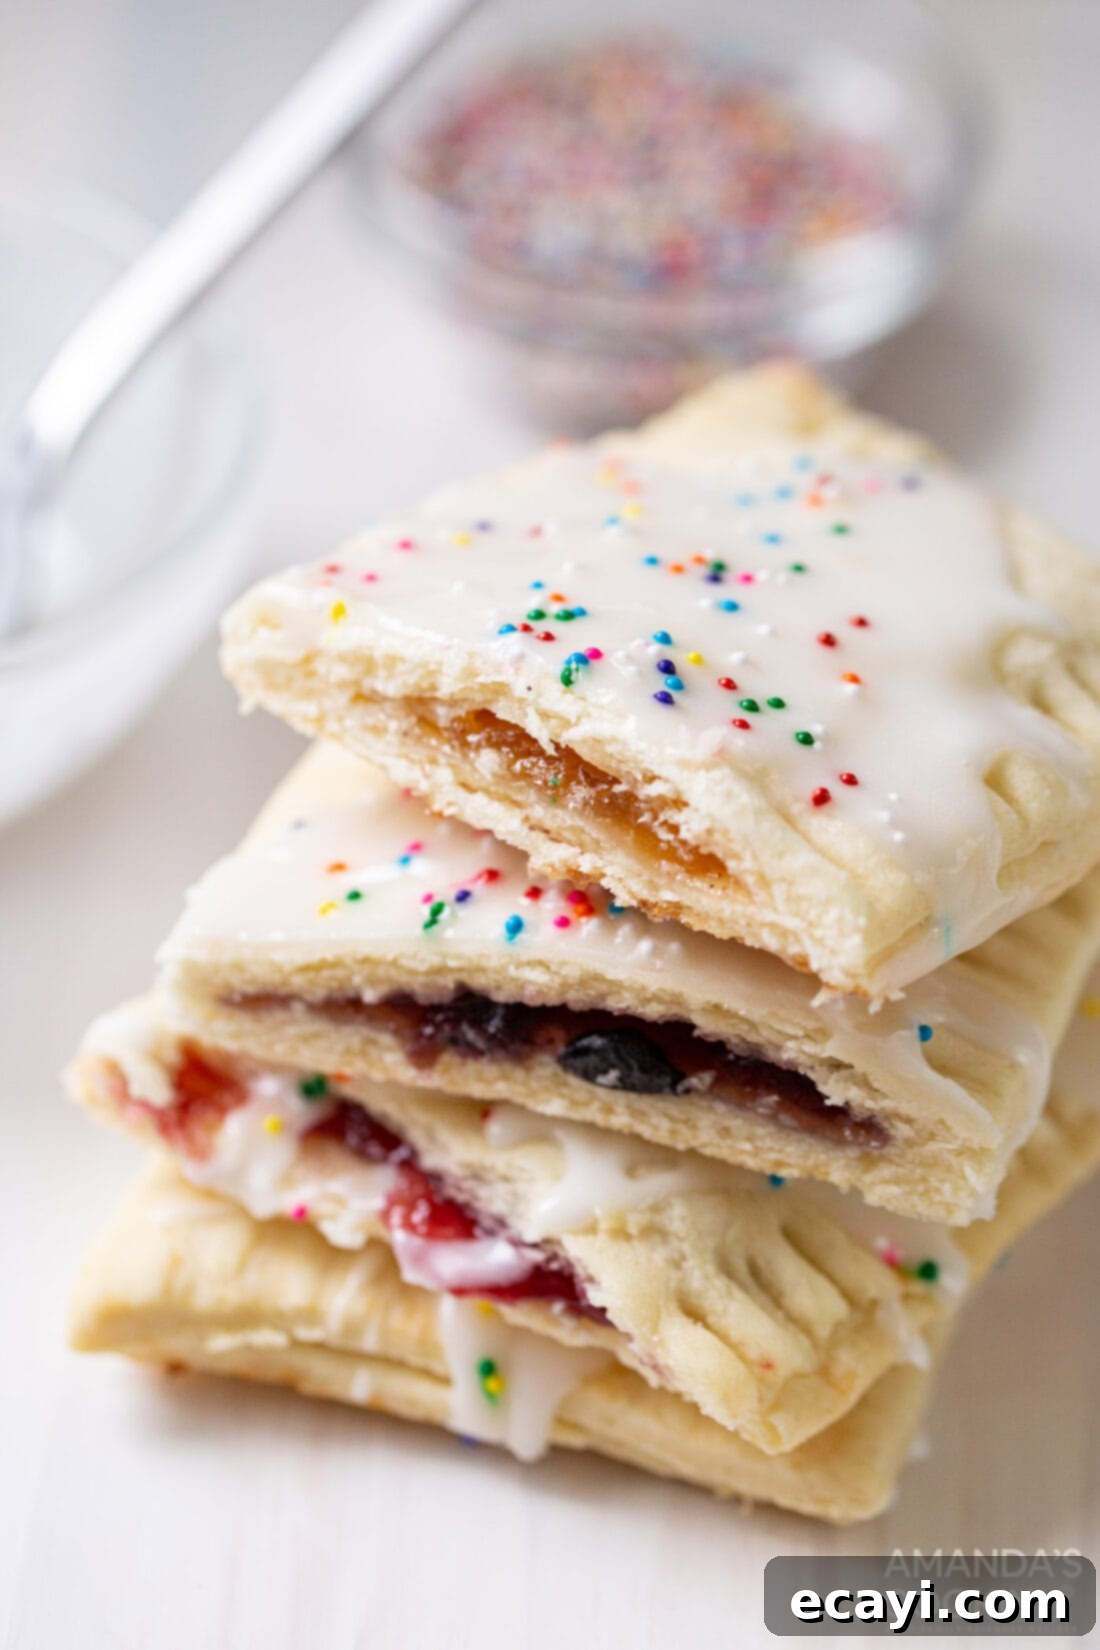
Craving a nostalgic sweet treat but looking for a healthier, more wholesome option? Look no further! These homemade pop tarts are an absolute game-changer. With just 5 simple ingredients and a quick 10-12 minutes of cook time, you can whip up a batch of delicious, flaky pastries that are far superior to their artificial, store-bought counterparts. Forget the guilt; embrace the joy of baking fresh, flavorful pop tarts right in your own kitchen.
Our simple recipe transforms basic ingredients into a delightful breakfast or snack, perfect for busy mornings or a satisfying afternoon pick-me-up. The beauty of making them from scratch lies in the ability to control the quality of ingredients, customize flavors, and avoid unnecessary additives. Plus, the process is so straightforward that even beginner bakers will find success, and it’s a fantastic activity to involve the kids in the kitchen, creating delicious memories together.
Why This Homemade Pop Tart Recipe is a Must-Try
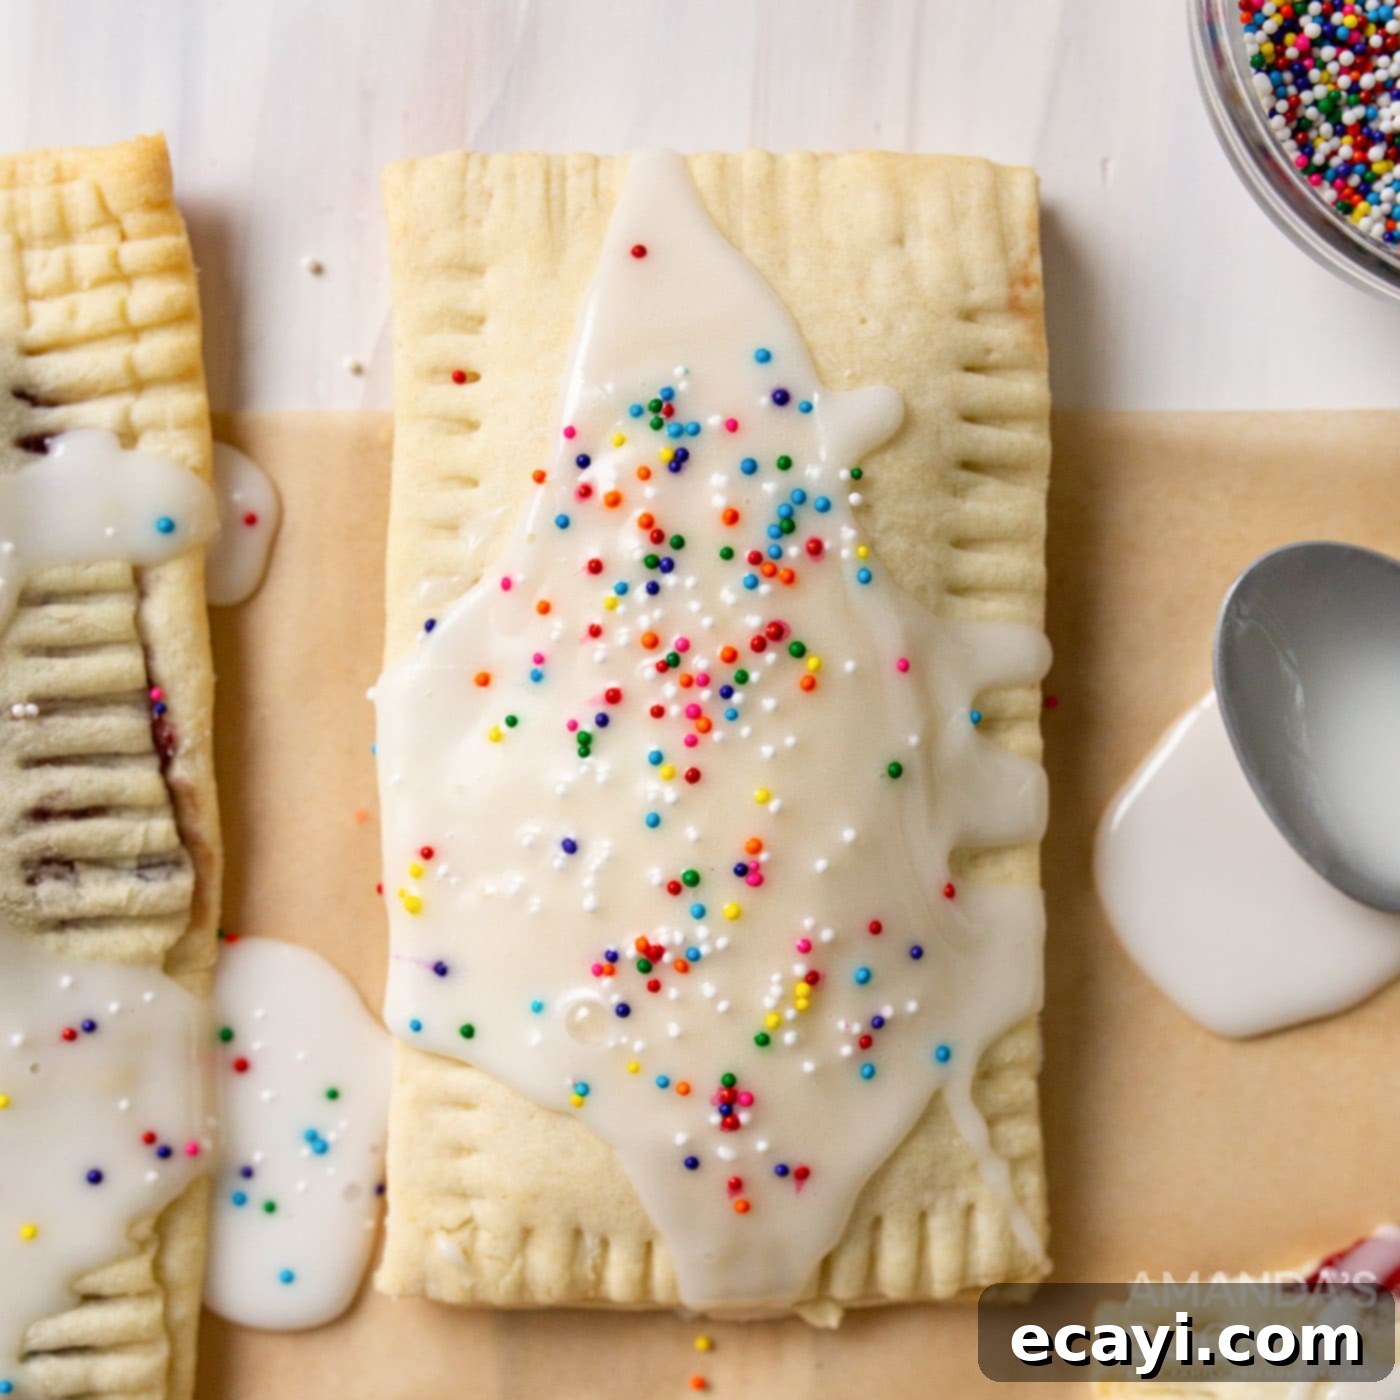
What makes this homemade pop tart recipe truly stand out? It all begins with the foundation: a wonderfully flaky pie crust that delivers the perfect crisp, buttery texture with every bite. This tender crust elegantly encases a generous filling of your favorite fruit jam, offering a burst of vibrant, natural sweetness. Finally, each pastry is crowned with an easy-to-make homemade glaze, adding that irresistible touch of sweetness without being overly sugary. The balance of flavors and textures is simply perfect, satisfying your sweet tooth without the artificial aftertaste or overwhelming sweetness often found in commercial versions.
My family, especially the kids, has always had a soft spot for traditional Pop-Tarts. However, I often found their taste a bit too artificial, and their ingredient lists left much to be desired. The idea of making pop tarts from scratch didn’t immediately come to mind, but once I ventured into it, there was absolutely no going back. The difference in flavor, texture, and overall quality is truly astounding. These pastries evoke the same comforting feeling as our beloved blueberry hand pies, thanks to the delightful combination of a sweet frosted glaze and a vibrant, fruit-filled center. What’s more, this recipe is incredibly fun and engaging, making it a wonderful baking project for the whole family – even the youngest aspiring chefs will love helping with the filling and decorating!
Beyond the superior taste, choosing to bake pop tarts at home means you have complete control over the ingredients. You can opt for high-quality, organic jams, use real butter (if making your crust from scratch), and adjust the amount of sugar in your glaze to your liking. This recipe offers a fantastic way to enjoy a classic childhood treat with a mindful approach to ingredients, ensuring a wholesome and delicious experience for everyone. It’s a simple step towards a healthier, tastier snack that you can feel good about serving.
Essential Ingredients for Your Delicious Homemade Pop Tarts
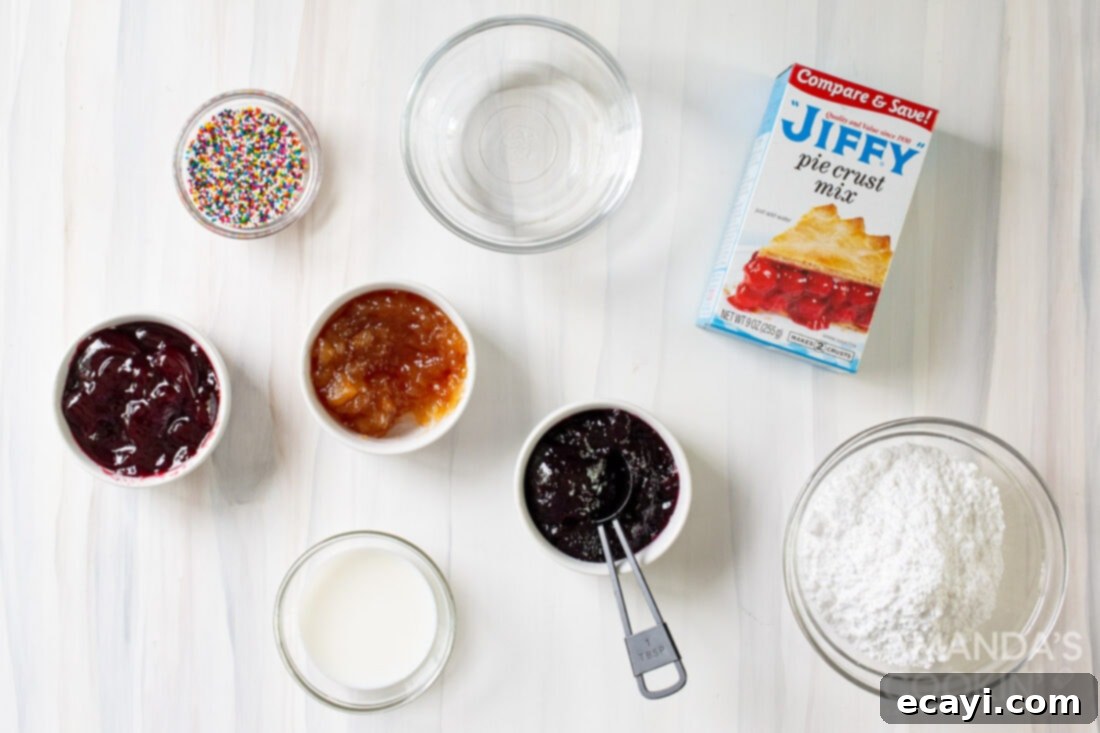
Crafting these delightful pop tarts requires only a handful of readily available and affordable ingredients. The beauty of this recipe lies in its simplicity, allowing the natural flavors to truly shine through. For a complete list of precise measurements and step-by-step instructions, please refer to the comprehensive printable recipe card located at the very end of this post.
Key Components Explained:
- Pie Crust: For ultimate convenience and consistent results, we highly recommend starting with an easy pie crust mix, such as Jiffy. This option significantly streamlines the preparation process, ensuring a flaky and tender crust with minimal effort and without the need for extensive pastry-making skills. While a store-bought refrigerated pie dough can also be used for convenience (though it might yield slightly fewer pop tarts due to its typical sizing), adventurous bakers might consider a homemade pie dough for an extra layer of freshness and complete control over the ingredients. The goal is a light, buttery foundation that perfectly complements the sweet filling.
- Water: This is a crucial ingredient for bringing your pie crust mix together. It helps to hydrate the dry ingredients, forming a cohesive and workable dough. The exact amount may vary slightly depending on your mix and atmospheric conditions, so add it gradually until the dough comes together without being too sticky or too dry.
- Jam: Here’s where you can truly personalize your pop tarts and unleash your creativity! The choice of jam is entirely up to your personal preference and what you have on hand. Classic and ever-popular flavors like strawberry, blueberry, blackberry, and raspberry jam are always winners, offering familiar and comforting tastes that everyone loves. Don’t hesitate to experiment with other delightful fruit preserves such as apricot, cherry, or even a rich, spiced apple butter for a unique autumnal twist. The most important tip for your filling is to select a good quality jam that isn’t excessively runny. A slightly thicker jam will ensure it stays neatly tucked inside the pastry during baking, preventing any messy leaks.
- Powdered Sugar: This fine sugar forms the essential base for our simple yet irresistibly delicious homemade glaze. Powdered sugar dissolves beautifully and quickly, creating a smooth, velvety topping that hardens slightly as it sets, mimicking that iconic frosted look of a classic Pop-Tart.
- Milk: Used to thin the powdered sugar into a smooth, pourable glaze. You have the flexibility to adjust the amount of milk to achieve your desired consistency – a thicker glaze for a more opaque, robust finish, or a thinner drizzle for a delicate, translucent touch. Any type of milk (dairy or non-dairy alternatives like almond or oat milk) will work perfectly here.
These core ingredients, when combined with a little love and minimal effort, create a treat that is both familiar and delightfully fresh, offering a wholesome and customizable alternative to mass-produced options. Gather your ingredients, prepare your kitchen, and let’s get baking!
Crafting Your Homemade Pop Tarts: A Detailed Step-by-Step Guide
These step-by-step photos and detailed instructions are designed to help you visualize each stage of making this delicious recipe. For a convenient printable version, complete with precise measurements and instructions, you can Jump to Recipe at the bottom of this post.
- Preheat Your Oven: Begin by preheating your oven to 400°F (200°C). This crucial first step ensures your pop tarts bake evenly and quickly, achieving that desirable golden-brown and flaky crust from the moment they enter the oven.
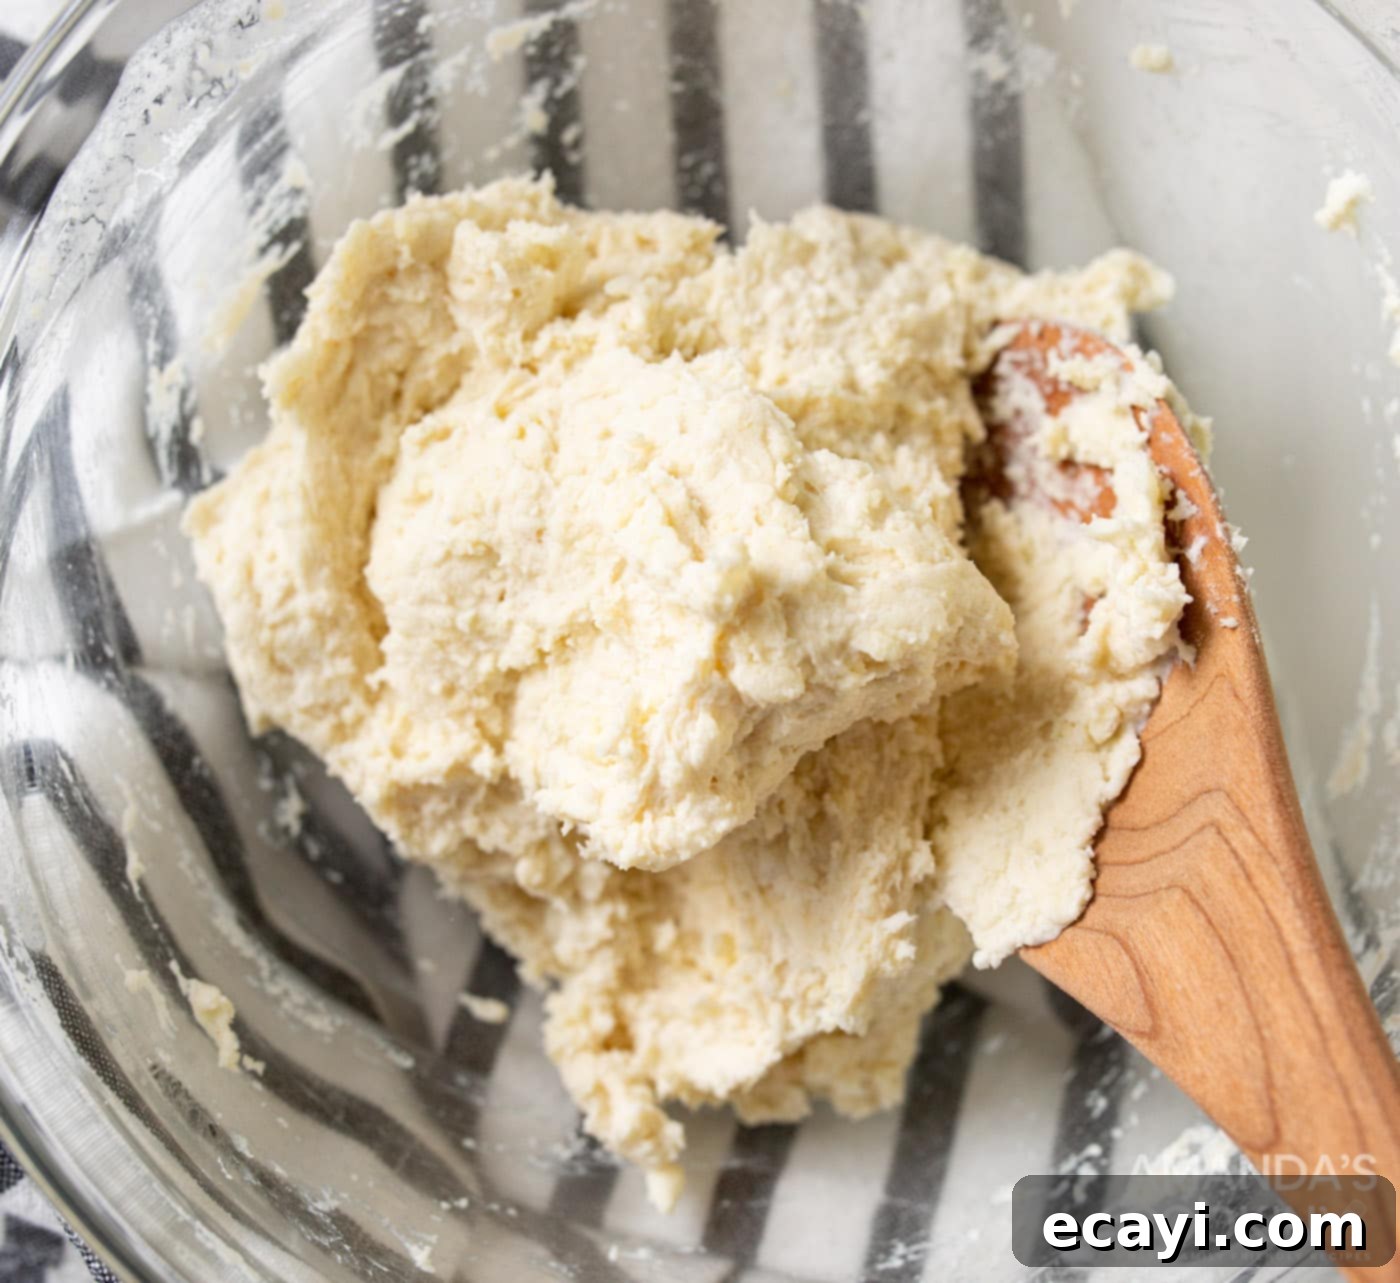
- Prepare the Pie Crust Dough: Carefully follow the instructions provided on your pie crust mix box. This typically involves adding 4-5 Tablespoons of cold water to the mix and combining until a cohesive dough forms. Ensure the water is cold to help keep the butter in the crust solid, which contributes to flakiness.
EXPERT TIP: To ensure all your pop tarts are uniform in size and shape, a clever trick is to use the face of the Jiffy box itself (or any similar rectangular cardboard box) as a template. Simply cut out a clean rectangle from the cardboard and use it to guide your dough cutting. This little hack saves time and guarantees a professional-looking, consistent finish for all your pastries!

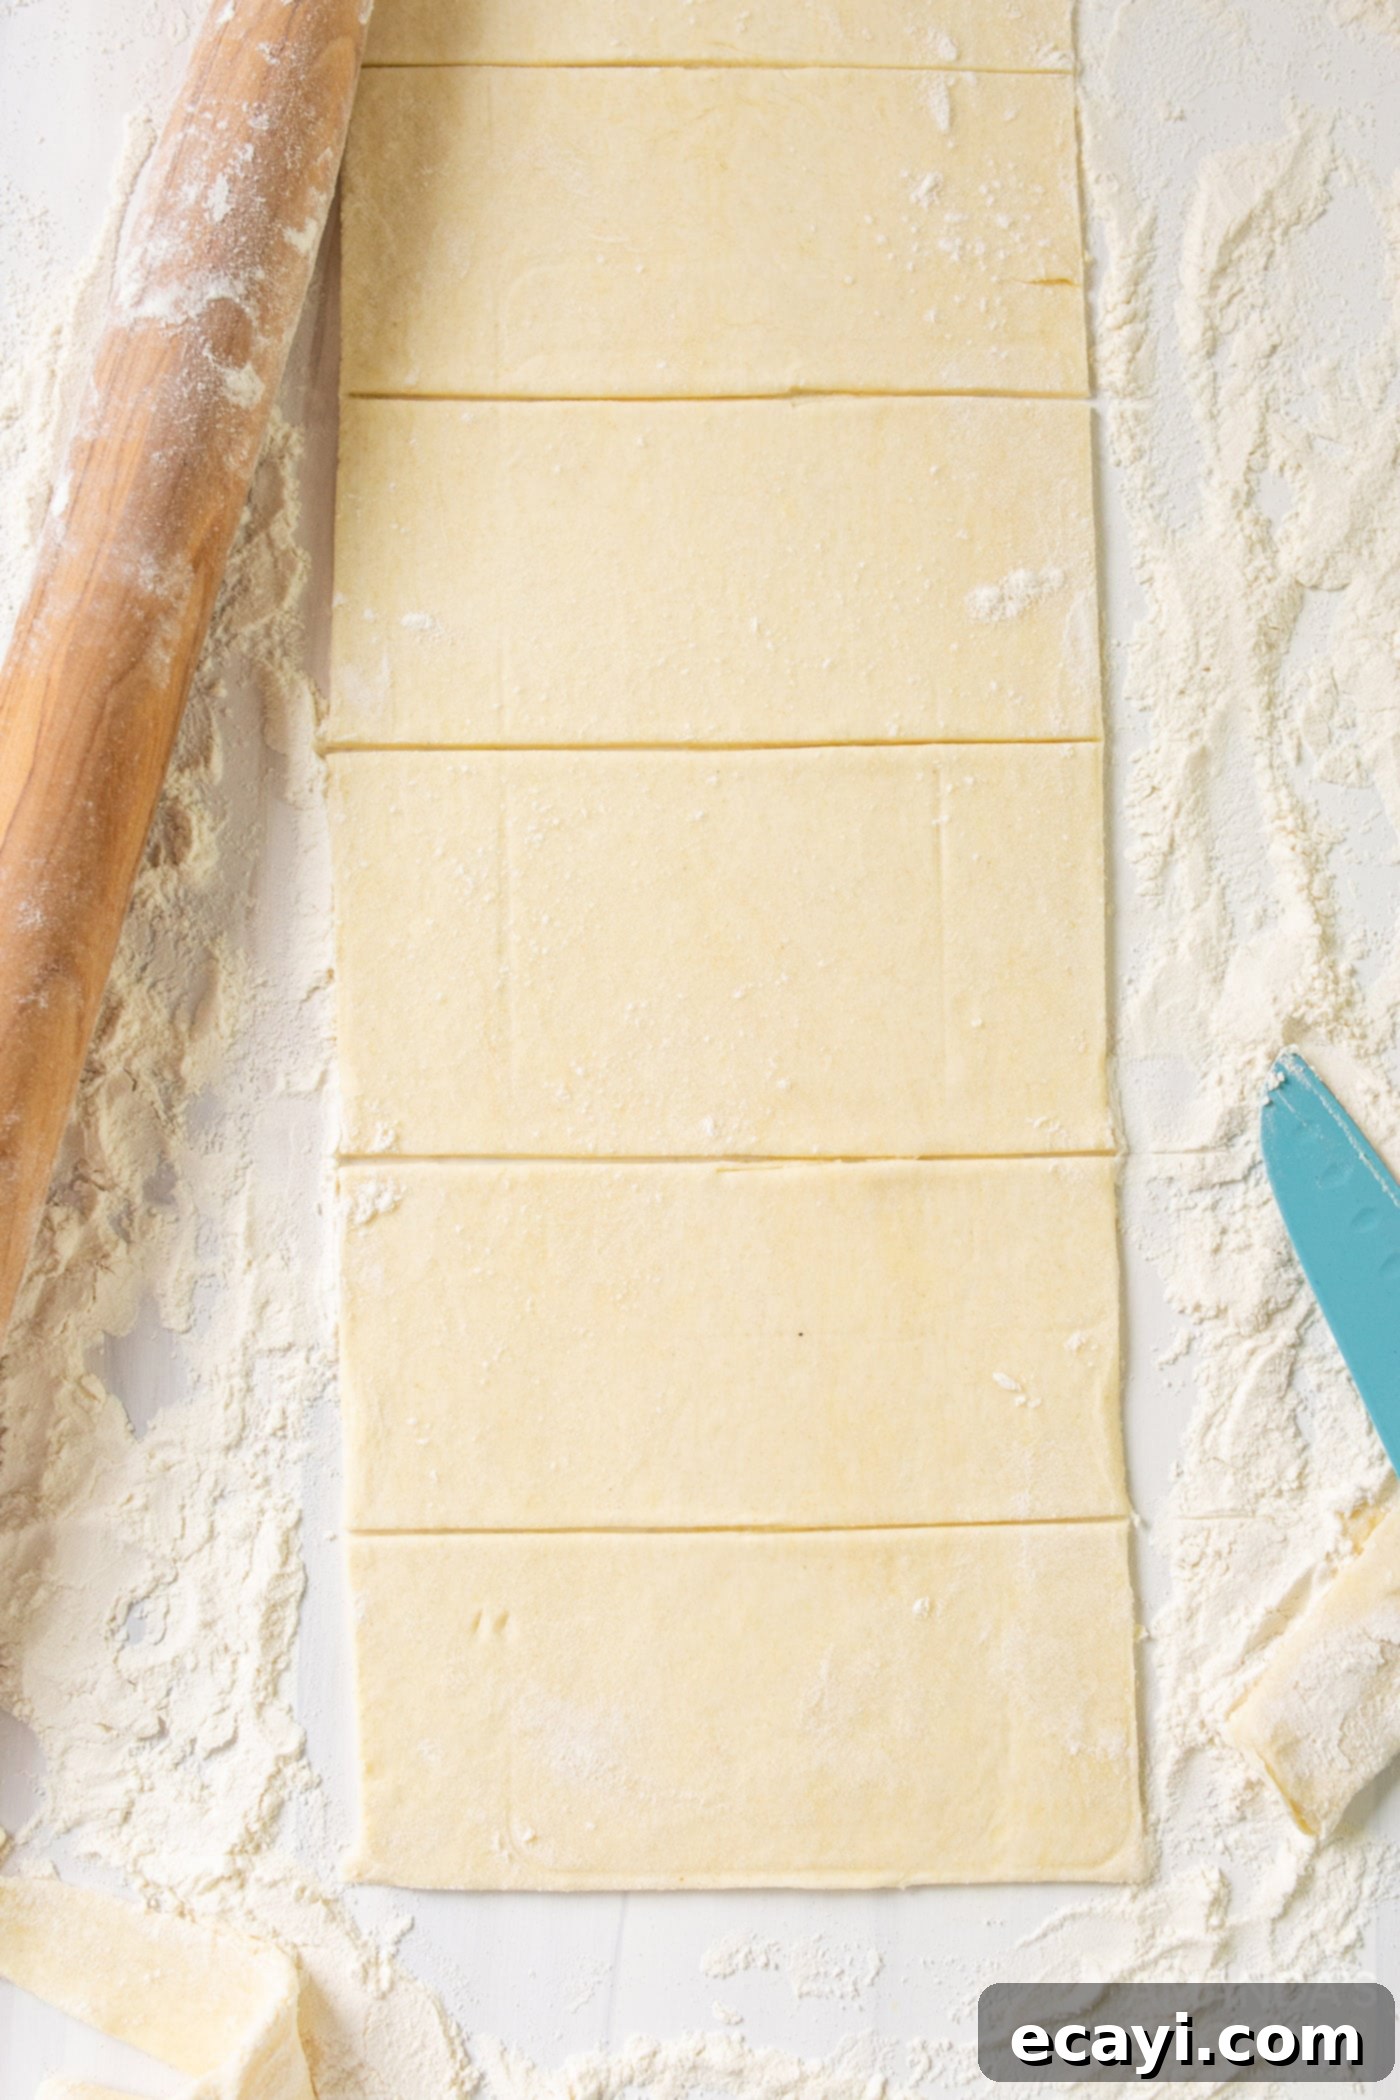
- Roll Out and Cut the Dough: On a lightly floured surface, roll out the prepared pie crust dough into a large, thin rectangle. Aim for a uniform thickness of approximately 1/8 to 1/4 inch. Using your homemade cardboard template, carefully cut out 8 uniform rectangles. You will likely need to gather and re-roll the dough scraps a few times to achieve all 8 rectangles. If the dough starts to become too dry or crumbly during the re-rolling process, add a tiny bit more cold water (half a teaspoon at a time) to bring it back together. Be careful not to overwork the dough, as this can develop too much gluten and result in a tough, rather than flaky, crust.

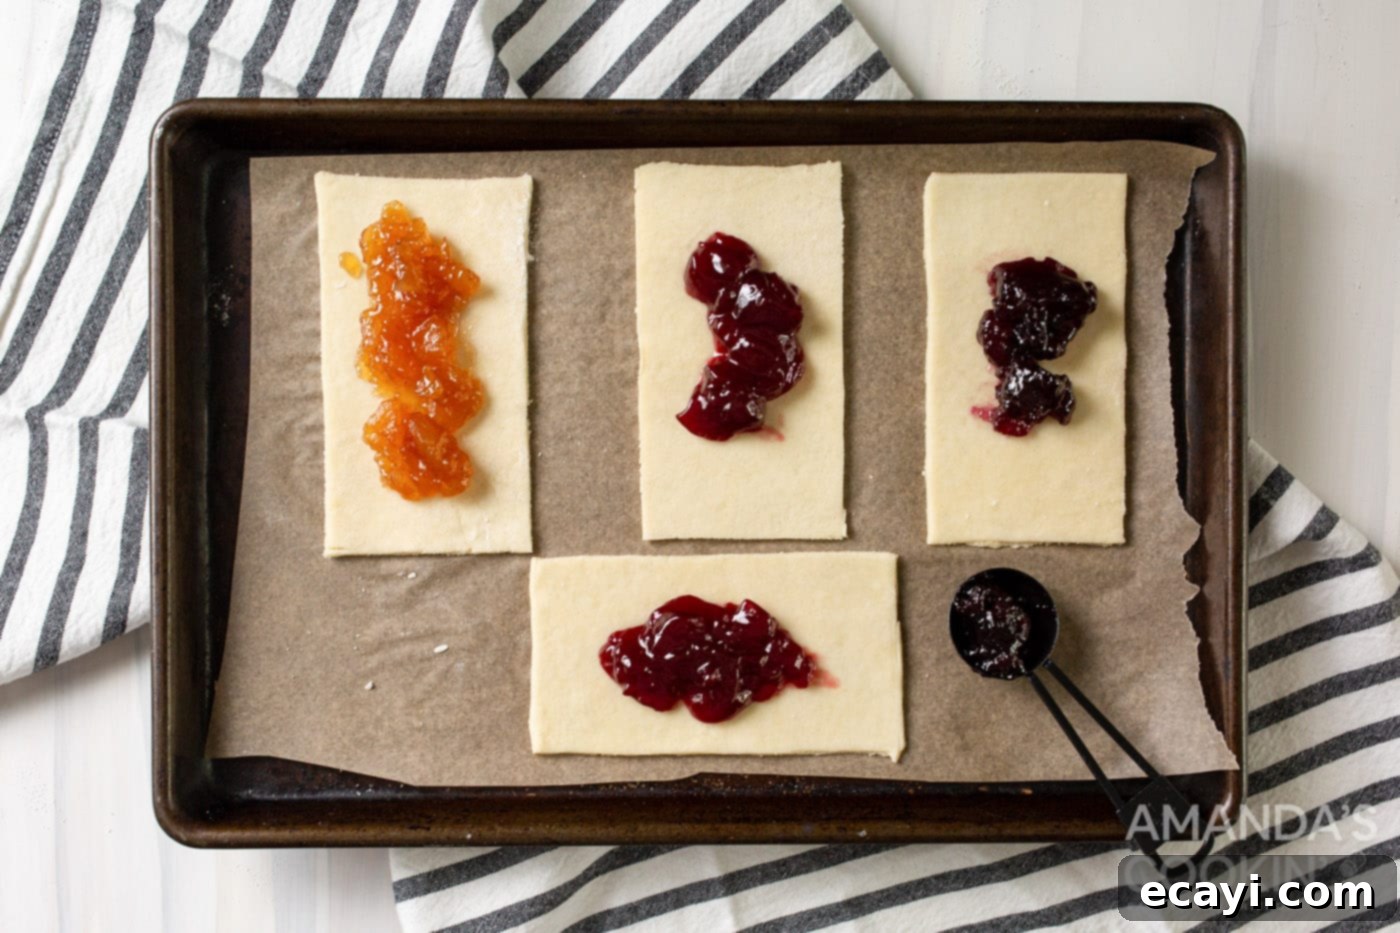
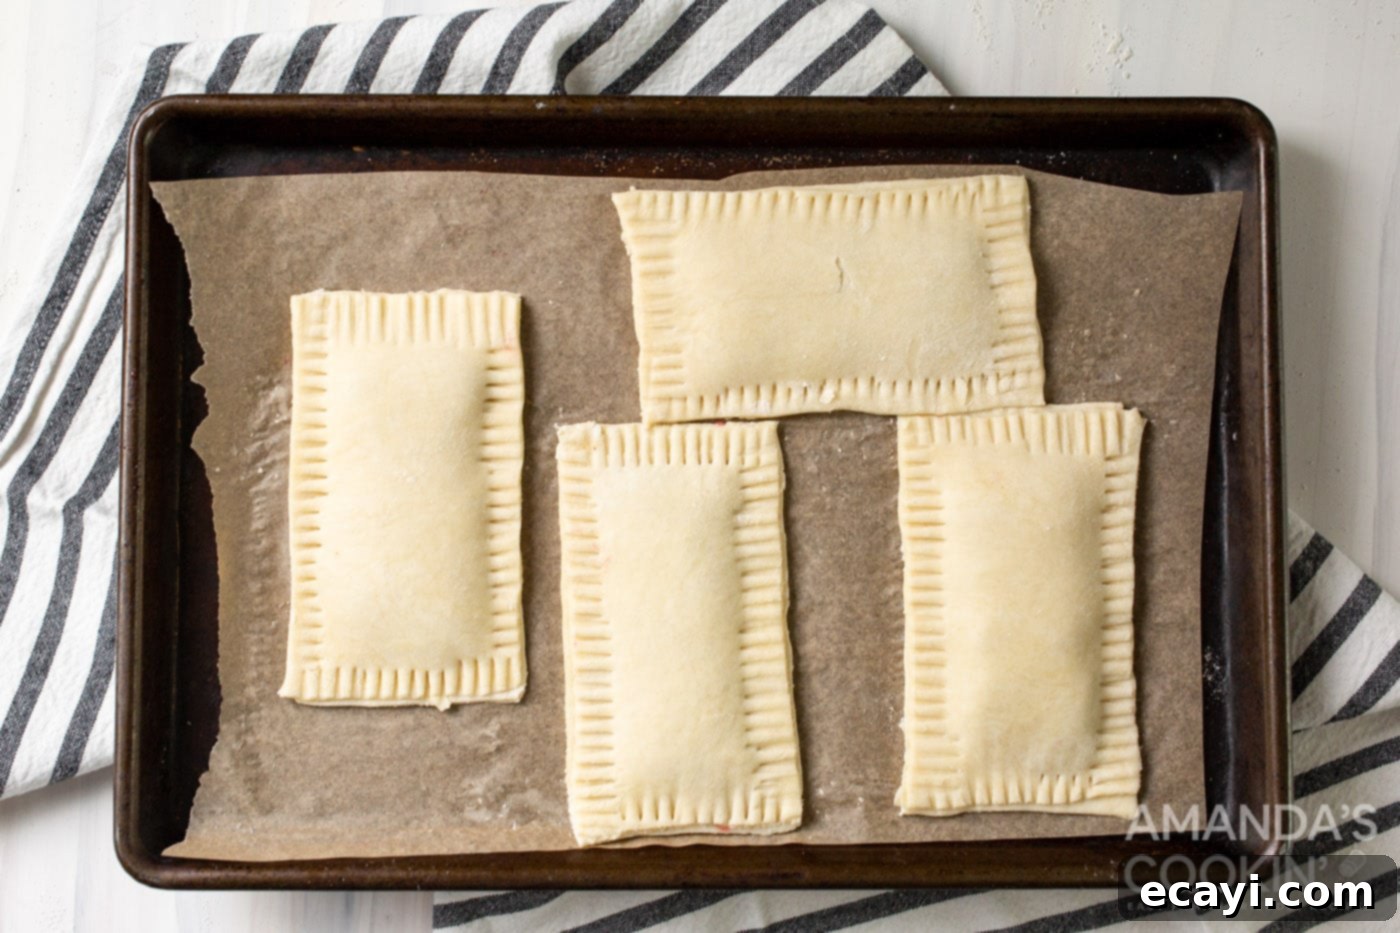
- Fill the Pastries: Line a baking sheet with parchment paper for effortless cleanup, then arrange four of your precisely cut dough rectangles on it. Place one generous Tablespoon of your chosen jelly, jam, or apple butter onto the center of each dough rectangle. Carefully spread the filling, ensuring you leave a clean 1/2-inch border around all edges. This border is absolutely crucial for effectively sealing the pop tarts and preventing the delicious filling from oozing out during baking, which can make a sticky mess.

- Seal and Crimp: Lightly moisten the 1/2-inch perimeter of each jam-topped dough rectangle with a small amount of water. You can use your fingertip or a pastry brush for this step. This water acts as a “glue” to create a secure seal. Carefully place a second dough rectangle directly on top of each filled rectangle, aligning the edges perfectly. Using the tines of a fork, firmly press down all along the edges of each pop tart. This not only securely seals the delicious filling inside but also creates that classic, decorative crimped edge that is so characteristic of pop tarts. Repeat this process for the remaining dough pieces and filling.

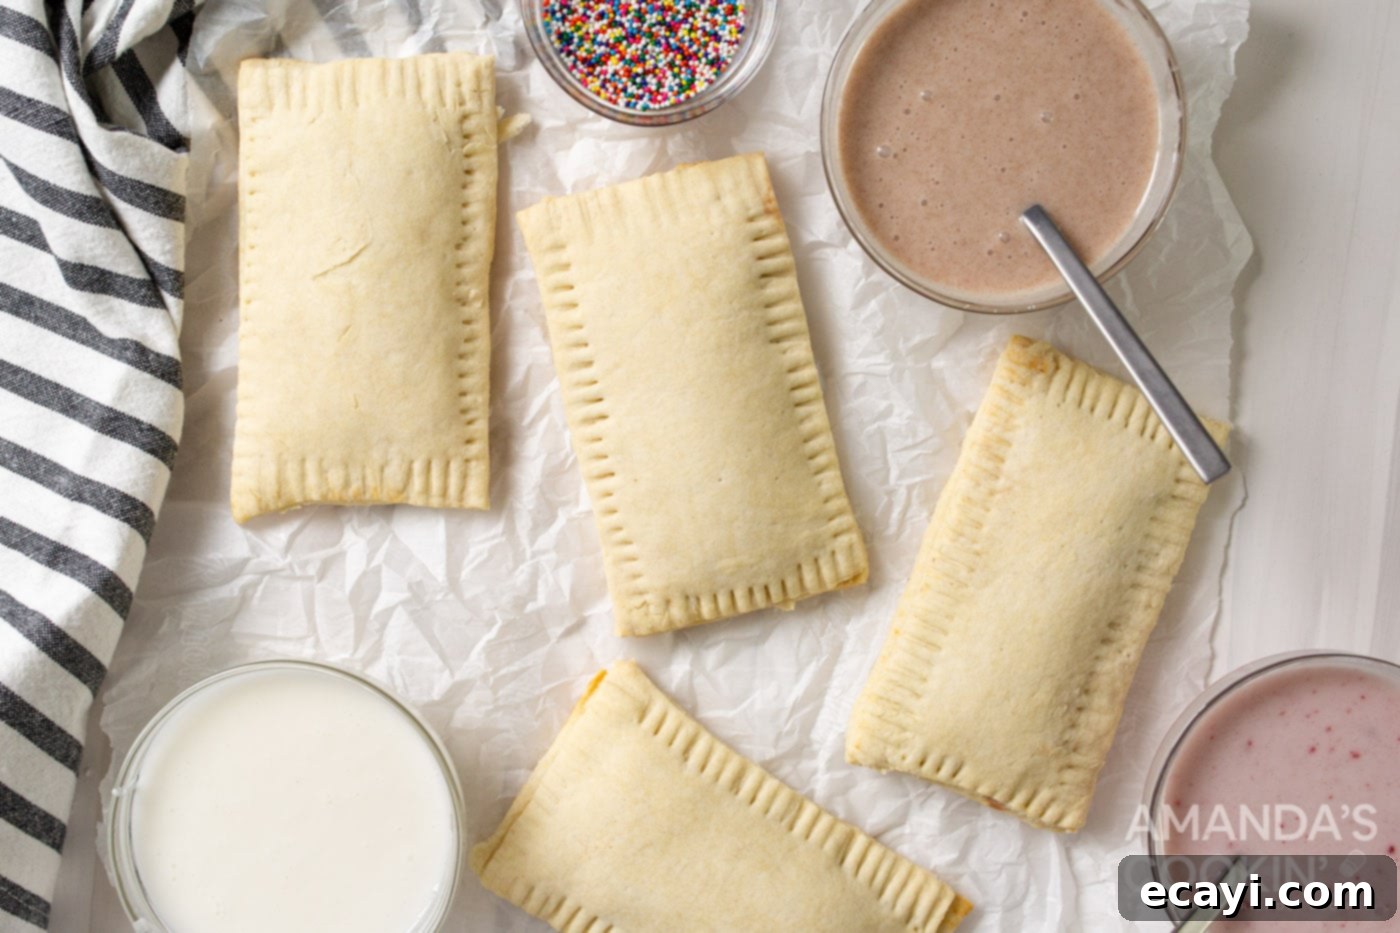
- Bake to Golden Perfection: Transfer the baking sheet, with your carefully prepared pop tarts, into the preheated 400°F (200°C) oven. Bake for approximately 10-12 minutes, or until the crusts are beautifully golden brown, visibly flaky, and cooked through. It’s always a good idea to keep a close eye on them towards the end of the baking time, as oven temperatures can vary.

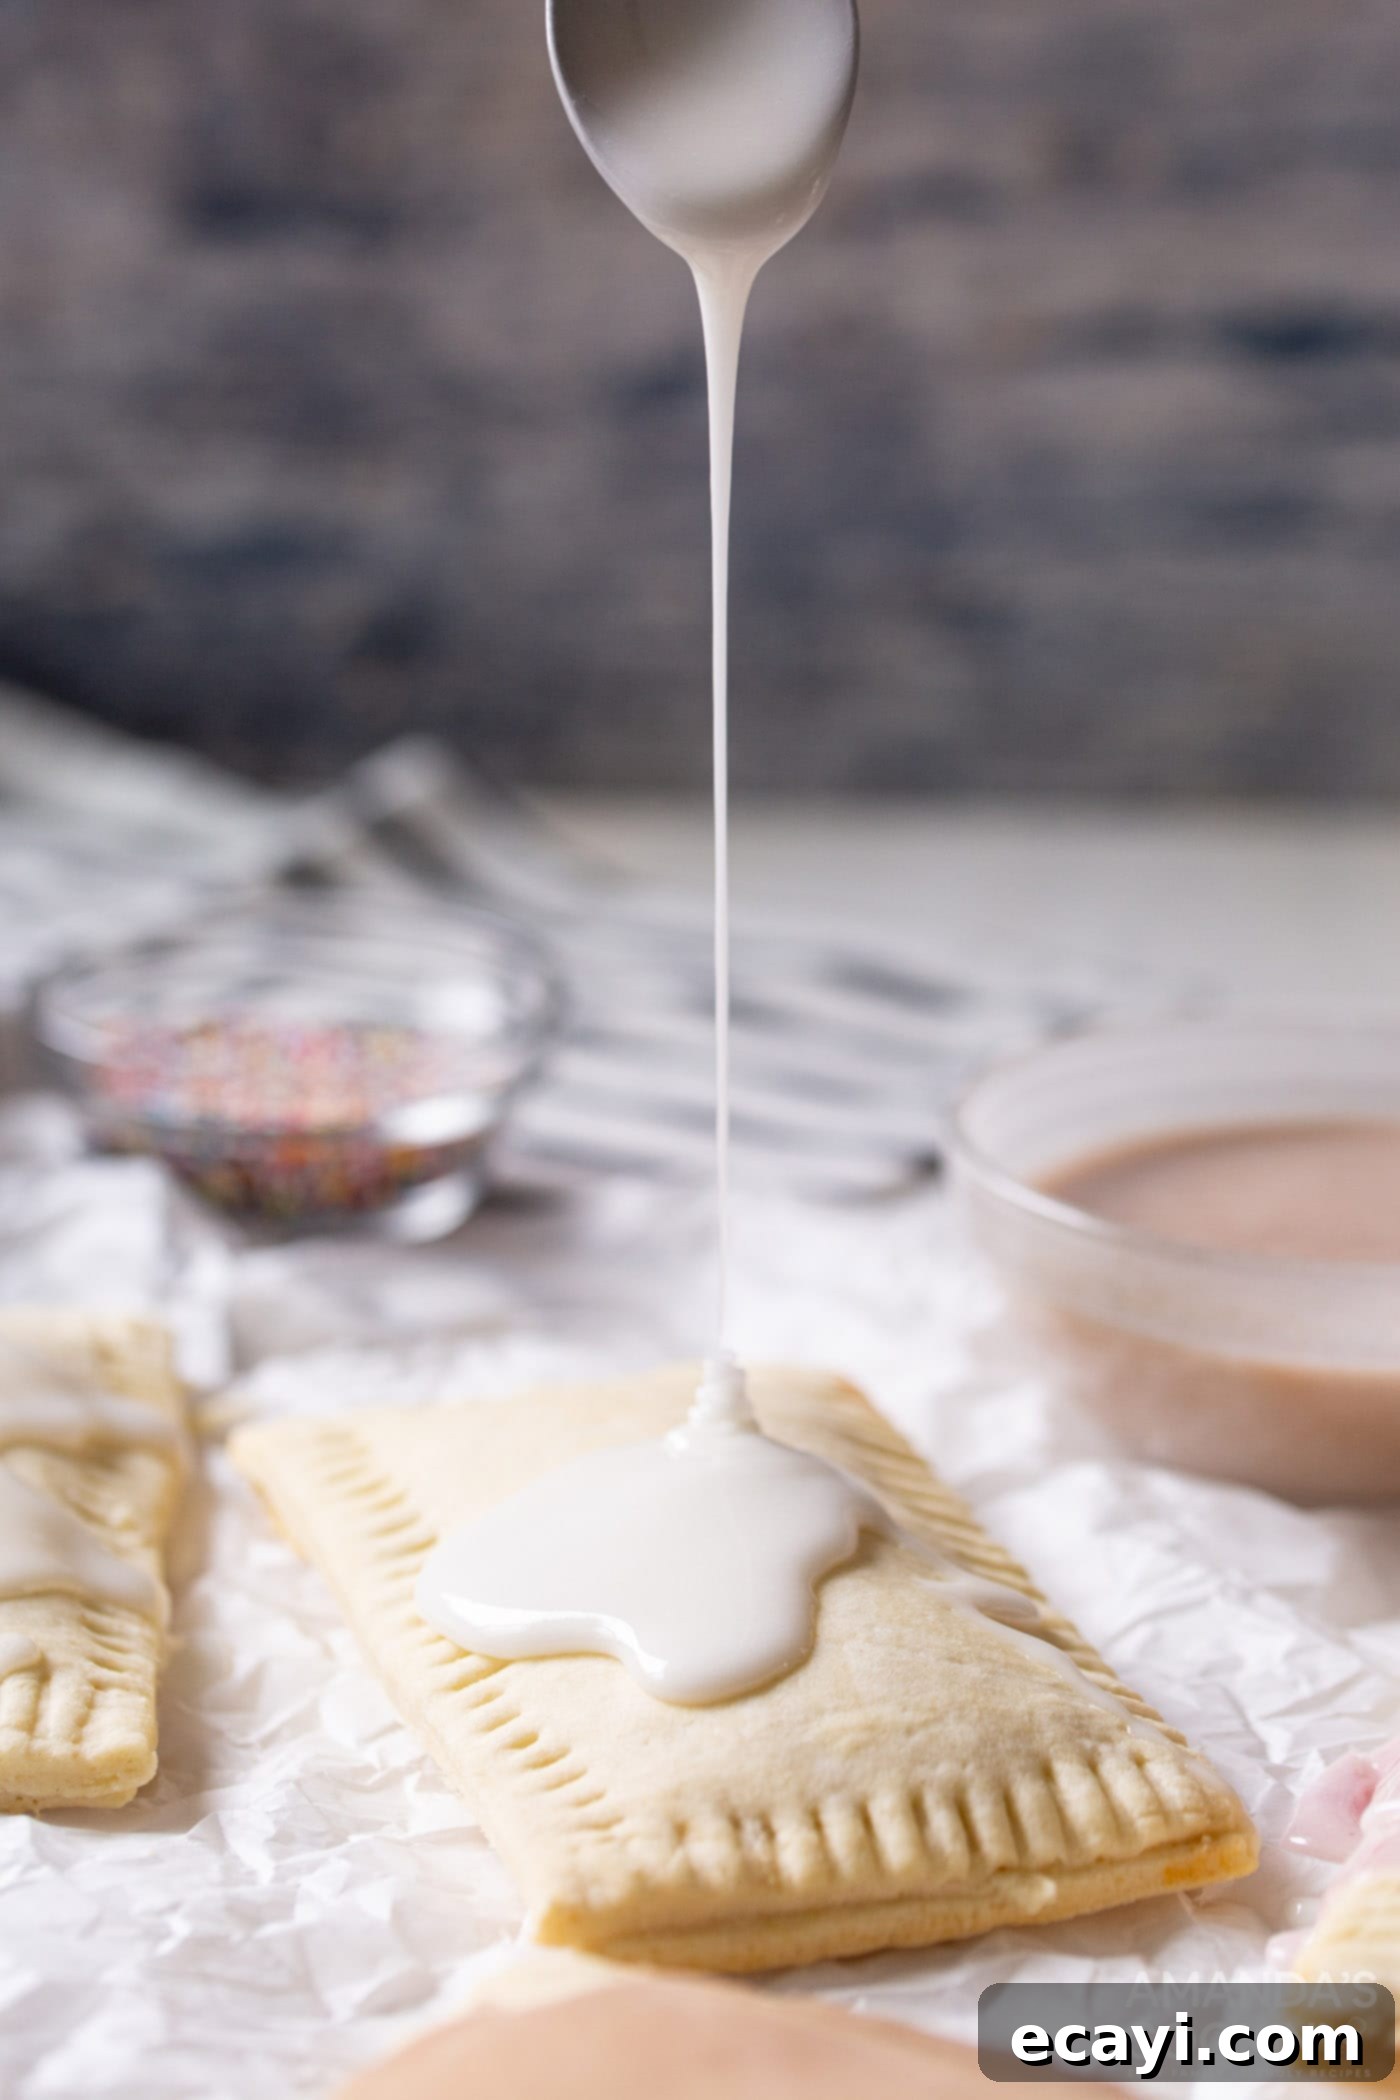
- Prepare and Apply the Glaze: While the pop tarts are still warm (but not piping hot), it’s time to prepare your simple yet luscious glaze. In a small bowl, combine the powdered sugar with milk. Whisk or stir vigorously with a spoon until you achieve a smooth, pourable consistency. If the glaze appears too thick, add a tiny bit more milk, a quarter teaspoon at a time; if it’s too thin, incorporate a little more powdered sugar until it reaches your desired texture. Drizzle this homemade glaze generously over the warm pop tarts.
EXPERT TIP for Glaze Variations:
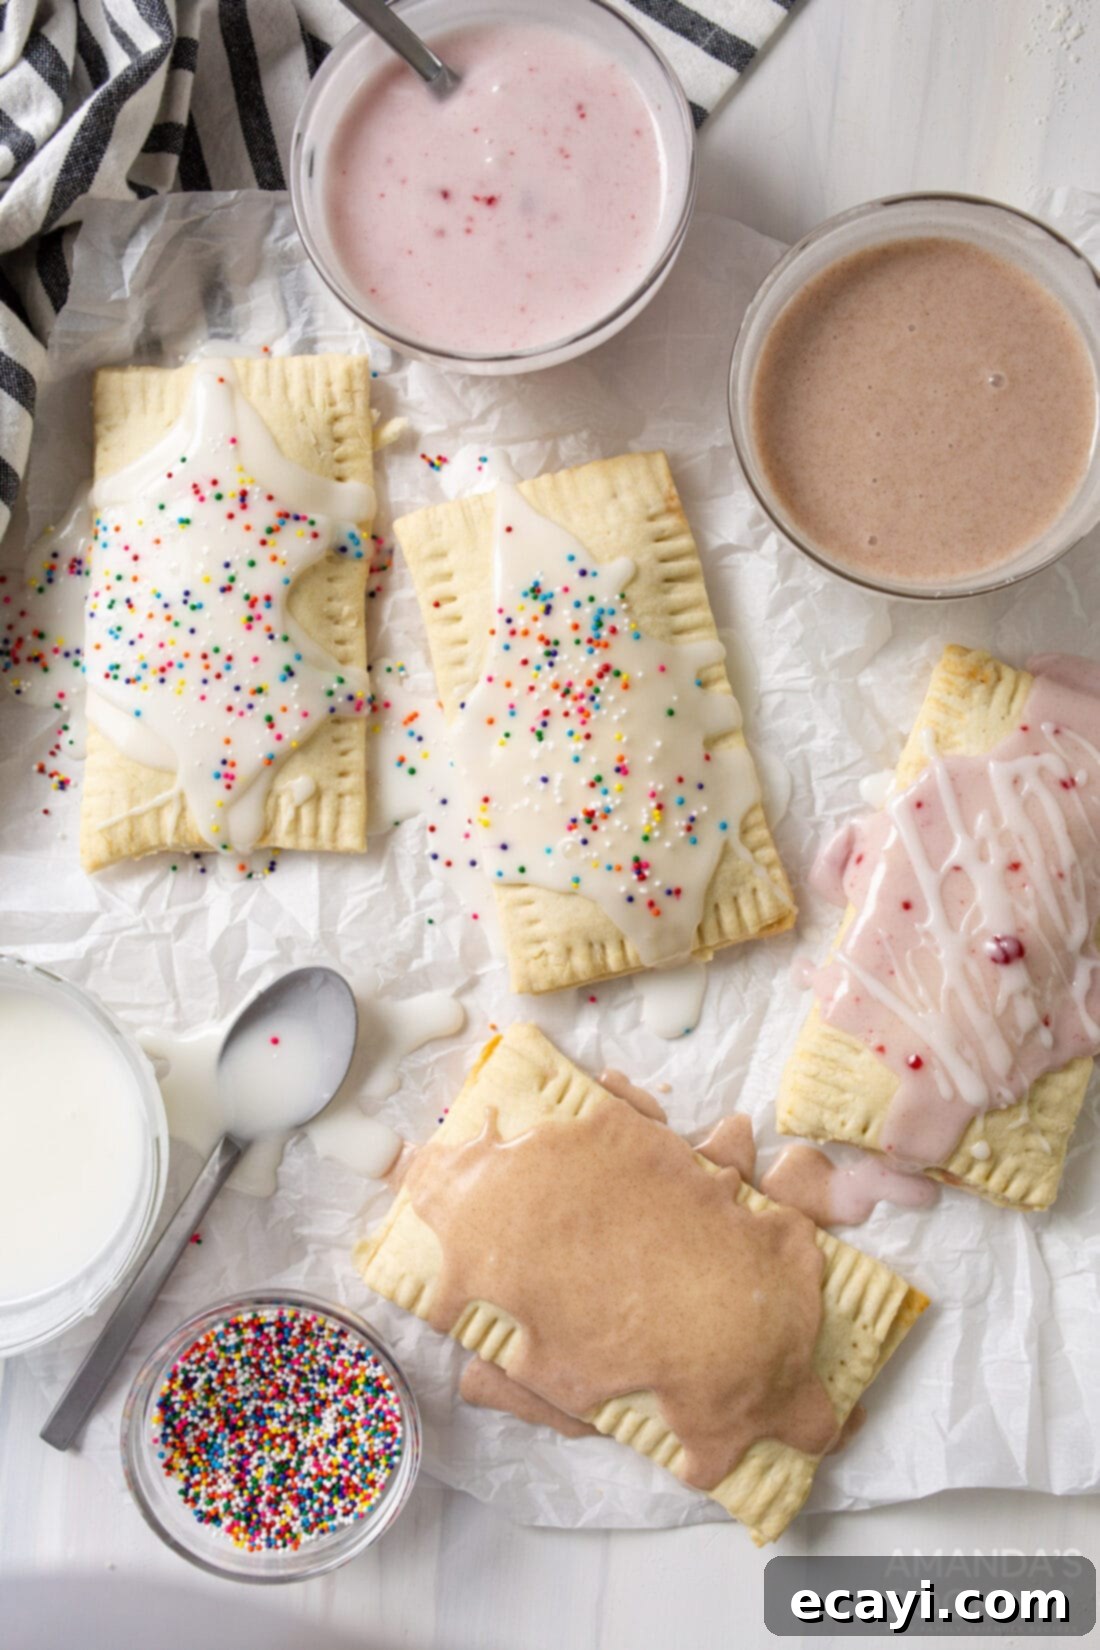
- Cinnamon Sugar Glaze: For a warming, spiced twist, simply add 1/4 teaspoon of ground cinnamon to your powdered sugar and milk mixture. This adds a wonderful depth of flavor.
- Fruity Pink Glaze: To create a lovely pink glaze (and subtly enhance the fruit flavor), stir in 1 teaspoon of your chosen red jam (raspberry or strawberry works perfectly for this) to the glaze mixture.
- Vanilla Glaze: A dash of pure vanilla extract (about 1/4 teaspoon) can add a classic, aromatic sweetness to your basic glaze.
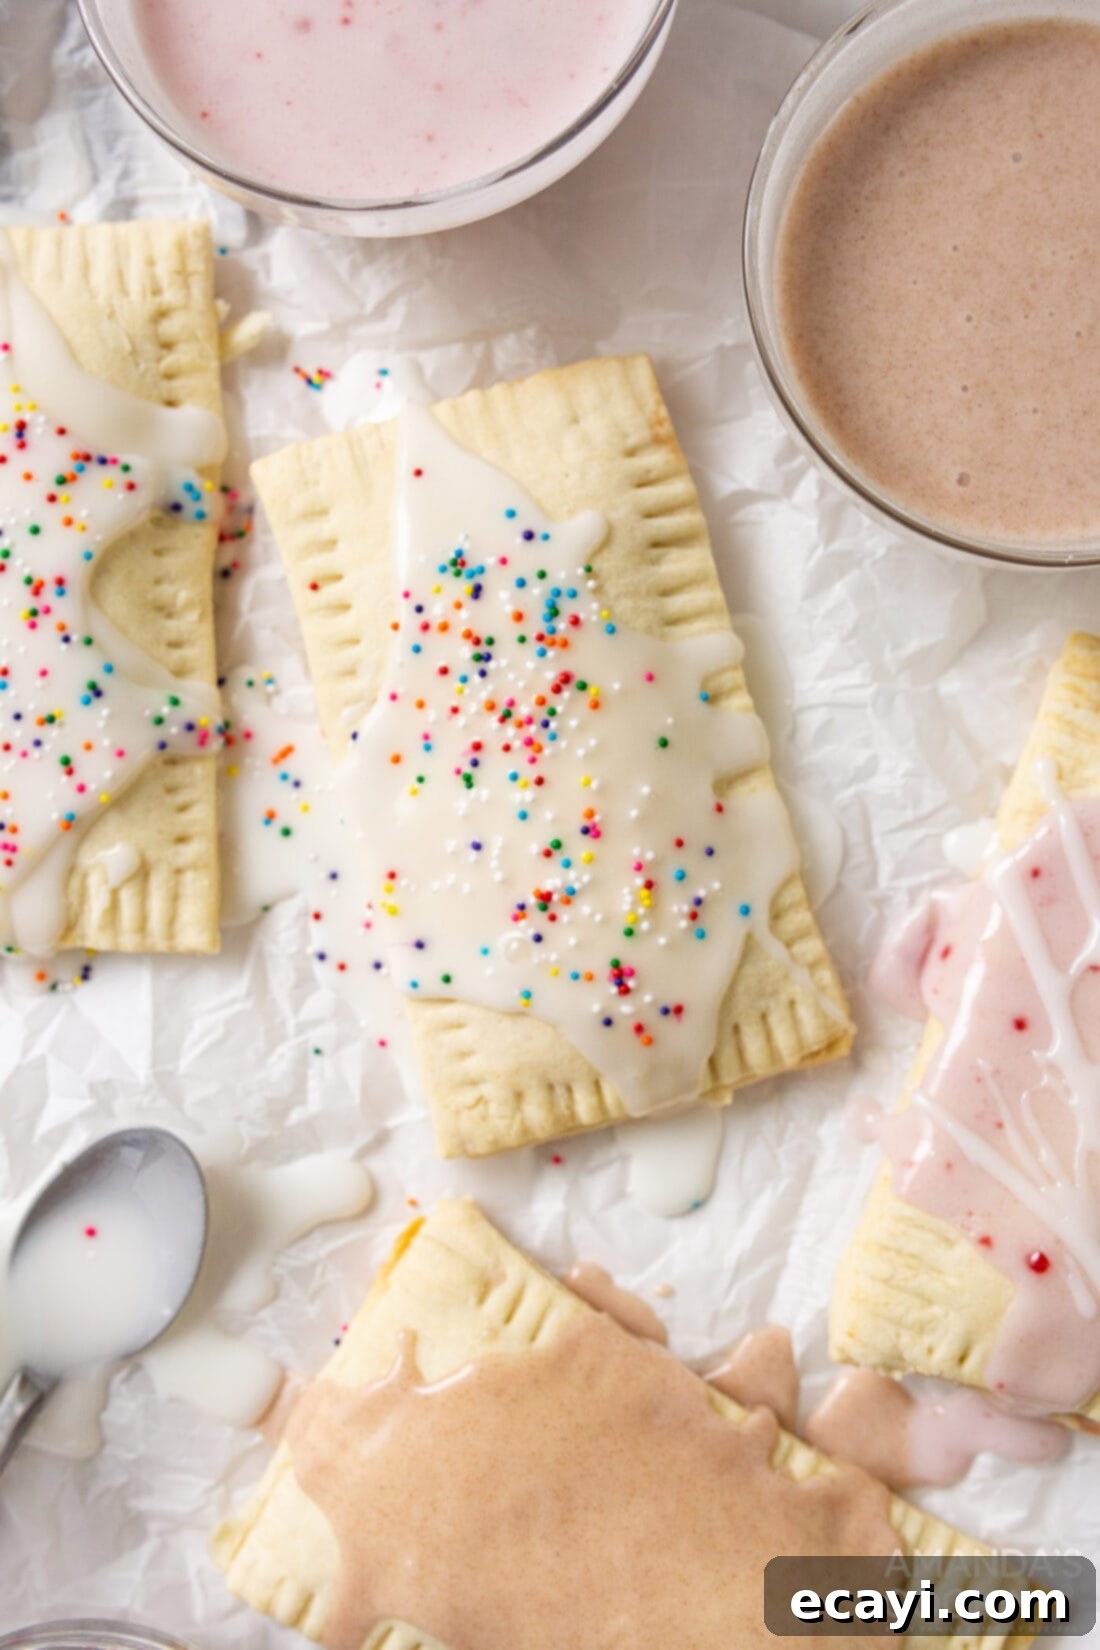
Finish by decorating your freshly glazed pop tarts with your choice of colorful sprinkles for a fun and festive touch!

Frequently Asked Questions & Expert Tips for Perfect Pop Tarts
Absolutely! These homemade pop tarts are excellent for meal prepping and freezing for later enjoyment, making them a fantastic grab-and-go breakfast or snack. Once your pop tarts have cooled completely to room temperature (this is important to prevent ice crystals), place them in a single layer on a baking sheet and freeze until solid. This “flash freeze” method prevents them from sticking together. Once solid, transfer the frozen pop tarts to a freezer-safe airtight bag or container. They can be stored in the freezer for up to 3 months. When you’re ready for a quick treat, simply let them thaw at room temperature for about 30 minutes, and then pop them into a toaster or toaster oven for a warm, deliciously crispy pastry. If you prefer, you can also reheat them in a preheated oven at 350°F (175°C) for 5-10 minutes until warmed through.
Proper storage ensures your homemade pop tarts remain fresh, flaky, and delicious for as long as possible. For short-term enjoyment, you can keep them in a sealed Ziploc bag or an airtight container at room temperature for up to 3 days. If you wish to extend their freshness a bit longer, store them in an airtight container in the refrigerator for up to 1 week. Always make sure they are completely cool before storing. Storing warm pastries can create condensation inside the container, which can make the crust soggy and less appealing.
Additional Expert Tips for Pop Tart Perfection:
- Avoid Overworking the Dough: Whether you’re using a store-bought mix or making your pie dough from scratch, remember that overworking the dough can develop too much gluten. This results in a tough, chewy crust rather than the desired flaky, tender texture. Mix just until the ingredients are combined.
- Keep Ingredients Cold: Cold ingredients, especially butter (or the fat in your pie crust mix), are paramount for achieving a wonderfully flaky crust. If your kitchen is warm, or if the dough becomes too soft during handling, consider chilling your rolled-out dough rectangles in the refrigerator for 10-15 minutes before filling and sealing.
- Even Jam Distribution: Spread your jam evenly and thinly within the designated 1/2-inch border. Using too much jam, or spreading it too close to the edges, can cause it to bubble out and leak during baking, creating a sticky mess and potentially ruining the seal.
- Ensure a Secure Seal: Don’t be shy when crimping the edges with a fork! Press down firmly to create a robust seal that will hold the filling in place. For an extra measure, you can also prick the top of each pop tart a few times with a fork (before baking) to allow any steam to escape, preventing the pastry from puffing up excessively or potentially bursting.
- Get Creative with Your Fillings: While classic fruit jam is always a winner, feel free to let your imagination run wild! Experiment with other delightful fillings like rich Nutella, creamy peanut butter, a spiced cream cheese mixture, or even a savory herb and cheese blend for a unique twist (adjusting glaze accordingly or omitting it).
- Master Glaze Consistency: For a beautifully smooth and drizzle-able glaze, add your milk to the powdered sugar gradually, a teaspoon at a time, until it reaches your desired consistency. It should be thick enough to generously coat the back of a spoon but thin enough to flow smoothly when drizzled.
Serving Suggestions & Creative Customizations
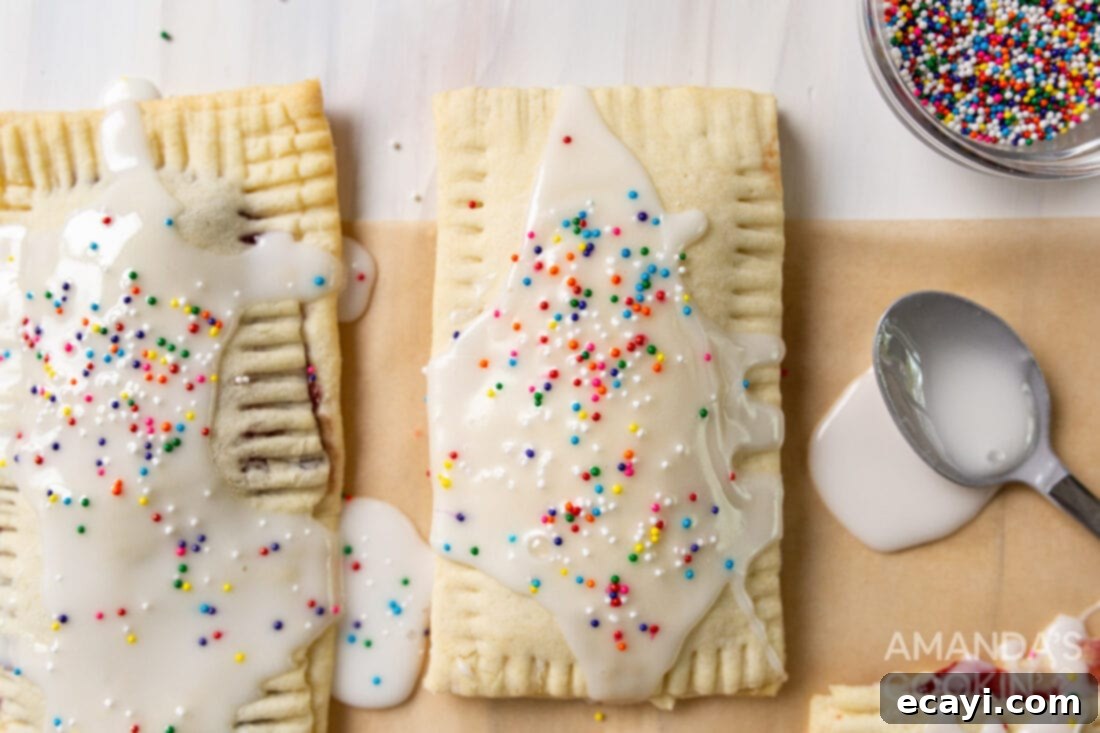
These homemade pop tarts are wonderfully versatile and can be enjoyed in a myriad of ways, perfectly suiting any occasion or preference. The most popular and visually appealing method is to serve them with a generous drizzle of our simple homemade glaze and a scattering of colorful sprinkles, just as we’ve demonstrated. However, if you prefer a less sweet option, you can easily use your spoon to lightly drizzle delicate lines across the top of the pastry, or even omit the glaze altogether for a simpler, more rustic treat that highlights the jam and flaky crust.
When it comes to sprinkles, the possibilities are truly endless, allowing for seasonal or themed customization! Classic nonpareils or vibrant rainbow jimmies are always a festive choice, adding a cheerful pop of color. For special occasions or holidays, consider using seasonal sprinkles – think red and green for Christmas, pastel hues for Easter, or orange and black for Halloween. You can also get creative with your glaze color by adding just a tiny drop of food coloring to the mixture. This is not only fun for presentation but can also be a clever and practical way to differentiate between various jam flavors if you’re making a multi-flavor batch.
Essentially, homemade pop tarts are delightful, jam-filled pastries encased in a sweet, flaky crust and lovingly topped with a lovely glaze. They make for a comforting and satisfying breakfast on busy mornings, a delightful accompaniment to your morning coffee or afternoon tea, or a quick, sweet snack to grab throughout the day. For those who cherish a warm treat with an extra bit of crunch, simply pop them into the toaster for a minute or two – just be cautious of any melty jam! They’re also perfect for packing into lunchboxes, bringing along on road trips, or giving as a thoughtful, homemade gift that shows you care.
Explore More Delicious Hand Pie Recipes
If you thoroughly enjoyed the process of making these homemade pop tarts and appreciate the convenience of a portable pastry, you’ll surely love exploring our other fantastic hand pie recipes. They offer the same delightful, convenient, and portable experience with a wide variety of both sweet and savory fillings. Perfect for experimenting with different flavors, textures, and meal times!
- Taco Empanadas
- Blueberry Hand Pies
- Pumpkin Hand Pies
- Cherry Hand Pies
I absolutely love to bake and cook, and my greatest joy comes from sharing my kitchen experiences and delicious recipes with all of you! Remembering to come back each day to check for new posts can be tough amidst busy schedules, which is why I offer a convenient newsletter every time a new recipe is published. Simply subscribe today and start receiving your free daily recipes straight to your inbox! Join our growing community of home bakers and ensure you never miss out on a delicious idea again!

Homemade Pop Tarts
IMPORTANT – There are often Frequently Asked Questions and Expert Tips within the blog post that you may find incredibly helpful. Simply scroll back up to read them for more insights!
Print It
Pin It
Rate It
Save It
Saved!
Prevent your screen from going dark
Course:
Breakfast, Dessert
Cuisine:
American
4
pop tarts
42 minutes
410
Amanda Davis
Ingredients
-
9
oz
jiffy pie crust mix
1 box -
4
Tbsp
water
4-5 Tbsp, cold -
4
Tbsp
jam
*1 TBSP per pop tart* (e.g., blackberry, raspberry, blueberry, strawberry, or apple butter)
Glaze
-
½
cup
powdered sugar -
2
Tbsp
milk
1-2 tbsp (adjust for desired consistency)
Things You’ll Need
-
Baking sheets -
Parchment paper (optional but recommended for easy cleanup)
Before You Begin
- For optimal freshness, store your cooled homemade pop tarts in a sealed Ziploc bag or an airtight container at room temperature for up to 3 days. Alternatively, you can keep them in an airtight container in the refrigerator for up to 1 week. For longer preservation, refer to the freezing instructions in the FAQ section above.
- Ensure all your ingredients are prepared and measured before you start, especially having your water for the crust mix nice and cold.
Instructions
-
Preheat your oven to 400°F (200°C). Prepare a baking sheet by lining it with parchment paper.
-
Prepare the pie crust according to the box instructions, typically by adding 4-5 Tablespoons of cold water. Mix just until a dough forms. Cut out a rectangular template from the Jiffy box itself to ensure consistent pop-tart sizing.
-
On a lightly floured surface, roll out the pie crust into a large rectangle, aiming for 1/8 to 1/4 inch thickness. Use your template to cut out 8 uniform rectangles. Gather and re-roll dough scraps as needed, adding tiny amounts of cold water if the dough becomes too dry.
-
Place four dough rectangles onto your prepared baking sheet. Spoon 1 Tablespoon of your chosen jelly, jam, or apple butter onto the center of each, spreading it out and leaving a clear 1/2-inch perimeter. Lightly wet this perimeter with water (using a fingertip or brush).
-
Carefully place a second dough rectangle on top of each filled one, aligning the edges. Use a fork to firmly press down all along the edges of each pop tart, sealing the filling inside and creating a decorative crimp. Repeat for the remaining dough pieces.
-
Bake in the preheated oven at 400°F (200°C) for 10-12 minutes, or until the crusts are beautifully golden brown and look flaky.
-
While the pop tarts are still warm, prepare the glaze: combine powdered sugar and milk in a small bowl, whisking until smooth and pourable. Drizzle generously onto the warm pop tarts and decorate with your choice of sprinkles.
-
Glaze Tip: For a cinnamon sugar glaze, add 1/4 teaspoon of ground cinnamon. To make a lovely pink glaze, stir in 1 teaspoon of your red jam (such as raspberry or strawberry) to the glaze mixture.
Nutrition
Serving:
1
pop tart
|
Calories:
410
cal
|
Carbohydrates:
60
g
|
Protein:
4
g
|
Fat:
17
g
|
Saturated Fat:
5
g
|
Cholesterol:
1
mg
|
Sodium:
272
mg
|
Potassium:
87
mg
|
Fiber:
2
g
|
Sugar:
25
g
|
Vitamin A:
13
IU
|
Vitamin C:
2
mg
|
Calcium:
25
mg
|
Iron:
2
mg
Tried this Recipe? Pin it for Later!
Follow on Pinterest @AmandasCookin or tag #AmandasCookin!
The recipes on this blog are tested with a conventional gas oven and gas stovetop. It’s important to note that some ovens, especially as they age, can cook and bake inconsistently. Using an inexpensive oven thermometer can assure you that your oven is truly heating to the proper temperature. If you use a toaster oven or countertop oven, please keep in mind that they may not distribute heat the same as a conventional full sized oven and you may need to adjust your cooking/baking times. In the case of recipes made with a pressure cooker, air fryer, slow cooker, or other appliance, a link to the appliances we use is listed within each respective recipe. For baking recipes where measurements are given by weight, please note that results may not be the same if cups are used instead, and we can’t guarantee success with that method.
