Easy Halloween Oreo Truffles: 3 Spooky & Sweet Ways to Celebrate
Get ready to conjure up some magic in your kitchen with these incredibly easy Halloween Oreo truffles! This comprehensive guide will show you how to create three distinctively delightful and spooky treats: creepy mummy truffles, adorable pumpkin truffles, and festive sprinkle-covered delights. Whether you’re hosting a ghoulish Halloween party, searching for a fun family activity, or simply craving a sweet indulgence during the spooky season, these no-bake Oreo truffles are the perfect solution. They are simple to prepare, wonderfully versatile, and guaranteed to be a hit with both kids and adults, making them an ideal addition to your holiday dessert repertoire.
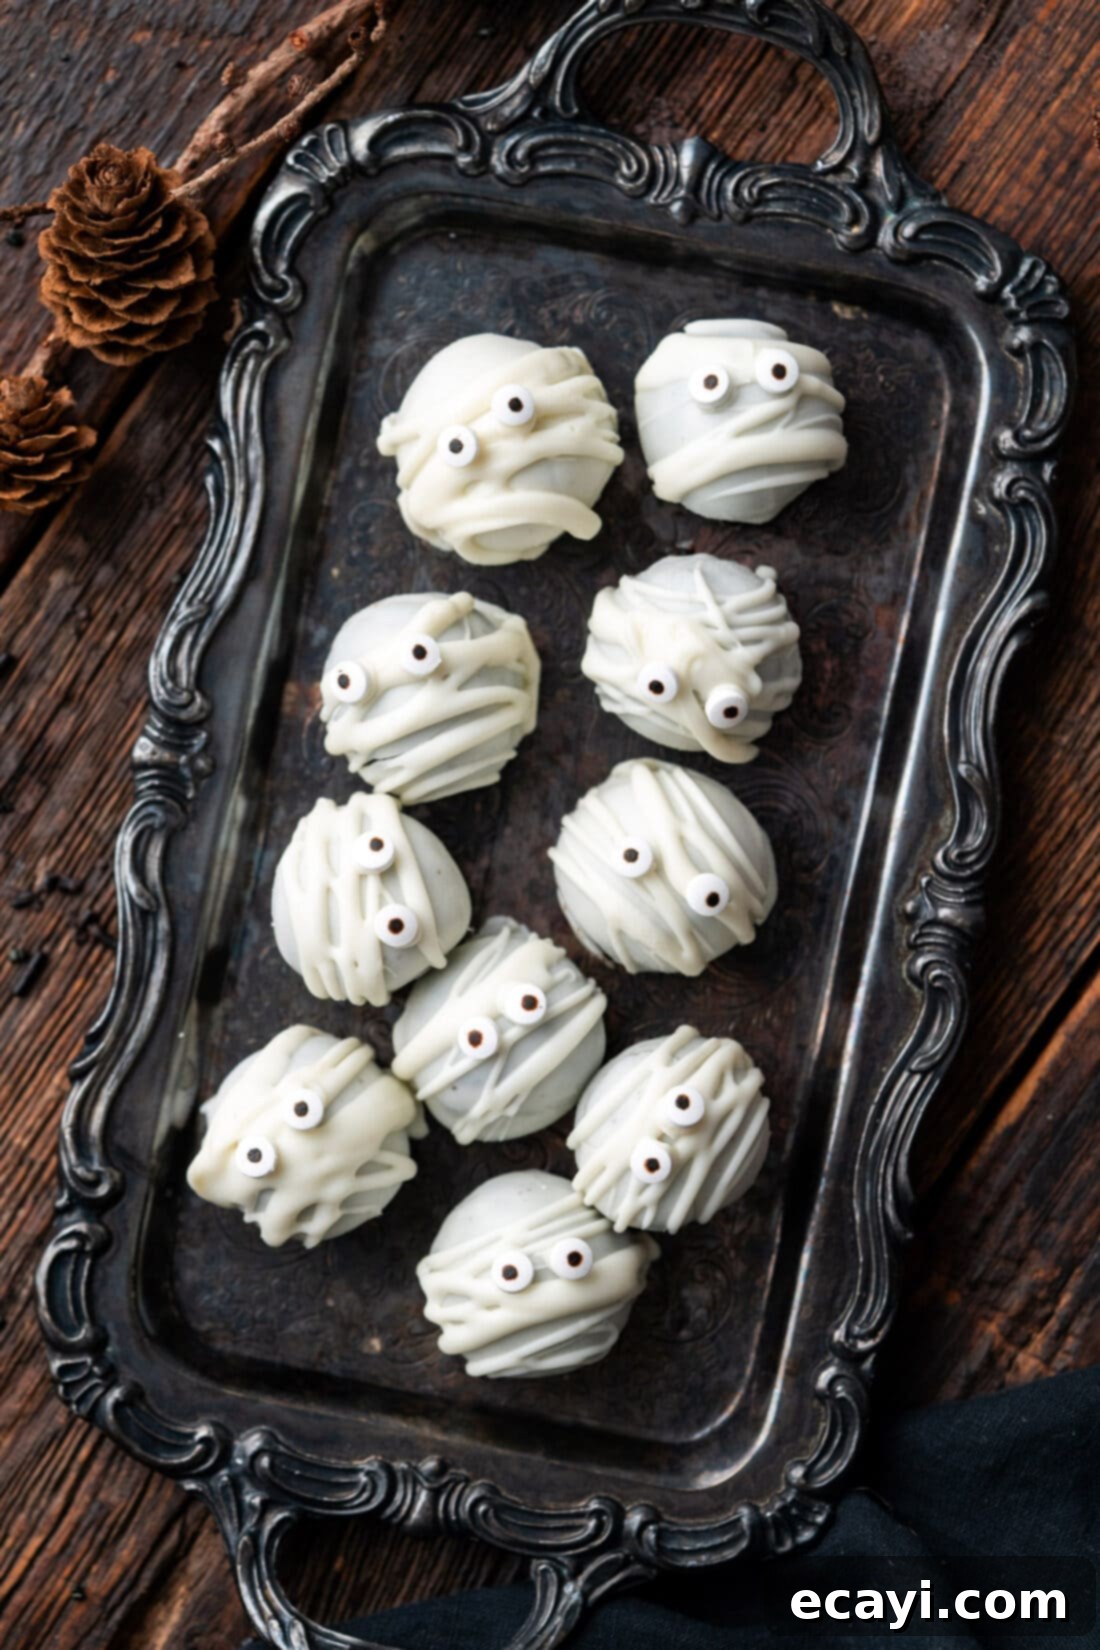
Why These Halloween Oreo Truffles Are a Must-Make Treat
This Halloween Oreo truffle recipe truly stands out for its impressive blend of simplicity, versatility, and sheer deliciousness. We’ve designed three distinct, delightful variations – eerie mummy truffles, charming pumpkin truffles, and classic Halloween sprinkle truffles – offering you the creative freedom to choose your favorite, or even better, make all three for an eye-catching assortment! These spooky yet utterly adorable bite-sized treats are guaranteed to be the star attraction of your Halloween dessert table, and the best part is, they couldn’t be easier to prepare.
Here’s why these easy Halloween Oreo truffles will become your go-to spooky season dessert:
- Effortless Preparation: Forget complicated baking! This no-bake recipe requires only a handful of readily available ingredients and straightforward steps, making it perfect for even novice bakers or those short on time. A food processor does most of the heavy lifting.
- Customizable Fun: The basic Oreo truffle mixture serves as a versatile canvas. With various colored candy melts, sprinkles, and edible decorations, you can unleash your creativity and tailor them to any Halloween theme, color scheme, or personal preference. The possibilities for spooky designs are endless!
- Perfect for Parties: These truffles are not only visually appealing but also perfectly portioned. Their bite-sized nature makes them ideal for Halloween parties, school events, potlucks, or even a cozy movie night at home with loved ones. They are easy to transport and simple for guests to enjoy.
- Kid-Friendly Activity: The decorating process is particularly engaging and safe for children, transforming recipe preparation into a fun, interactive holiday craft. It’s a wonderful way to involve the whole family in the Halloween festivities.
- Rich, Decadent Flavor: At their core, Oreo truffles are a universally beloved dessert, known for their rich, creamy, and deeply satisfying taste. The simple combination of crushed Oreo cookies, tangy cream cheese, and a sweet chocolate coating creates a delightful texture and flavor profile that’s hard to resist. This recipe builds on that classic foundation, infusing it with playful Halloween flair.
These simple yet impressive treats prove that you don’t need to spend hours in the kitchen to create a memorable and delicious Halloween dessert spread. Get ready for compliments!
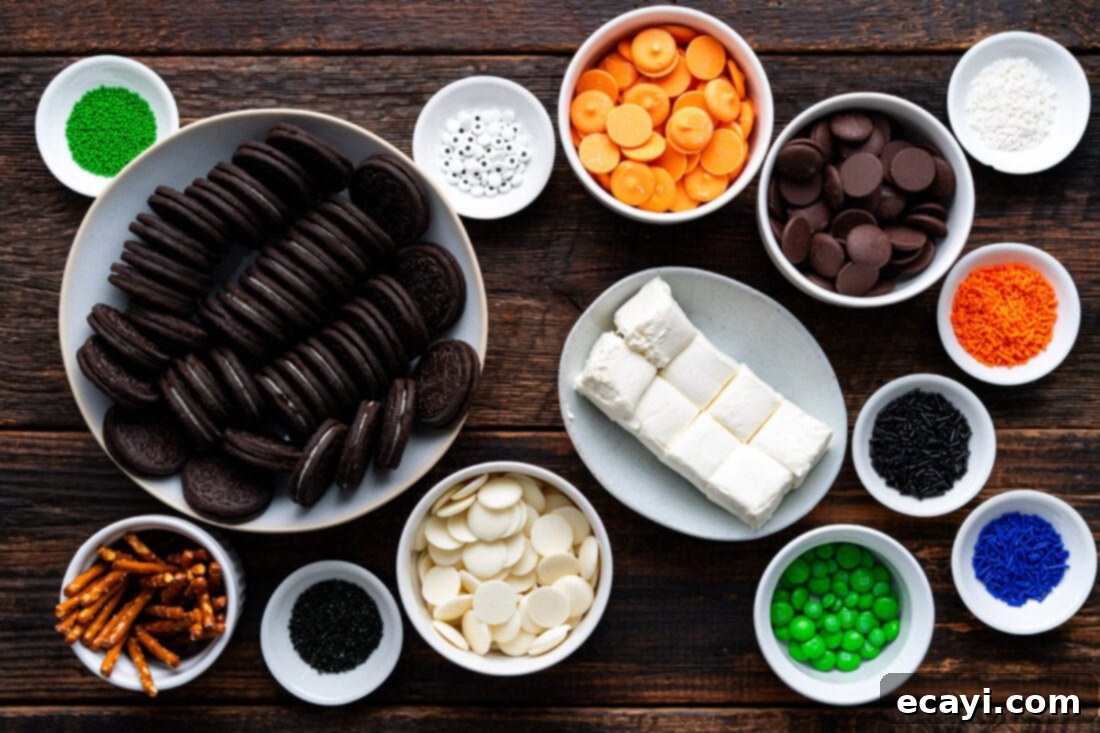
Essential Ingredients for Spooky Oreo Truffles
Before you begin your culinary adventure into creating these delightful Halloween Oreo truffles, let’s make sure you have all the necessary components. The ingredient list is refreshingly short and sweet, emphasizing ease and accessibility. You’ll find all the precise measurements, ingredient quantities, and comprehensive instructions meticulously detailed in the printable recipe card, conveniently located at the very end of this blog post. For now, here’s a general overview of the key ingredients you’ll need to gather to bring these spooky and sweet treats to life.
Ingredient Spotlight & Creative Substitution Suggestions
A successful truffle starts with quality ingredients, but also understanding how they work together and where you can get creative. Here’s a deeper dive into each core component and some ideas for customizing your easy Halloween Oreo truffles:
Oreos
For this recipe, you will need 36 regular (not double-stuffed) Oreo sandwich cookies. It’s crucial to include the creamy white filling, as it plays a vital role in lending moisture to the mixture, which is essential for achieving that perfect, pliable truffle “dough” consistency. While classic Oreos provide a familiar and delicious flavor, don’t hesitate to unleash your creativity with substitutions! Golden Oreos can be used for a lighter base, which can make colored candy coatings even more vibrant. For a unique flavor twist, consider using seasonal or specialty Oreo flavors like mint, peanut butter, or even red velvet to add an extra layer of taste and a subtle color variation to your truffles. Just ensure whichever flavor you choose, they are standard-stuffed to maintain the correct moisture balance in the truffle mixture.
Cream Cheese
Cream cheese is the magical binder that transforms crushed Oreos into a rich, decadent, and perfectly scoopable truffle base. Beyond its binding properties, it also contributes a subtle tanginess that beautifully balances the sweetness of the cookies and chocolate coating, elevating the overall flavor profile. For optimal results, it is absolutely essential to start with room temperature cream cheese. Cold cream cheese will be firm and difficult to blend smoothly, potentially resulting in a lumpy or uneven truffle mixture. To ensure it softens properly, cut the cream cheese into 1-inch cubes and allow it to rest on your countertop for 30-45 minutes before you begin processing. This step guarantees a silky-smooth truffle base that’s easy to work with.
Chocolate and Candy Melts
The outer coating is where your Halloween Oreo truffles truly come to life, offering a canvas for all your spooky decorations! You have several excellent options for the coating:
- Melting Wafers: Brands like Ghirardelli offer high-quality semi-sweet or white chocolate melts that are fantastic for this recipe. These wafers are specifically formulated to melt smoothly and consistently without the need for tempering, providing a professional-looking, glossy finish. They also come in a vibrant array of colors, making them perfect for festive themes.
- Baking Chocolate Bars: If you prefer to use real chocolate, chopping up a good quality bar of baking chocolate (dark, milk, or white) will also yield delicious results. Just be aware that real chocolate might require tempering for the smoothest, snappiest coating, though for truffles, simply melting it carefully usually suffices.
- Chocolate Chips: While convenient, standard chocolate chips are not always the best choice for coating truffles. They often contain stabilizers that prevent them from melting as smoothly as dedicated melting wafers or baking chocolate. White chocolate chips, in particular, are notorious for seizing (becoming thick and grainy) when heated, even slightly. If chocolate chips are your only option, melt them very slowly over low heat or in short microwave bursts, stirring constantly. You may also need to add a small amount of shortening or coconut oil to achieve a more fluid consistency.
- Colored Candy Melts (Orange Wafers): For our cheerful pumpkin truffles, orange melting wafers are essential for that classic Halloween look. It’s worth noting that some colored candy melts, including orange, can sometimes be a bit harder to work with than white or standard chocolate wafers, often being slightly thicker or less fluid. If you find your orange melting wafers are too thick, you can easily thin them out by stirring in approximately 1 teaspoon of shortening or coconut oil per 8 ounces of melting wafers. This will help achieve a smoother, more even coating. If you can’t find orange melting wafers, you can tint melted white chocolate with a few drops of orange gel food coloring. Avoid liquid food coloring, as it can cause chocolate to seize.
Always melt your chosen chocolate or candy melts in a microwave-safe bowl in short, 30-second increments, stirring thoroughly after each interval. This prevents burning and ensures a silky-smooth, pourable consistency, crucial for an even truffle coating.
Step-by-Step Guide: Crafting Your Basic Oreo Truffle Base
These step-by-step photos and detailed instructions are thoughtfully provided to help you visualize and master each stage of this delicious recipe. For your convenience, a printable version of the entire recipe, complete with precise measurements for all ingredients and instructions, is readily available. Simply Jump to Recipe at the very bottom of this post to access it.
- Pulverize the Oreos: Begin by carefully placing all 36 regular Oreo cookies, including their creamy white filling, into the bowl of a food processor. Pulse or process them until they are transformed into very fine, uniform crumbs. The key here is consistency – the finer the crumbs, the smoother and more cohesive your truffle mixture will be.
- Combine with Cream Cheese: Add the softened, cubed cream cheese directly into the food processor with the finely crushed Oreo crumbs. Continue to process the mixture until all ingredients are thoroughly combined. The mixture should come together to form a thick, cohesive “dough” that easily clumps when pressed between your fingers. You may need to stop and scrape down the sides of the bowl once or twice to ensure everything is evenly incorporated.
- Scoop for Uniformity: Using a 1-tablespoon sized scoop, portion out uniform balls of the Oreo mixture. This ensures consistent truffle sizes, which is important for even coating and presentation. Place each scooped ball onto a baking sheet that has been lined with parchment paper. This preparation prevents sticking and makes subsequent handling much easier.
- Initial Chill for Firmness: Once all the mixture has been scooped, place the entire baking sheet into the freezer for approximately 10 minutes. This quick initial chill is crucial as it helps to firm up the truffle dough slightly, making it significantly easier to handle and roll into smooth spheres without them becoming sticky or losing shape.
- Roll for Smoothness: Remove the tray from the freezer. Gently roll each truffle ball between the palms of your hands to create perfectly smooth, round spheres. This step gives your truffles a polished, professional finish, which is especially important for decorative variations.
- Final Chill Before Coating: After rolling, return the tray to the freezer for an additional 10 to 15 minutes, or, if you prefer, place it in the refrigerator for about 30 minutes. It is absolutely essential that the truffle balls are thoroughly chilled and firm before you attempt to coat them. This cold temperature prevents them from falling apart or melting into the warm candy coating, ensuring a beautiful, unblemished outer layer.
Decorating Spooky Mummy Oreo Truffles
Transform your classic Oreo truffles into charmingly eerie mummy treats with a simple white chocolate coating and a few edible candy eyes. This decoration method is surprisingly easy to execute and delivers maximum visual impact, making these mummy truffles a standout addition to your Halloween dessert spread.
- Melt White Wafers: Place 8 ounces of white melting wafers into a clean, microwave-safe bowl. Heat them in short, 30-second increments, diligently stirring between each interval, until the wafers are completely melted and possess a smooth, fluid consistency. Exercise caution to avoid overheating, as this can cause the chocolate to seize or burn, making it unusable.
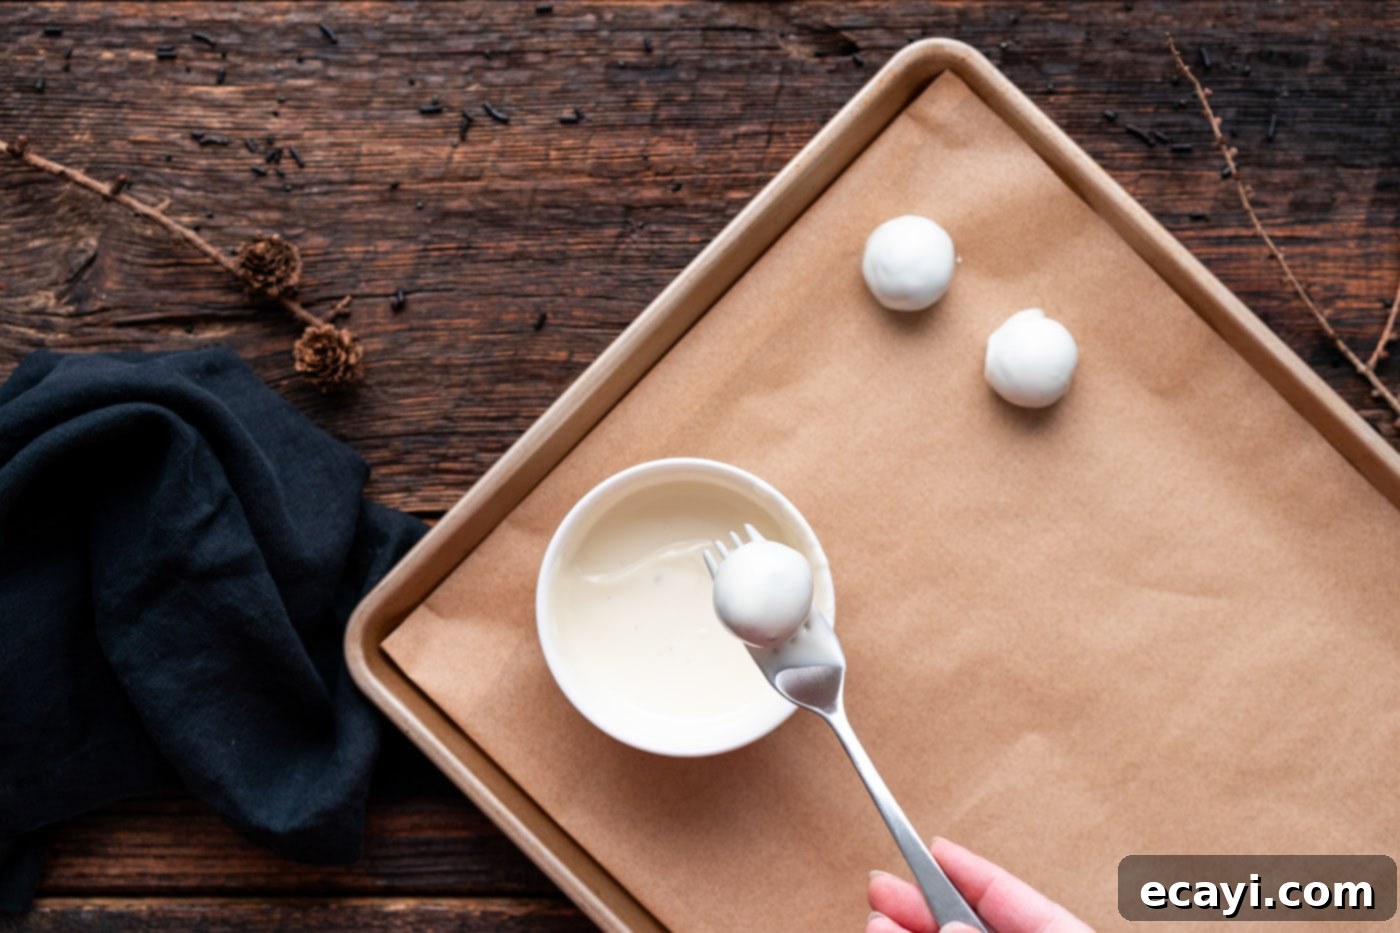
- Coat the Truffles: Work quickly and efficiently, handling one firm truffle ball at a time. Fully immerse the truffle into the melted white candy. Use a fork to gently turn the truffle, ensuring it’s completely and evenly coated. Lift the truffle out with the fork, gently tapping the side of the bowl to allow any excess coating to drip off. Carefully transfer the coated truffle to a baking sheet lined with clean parchment paper. Continue this dipping process until all the truffles designated for mummies have a smooth white base coat.
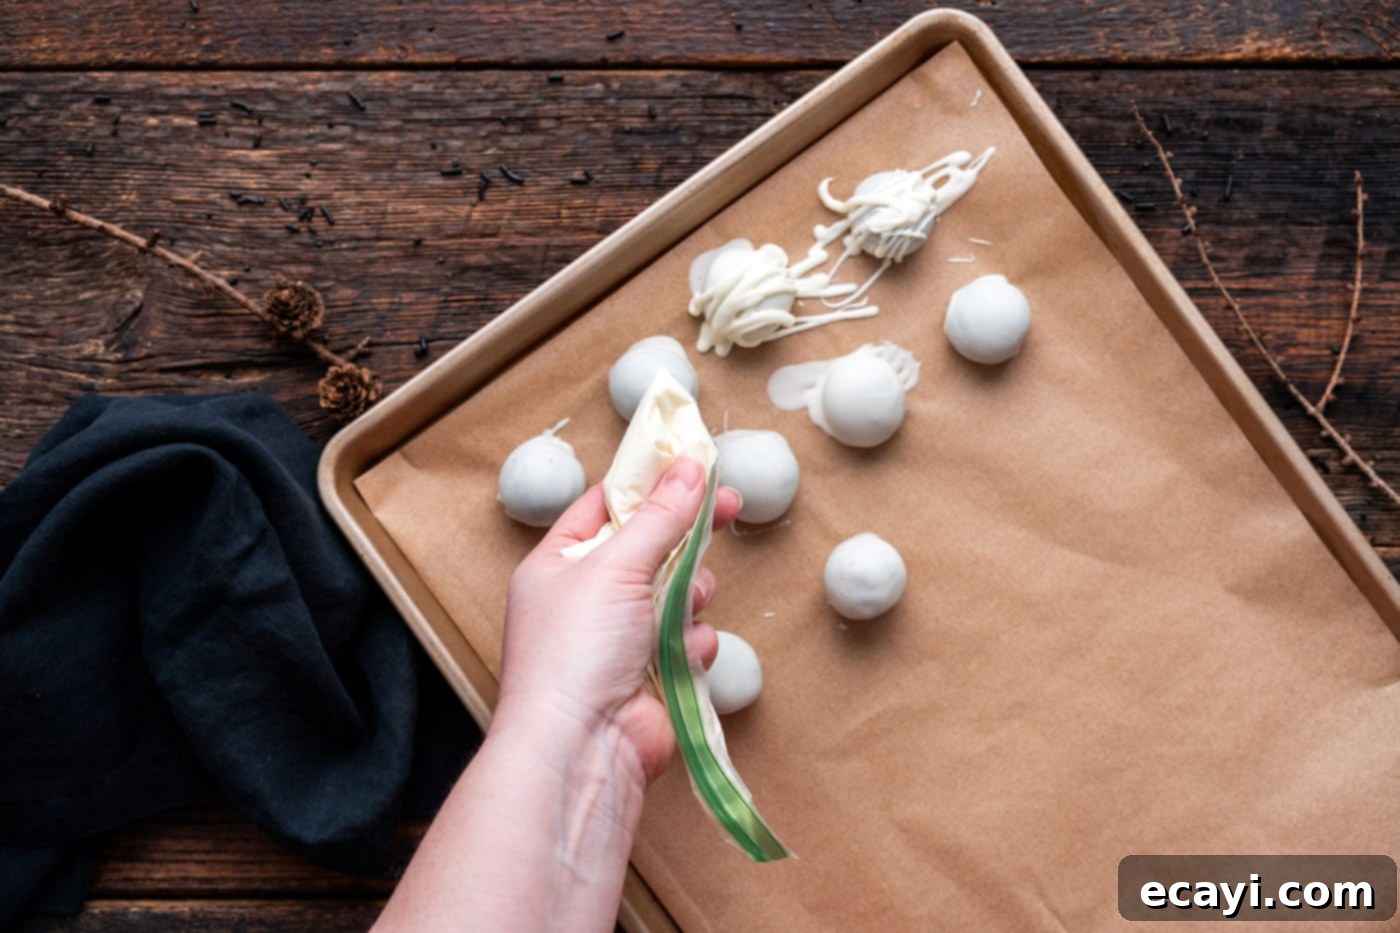
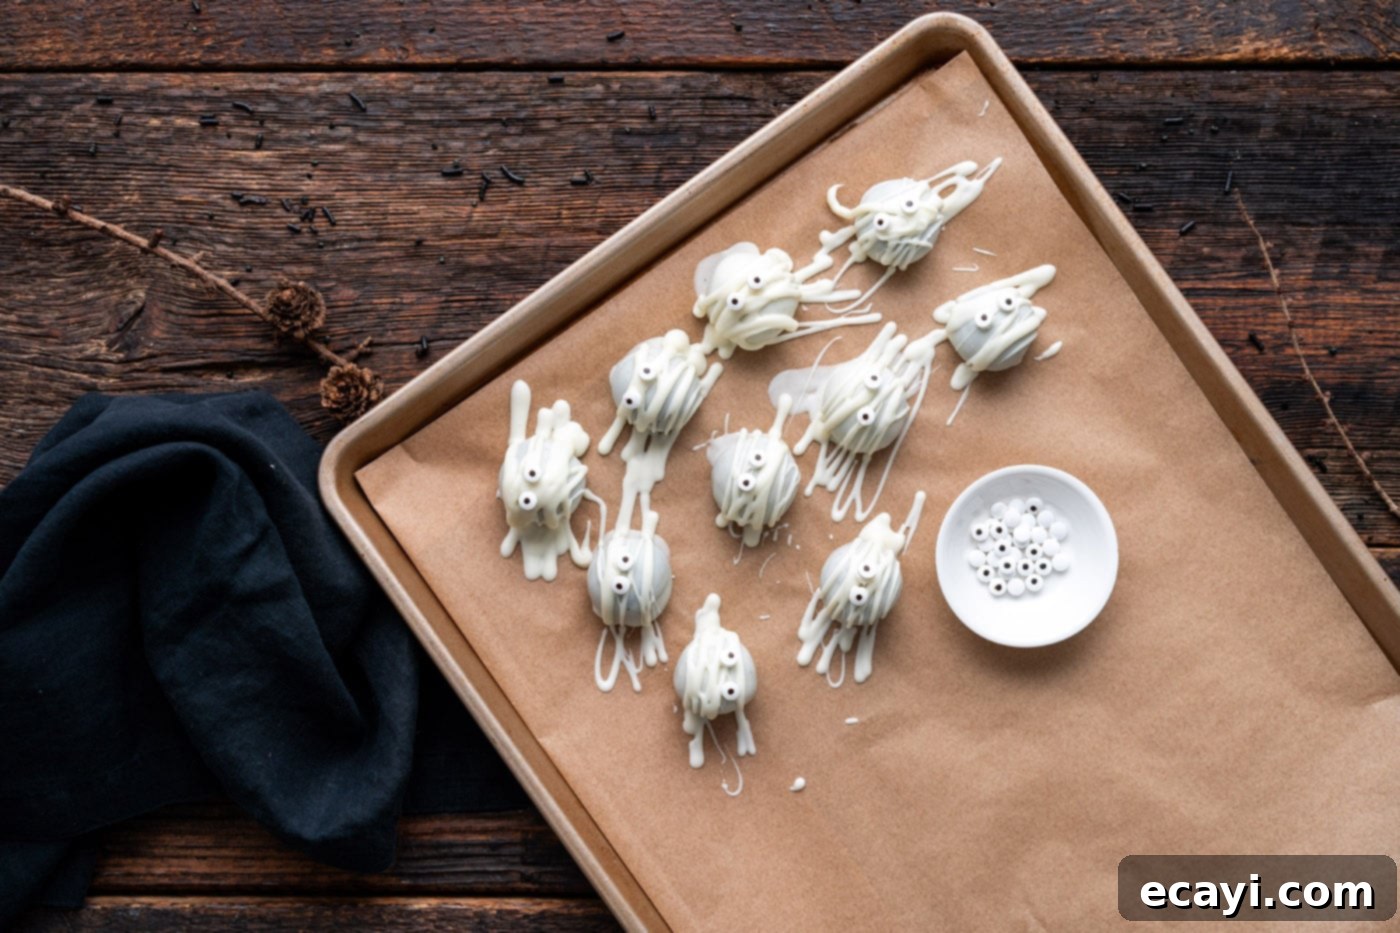
- Create Bandages and Eyes: Melt the remaining 2 ounces of white melting wafers using the exact same microwave method. Transfer this smaller batch of freshly melted candy into a small zip-top bag, then snip off a tiny corner of the bag (this effectively creates a makeshift piping bag). Immediately begin drizzling the melted white candy across each coated truffle in a back-and-forth, irregular motion to create the appearance of mummy bandages. While the “bandages” are still wet and pliable, immediately place two small candy eyeballs onto each truffle. The wet candy will serve as a natural “glue,” securely holding the eyes in place.
- Repeat and Set: Continue the drizzling and eye-placement process swiftly until all your mummy truffles are complete and adorned. Allow them to set completely at room temperature or in the refrigerator until the coating is firm and hard to the touch.
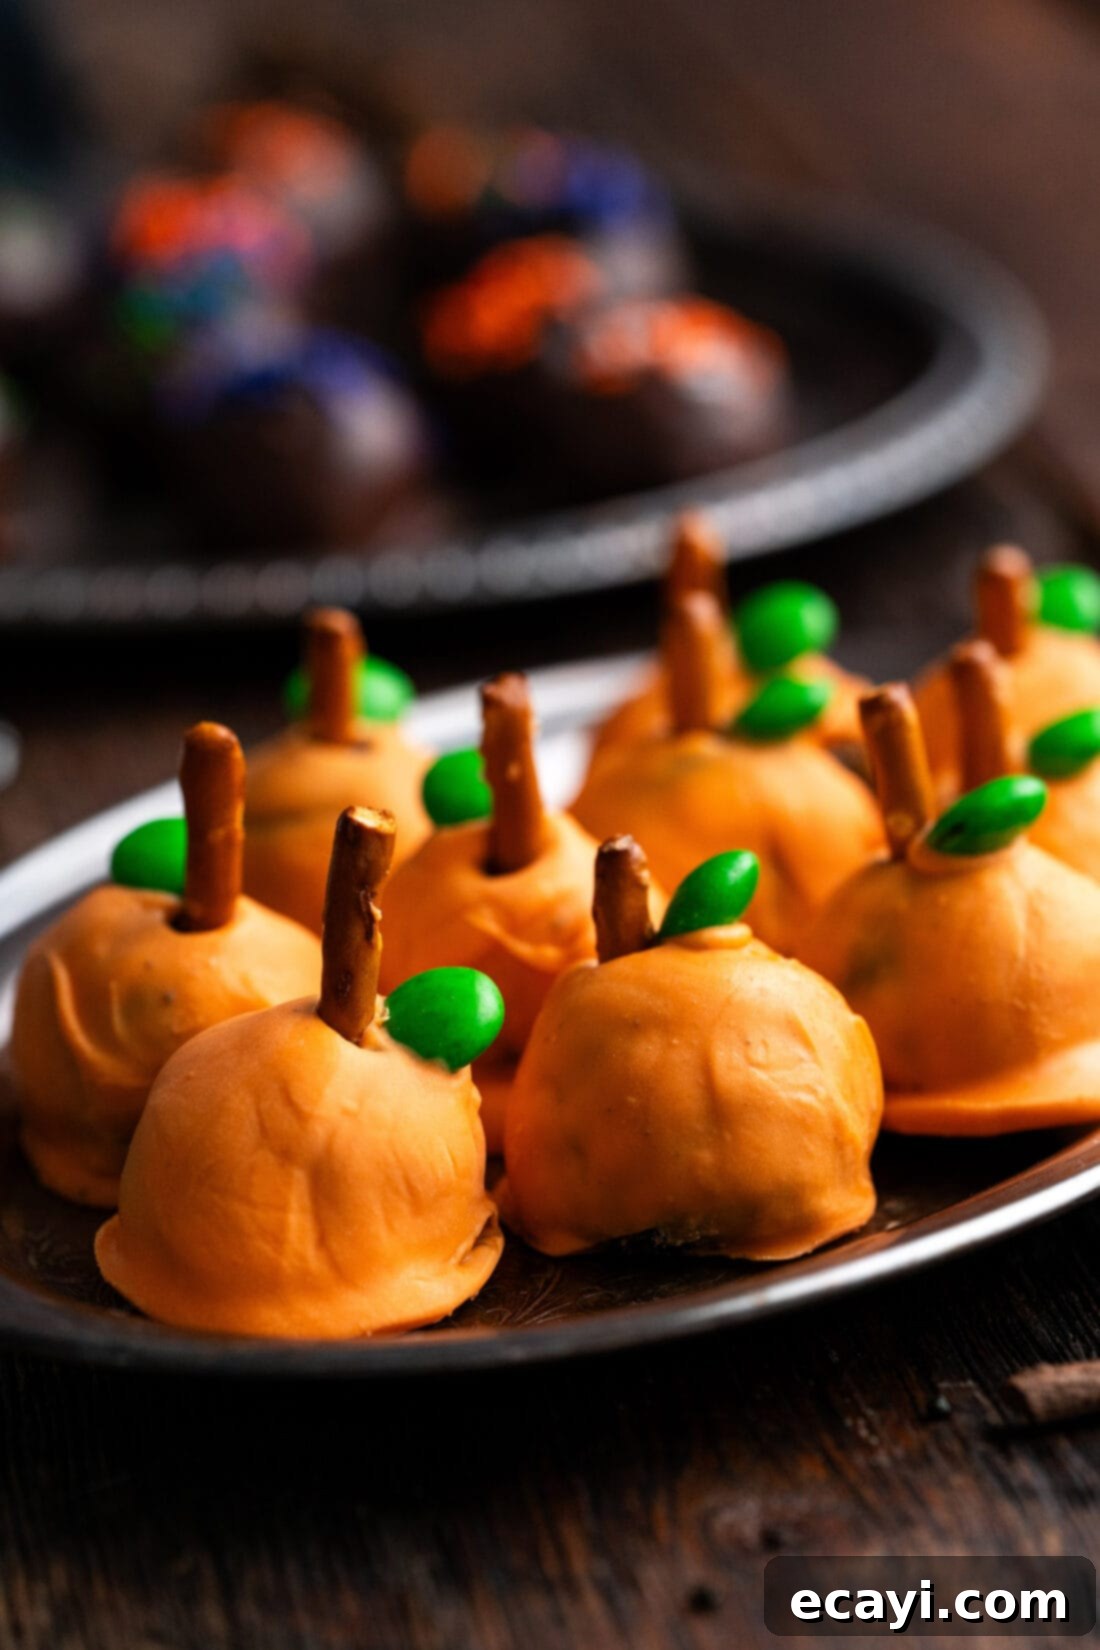
Crafting Adorable Pumpkin Oreo Truffles
These vibrant pumpkin truffles are an undeniable and quintessential symbol of fall and Halloween. Their bright orange hue, combined with a charming pretzel stick stem and a small M&M leaf, makes them an irresistible and festive addition to any holiday gathering. The key to successfully creating these delightful pumpkin truffles lies in working efficiently and having all your decorative elements prepped and ready for immediate application.
- Melt Orange Wafers: Place the orange melting wafers into a clean, microwave-safe bowl. Heat them in precise 30-second bursts, stirring diligently and thoroughly after each interval, until the wafers are completely melted and achieve a smooth, consistent texture. As previously noted in the ingredient section, orange candy melts can sometimes be naturally thicker than other colors; if you find yours too viscous, stir in a tiny amount of shortening or coconut oil (about 1 teaspoon per 8 ounces) to attain a smoother, more manageable dipping consistency.
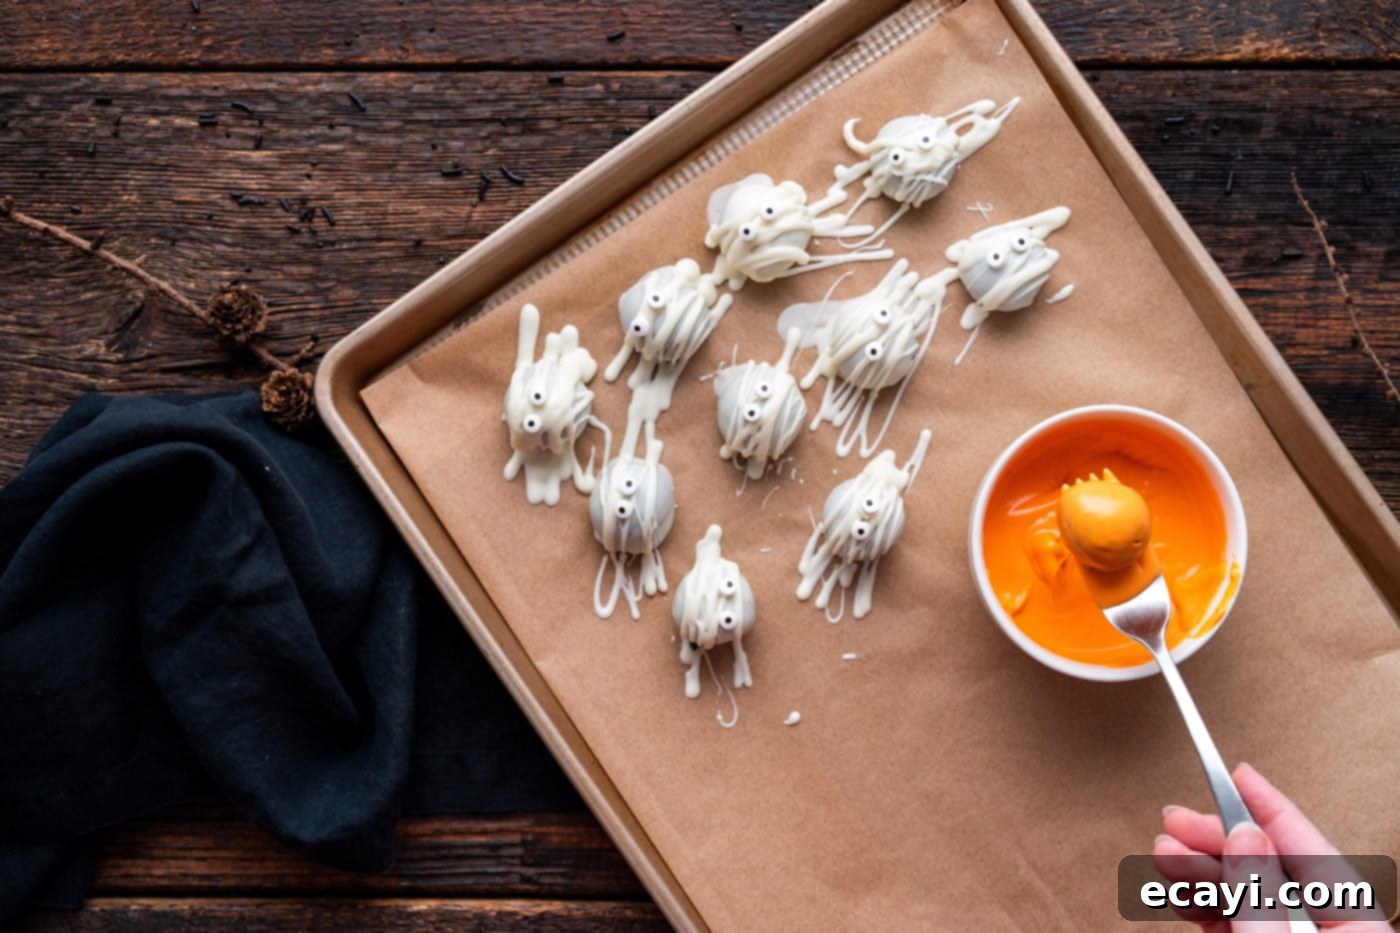
- Coat the Truffles: Take one firm truffle ball at a time and immerse it completely into the melted orange candy. Gently turn it with a fork to ensure a complete and even coating across its entire surface. Lift the truffle out with the fork, lightly tapping it against the edge of the bowl to allow any excess coating to drip away. Carefully place the freshly coated ball onto a baking sheet that has been lined with clean parchment paper.
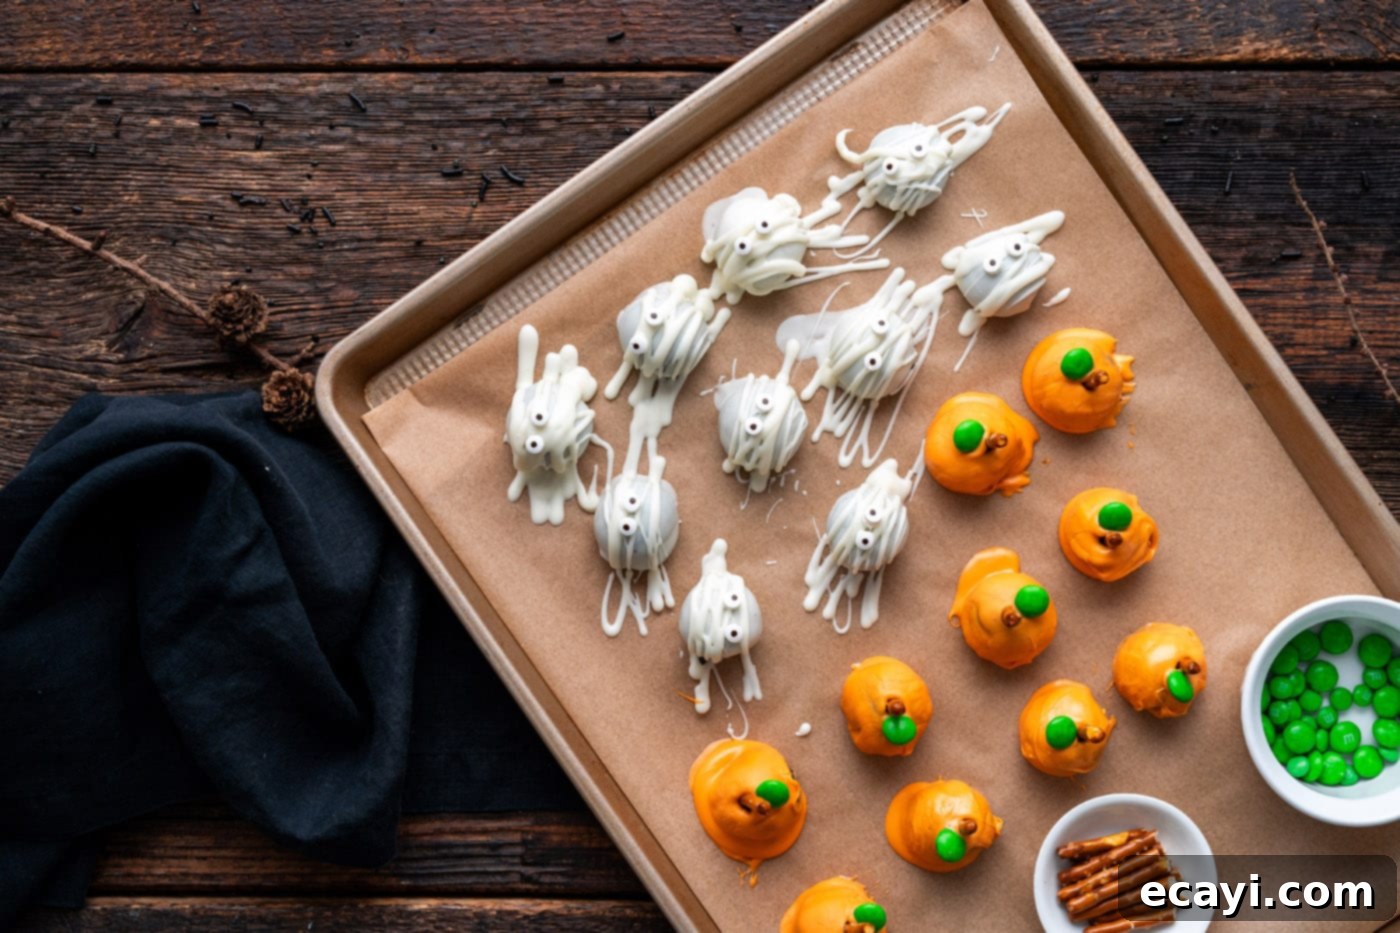
- Add Stem and Leaf Immediately: This step is time-sensitive and requires swift action! As soon as each truffle is coated and placed on the parchment, carefully insert half of a small pretzel stick into the very center of the truffle. This piece will perfectly mimic the pumpkin’s stem. Immediately after, position a green M&M right next to the pretzel stick, pressing it gently into the still-wet candy coating to resemble a small, fresh leaf. The unset candy coating will securely hold both decorations in place as it hardens.
- Complete the Batch: Continue this dipping and immediate decorating process swiftly until all the truffle balls designated for pumpkins have been beautifully transformed. Allow them to set fully at room temperature or, for faster results, place them in the refrigerator until the coating is firm and hard.
Classic Halloween Oreo Truffles with Festive Sprinkles
Sometimes, the simplest decorations can be the most effective and undeniably festive. These sprinkle-covered Halloween Oreo truffles offer a delightful textural crunch and a vibrant pop of color, making them a festive and joyful staple for any holiday celebration. This particular variation is incredibly straightforward and allows for endless creativity when it comes to choosing your favorite Halloween-themed sprinkles.
- Melt Chocolate Wafers: Place 8 ounces of chocolate melting wafers into a clean, microwave-safe bowl. Heat them in controlled 30-second increments, stirring meticulously after each burst, until the chocolate is completely melted and has a consistently smooth, glossy texture. Chocolate melts generally offer the smoothest and most consistent coating for dipping.
- Coat with Chocolate: Working efficiently, take one firm truffle ball at a time and completely immerse it into the melted chocolate. Use a fork to lift the truffle, gently tapping it against the side of the bowl to allow any excess chocolate to drip away. Carefully place the freshly coated ball onto a baking sheet that has been lined with parchment paper.
- Apply Sprinkles Immediately: This is a crucial and time-sensitive step! As soon as each truffle is coated and placed on the parchment, immediately and generously sprinkle it with your chosen assorted Halloween sprinkles. The chocolate coating hardens quite rapidly, so applying the sprinkles while it’s still wet and tacky is absolutely essential for them to adhere properly. Don’t be shy with the sprinkles – a good, ample coating adds both a delightful crunch and significant visual appeal.
- Finish and Set: Continue this dipping and immediate sprinkling process until all your Halloween truffles are beautifully adorned. Allow them to set completely at room temperature or, for quicker setting, place them in the refrigerator until the chocolate is firm and the sprinkles are securely attached.


Frequently Asked Questions & Expert Tips for Perfect Truffles
Given their cream cheese content, these delightful Halloween Oreo truffles require refrigeration to maintain their freshness and food safety. To store them effectively, place them in an airtight container. For best results and to prevent them from sticking together or damaging delicate decorations, arrange them in layers separated by pieces of parchment paper. When stored correctly in the refrigerator, these truffles will remain fresh, moist, and utterly delicious for up to 2 weeks. It’s important to note that when you remove them from the cold environment of the fridge, you might observe some condensation forming on their surface. This is a completely normal occurrence and will not negatively affect their superb taste or delightful texture.
Absolutely! Oreo truffles are exceptionally freezer-friendly, making them a fantastic make-ahead option for busy periods or to enjoy spooky treats year-round. You have two convenient primary methods for freezing them:
- Freezing Uncoated Truffle Balls: After you’ve shaped the truffle balls but before you’ve applied any chocolate coating, arrange them in a single layer on a baking sheet. Flash-freeze them until they are completely solid. This crucial step prevents them from sticking together. Once firm, transfer the frozen balls to a large zip-top freezer bag or an airtight freezer-safe container. They can be safely stored in the freezer for up to 3 months. When you’re ready to indulge, simply thaw them slightly in the refrigerator and then proceed with coating and decorating as desired.
- Freezing Coated and Decorated Truffles: If you’ve already coated and decorated your truffles, ensure the chocolate coating has fully set and hardened before freezing. Carefully arrange the finished truffles in an airtight freezer-safe container. If you need to stack them, make sure to separate each layer with parchment paper to protect any delicate decorations like candy eyes or pretzel stems. These can also be frozen for up to 3 months. When thawing, transfer them to the refrigerator and allow them to come to temperature slowly to prevent condensation from affecting the decorations.
Freezing these easy Halloween Oreo truffles provides incredible flexibility, allowing you to prepare them well in advance and savor them whenever the craving for a sweet, spooky bite strikes!
Yes, absolutely! These Halloween Oreo truffles are an ideal make-ahead dessert, which is a significant advantage when you’re planning for busy holiday celebrations or parties. You can comfortably prepare them a day or even two days in advance without any compromise on taste or quality. Simply follow all the steps for creating and decorating your truffles, allow them to set completely, and then store them in an airtight container in the refrigerator until you are ready to serve. Preparing them in advance frees up valuable time on the day of your event, allowing you to focus on other party preparations or simply to enjoy a more relaxed, stress-free Halloween. In fact, many find that the flavors of these truffles meld and deepen slightly overnight, making them even more delicious!
When working with candy melting wafers or melted chocolate, it’s crucial to remember that they begin to set and harden quite quickly. To ensure all your festive decorations – such as sprinkles, candy eyes, or pretzel stems – adhere properly, it is always best practice to apply them immediately after dipping each truffle in the melted candy. For example, when creating mummy truffles, make sure to place the candy eyes on while the “bandages” (drizzled white chocolate) are still wet. If you happen to wait too long and the candy has already set, don’t fret! There’s an easy fix: simply dab a tiny bit of freshly melted candy onto the back of your decoration (like a candy eye) to act as a “glue,” and then carefully place it onto the truffle. This will secure it in place beautifully.
You might notice that orange candy melts, and some other vibrant colored wafers, can occasionally be a bit thicker and less fluid compared to white or standard chocolate melting wafers. This difference in consistency can sometimes make it challenging to achieve a perfectly smooth, even coating on your truffles. If you encounter this and find your orange melts too thick for easy dipping, a simple solution is to stir in a small amount of neutral-flavored shortening or coconut oil. Approximately 1 teaspoon per 8 ounces of melting wafers is usually sufficient to help thin it out to a more workable, silky consistency. This minor addition will significantly improve the ease and smoothness of your dipping process without altering the delicious taste or affecting the setting ability of the candy.

Creative Serving & Presentation Ideas for Your Halloween Truffles
Once your easy Halloween Oreo truffles are perfectly set and looking frightfully fantastic, it’s time to showcase them! These versatile treats offer endless opportunities for creative serving and presentation, significantly enhancing the festive atmosphere of your Halloween celebration. Make them a centerpiece or a delightful addition to your spooky spread:
- Interactive Decorating Station: For an engaging party activity, consider setting up a DIY decorating station! Prepare a batch of plain coated truffles (e.g., just white or chocolate dipped) and then offer a vibrant array of Halloween-themed toppings. Think different colored sprinkles (purple, green, orange, black), mini candy eyeballs, edible glitter, or small bowls of additional melted colored candy wafers for guests to drizzle themselves. This is a fantastic, interactive way to engage guests, especially kids, allowing everyone to personalize their spooky treats.
- Festive Platters and Displays: Arrange your assorted mummy, pumpkin, and sprinkle truffles artfully on a large serving platter. Enhance the spooky ambiance by using Halloween-themed serving dishes, black and orange napkins, or even a cobweb-patterned tablecloth as a backdrop. A scattering of faux spiders or candy corn can add an extra touch.
- Elegant Tiered Trays: For an elevated and space-saving display, consider utilizing a tiered tray. This method not only allows you to present a larger quantity of truffles but also beautifully showcases the variety of your different truffle designs, creating an eye-catching centerpiece for your dessert table.
- Beyond the Basics: Don’t limit yourself to just the three main designs! Get even more creative with edible decorations. You could add small plastic spider rings to the chocolate truffles, use thin green licorice strings for “vines” on the pumpkins, or even create tiny ghost shapes with piped melted white chocolate and a toothpick for eyes.
- Thoughtful Gifting: These homemade truffles make incredibly thoughtful and delicious Halloween gifts! Package a few assorted truffles in clear cello bags, tie them with festive ribbons (orange, black, or purple), and present them to friends, teachers, or neighbors. They’re a homemade touch everyone will appreciate.
Remember, as an expert tip, the candy coating hardens quite quickly, so it’s always best to have your chosen decorations ready and apply them immediately after dipping each truffle to ensure optimal adhesion. These easy Halloween Oreo truffles are more than just a dessert; they are a truly fun and interactive recipe to make and share, adding an extra layer of joy and sweetness to your spooky celebrations!
More Spooky & Sweet Halloween Recipes to Try
If you’ve thoroughly enjoyed making and devouring these delightful Halloween Oreo truffles, you’re in for a treat! We have a collection of other festive and fun recipes that are perfectly suited for the spooky season. Explore these additional Halloween-themed delights to make your celebrations even more memorable:
- Monster Cupcakes
- Halloween Dirt Cups
- Witch Finger Cookies
- Halloween Candy Apples
- Cheese and Pretzel Broomsticks
- Mini Candy Corn Cheesecakes
I love to bake and cook and share my kitchen experience with all of you! Remembering to come back each day can be tough, that’s why I offer a convenient newsletter every time a new recipe posts. Simply subscribe and start receiving your free daily recipes!

Halloween Oreo Truffles
IMPORTANT – There are often Frequently Asked Questions within the blog post that you may find helpful. Simply scroll back up to read them!
Print It
Pin It
Rate It
Save ItSaved!
Ingredients
- 36 Oreo cookies regular stuffed, filling included
- 8 ounces cream cheese softened at room temp
Pumpkin Truffles
- 8 ounces orange melting wafers
- 5 small pretzel sticks each halved for a total of 10 sticks
- 10 green M&M’s
Mummy Truffles
- 10 ounces white melting wafers divided into 8 ounces and 2 ounces
- 20 small candy eyeballs
Halloween Sprinkle Truffles
- 8 ounces chocolate melting wafers
- assorted Halloween sprinkles in orange, green, purple, and white
Things You’ll Need
-
Food processor
-
Mixing bowls
Before You Begin
- You will need 36 regular (not double stuffed) Oreo sandwich cookies, filling included. The filling lends moisture to the mixture. You can easily substitute with golden Oreos or other flavors as you wish.
- If you melt all the melting wafers at the same time, they will likely harden before you’re done making the first type of truffles. Work on one type of truffle at a time, and then move on to the next.
- Candy melting wafer coating hardens quite quickly, so I recommend decorating the truffles as you go so that the decorations stick. However, there is a fix for the mummy truffles; if you wait too long to add the mummy eyes, you can always add a tiny bit of melted candy on the back of each eyeball (as “glue”) and then place them on the truffles.
- The orange candy melts are a bit harder to work with than white melting wafers, and especially chocolate melting wafers, as it doesn’t melt quite as smoothly. If you need to, you can add a little bit of shortening or coconut oil (about 1 teaspoon per 8 ounces of melting wafers) to help thin it out.
- STORING – Store the Halloween Oreo balls in an air-tight container layered between pieces of parchment paper. Store in the refrigerator for up to 2 weeks. They must be refrigerated as they contain cream cheese, however, do note that they will develop condensation when removed from the fridge. This won’t affect the truffles themselves.
- You can prepare them a day or two in advance and store them in the refrigerator in an air-tight container until you are ready to serve.
Instructions
-
Place the Oreos in the bowl of a food processor and pulverize into small crumbs.
-
Add the cream cheese into the food processor, and process until the mixture is fully combined and clumps into a “dough”.
-
Use a 1-tablespoon sized scoop to make balls of the mixture, and place each ball on a parchment paper-lined baking sheet.
-
Chill in the freezer for 10 minutes to firm the dough a bit.
-
Roll each ball between the palms of your hands to form a smooth ball. Place the tray back into the freezer for an additional 10 to 15 minutes, or in the refrigerator for about 30 minutes.
To Make the Pumpkin Truffles
-
Put the orange melting wafers in a microwave-safe bowl and heat in 30-second increments, stirring between each interval, until the wafers are melted and smooth.
-
Working with one ball at a time, dip the firm ball into the melted orange wafer candy, turning it gently to coat completely. Use a fork to lift it out, tap off the excess coating, and place the coated ball on a baking sheet lined with clean parchment paper.
-
Immediately insert half a small pretzel stick into the center of the truffle so a small part of it sticks out (for the pumpkin stem). Immediately place a green M&M next to the pretzel (for a leaf).
-
Continue this way until all the pumpkin truffles are made.
To Make the Mummy Truffles
-
Put 8 ounces of white melting wafers in a microwave-safe bowl and heat in 30-second increments, stirring between each interval, until the wafers are melted and smooth.
-
Working with one ball at a time, place the firm ball into the melted white wafer candy, turning it gently to coat completely. Use a fork to lift it out, tap off the excess coating, and place the coated ball on a baking sheet lined with clean parchment paper. Continue this way until all the mummy truffles are coated.
-
Melt the remaining 2 ounces of white melting wafers the same way. Transfer the melted candy to a small zip-top bag, and snip off one corner of the bag. Working with one mummy truffle at a time, drizzle the white melted candy across one truffle to look like mummy bandages, and immediately put on 2 candy eyes.
-
Continue this way until all the mummy truffles are made.
To Make the Halloween Sprinkle Truffles
-
Put 8 ounces of chocolate melting wafers in a microwave-safe bowl and heat in 30-second increments, stirring between each interval, until the wafers are melted and smooth.
-
Working with one ball at a time, dip the firm ball into the melted chocolate wafer candy, turning it gently to coat completely. Use a fork to lift it out, tap off the excess coating, and place the coated ball on a baking sheet lined with clean parchment paper.
-
Once coated, immediately top with assorted Halloween sprinkles.
-
Continue this way until all the Halloween truffles are made.
Nutrition
The recipes on this blog are tested with a conventional gas oven and gas stovetop. It’s important to note that some ovens, especially as they age, can cook and bake inconsistently. Using an inexpensive oven thermometer can assure you that your oven is truly heating to the proper temperature. If you use a toaster oven or countertop oven, please keep in mind that they may not distribute heat the same as a conventional full sized oven and you may need to adjust your cooking/baking times. In the case of recipes made with a pressure cooker, air fryer, slow cooker, or other appliance, a link to the appliances we use is listed within each respective recipe. For baking recipes where measurements are given by weight, please note that results may not be the same if cups are used instead, and we can’t guarantee success with that method.
